Team:Aachen/Notebook/Engineering/WatsOn
From 2014.igem.org
| Line 3: | Line 3: | ||
{{Team:Aachen/Stylesheet}} | {{Team:Aachen/Stylesheet}} | ||
{{Team:Aachen/Header}} | {{Team:Aachen/Header}} | ||
| + | |||
| + | = ''WatsOn'' = | ||
| + | |||
| + | This page contains technical details and construction manuals for our measurement device ''WatsOn''. For more details, please click on the respective tile. | ||
| + | |||
| + | <html> | ||
| + | <center> | ||
| + | <ul class="team-grid" style="width:inherit;"> | ||
| + | <!-- Overview --> | ||
| + | |||
| + | <li><a href="https://2014.igem.org/Team:Aachen/Notebook/Engineering/WatsOn#watsonsoftware" style="color:black"> | ||
| + | <div class="team-item team-info" > | ||
| + | <br/><br> | ||
| + | <b>Software</b> | ||
| + | <br/><br/> | ||
| + | <!-- click for more information --> | ||
| + | </div> | ||
| + | <div class="team-item team-img" style="background: url(https://static.igem.org/mediawiki/2014/7/74/Aachen_14-10-13_Galectin-3-YFP_iNB.png); norepeat scroll 0% 0% transparent; background-size:100%"> </div></a> | ||
| + | </li> | ||
| + | |||
| + | <li><a href="https://2014.igem.org/Team:Aachen/Notebook/Engineering/WatsOn#watsonhardware" style="color:black"> | ||
| + | <div class="team-item team-info" > | ||
| + | <br/><br/> | ||
| + | <b>Hardware</b> | ||
| + | <br/><br/> | ||
| + | <!-- click for more information --> | ||
| + | </div> | ||
| + | <div class="team-item team-img" style="background: url(https://static.igem.org/mediawiki/2014/7/76/Aachen_14-10-13_Galectin-3_iNB.png); norepeat scroll 0% 0% transparent; background-size:100%"> </div></a> | ||
| + | </li> | ||
| + | |||
| + | <li><a href="https://2014.igem.org/Team:Aachen/Notebook/Engineering/WatsOn#watsondiy" style="color:black"> | ||
| + | <div class="team-item team-info" > | ||
| + | <br/><br/> | ||
| + | <b>DIY</b> | ||
| + | <br/><br/> | ||
| + | <!-- click for more information --> | ||
| + | </div> | ||
| + | <div class="team-item team-img" style="background: url(https://static.igem.org/mediawiki/2014/7/76/Aachen_14-10-13_Galectin-3_iNB.png); norepeat scroll 0% 0% transparent; background-size:100%"> </div></a> | ||
| + | </li> | ||
| + | |||
| + | </ul> | ||
| + | </center> | ||
| + | </html> | ||
| + | |||
| + | {{Team:Aachen/BlockSeparator}} | ||
== Software == | == Software == | ||
| + | <span class="anchor" id="watsonsoftware"></span> | ||
The software consists of several parts which provide a user interface and manage the connection to the hardware. | The software consists of several parts which provide a user interface and manage the connection to the hardware. | ||
| Line 26: | Line 72: | ||
* '''Backend''': The backend is a software that runs on the Raspberry Pi and is responsible for the connection between the GUI and the hardware. If the user interface is executed on another device e.g. a notebook it has to be in the same network as the Raspberry Pi. The backend works like a webserver that receives commands and acts corresponding to the submitted parameters. It can take images and returns them to the GUI. | * '''Backend''': The backend is a software that runs on the Raspberry Pi and is responsible for the connection between the GUI and the hardware. If the user interface is executed on another device e.g. a notebook it has to be in the same network as the Raspberry Pi. The backend works like a webserver that receives commands and acts corresponding to the submitted parameters. It can take images and returns them to the GUI. | ||
Before an image is taken the backend turns on the specified LEDs by sending a command to the connected Arduino board. Afterwards the LEDs are turned off using the same mechanism. These steps are repeated in the given interval for a time lapse shooting. | Before an image is taken the backend turns on the specified LEDs by sending a command to the connected Arduino board. Afterwards the LEDs are turned off using the same mechanism. These steps are repeated in the given interval for a time lapse shooting. | ||
| - | |||
{{Team:Aachen/BlockSeparator}} | {{Team:Aachen/BlockSeparator}} | ||
== Hardware == | == Hardware == | ||
| + | <span class="anchor" id="watsonhardware"></span> | ||
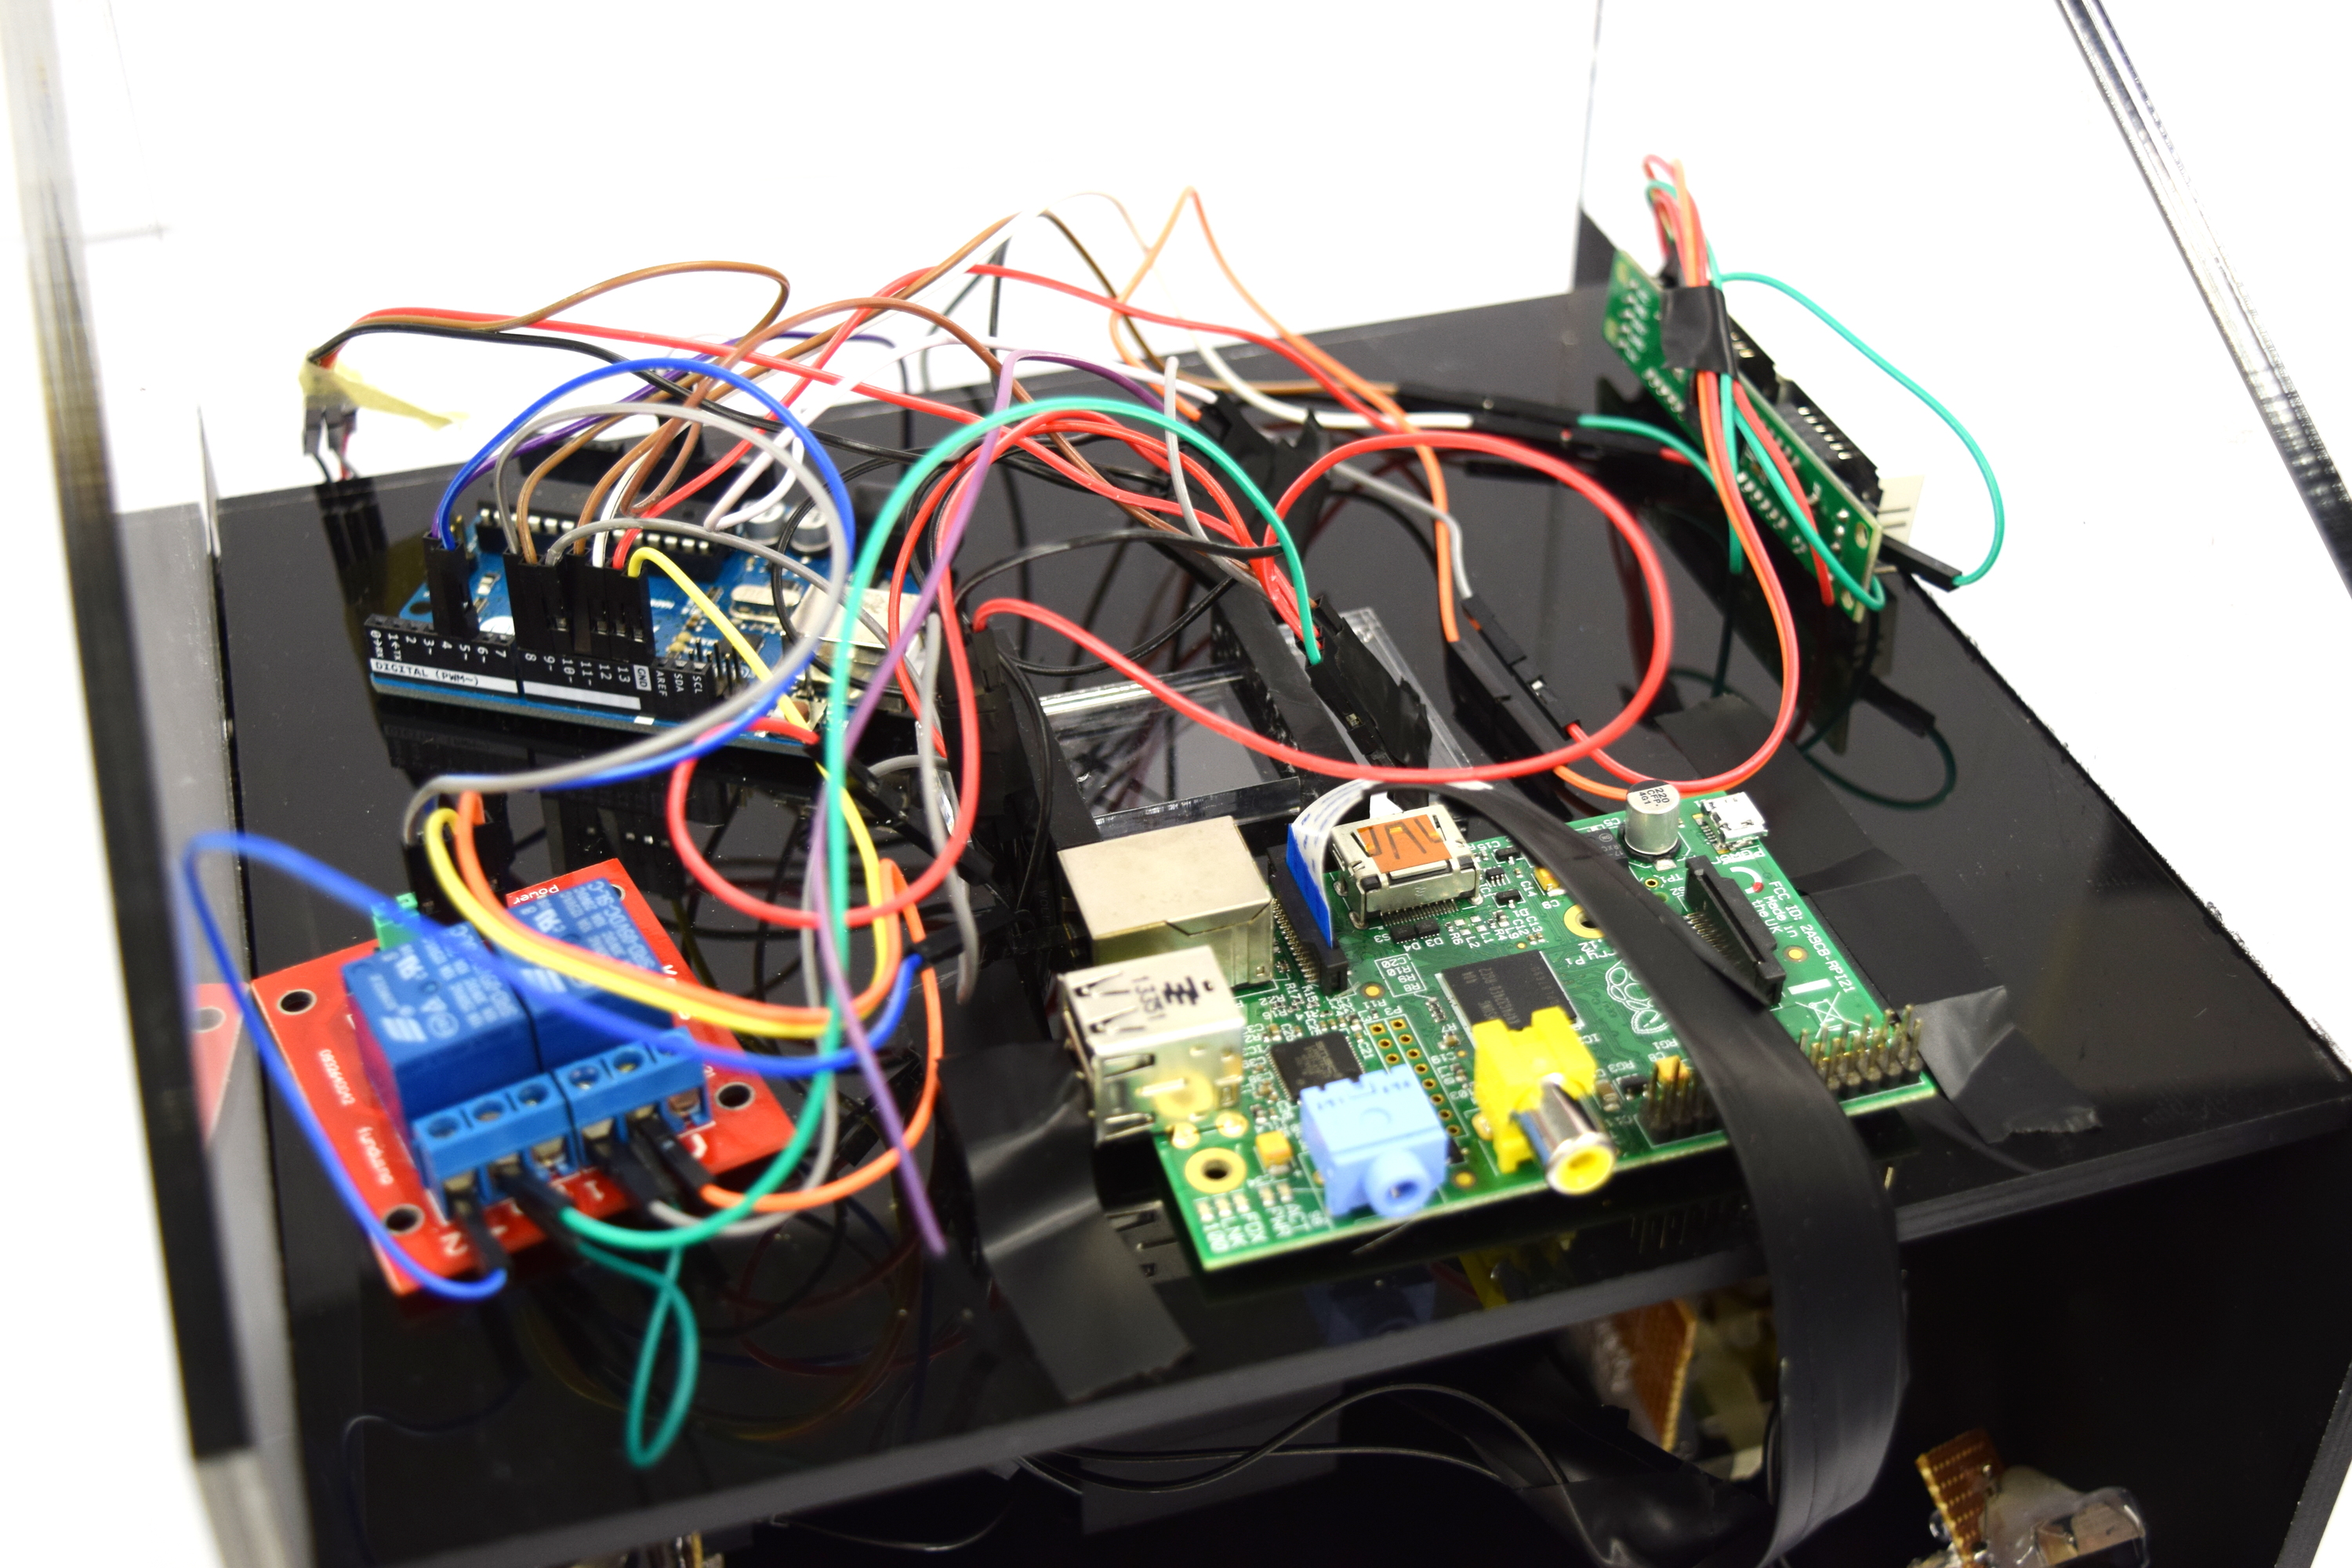
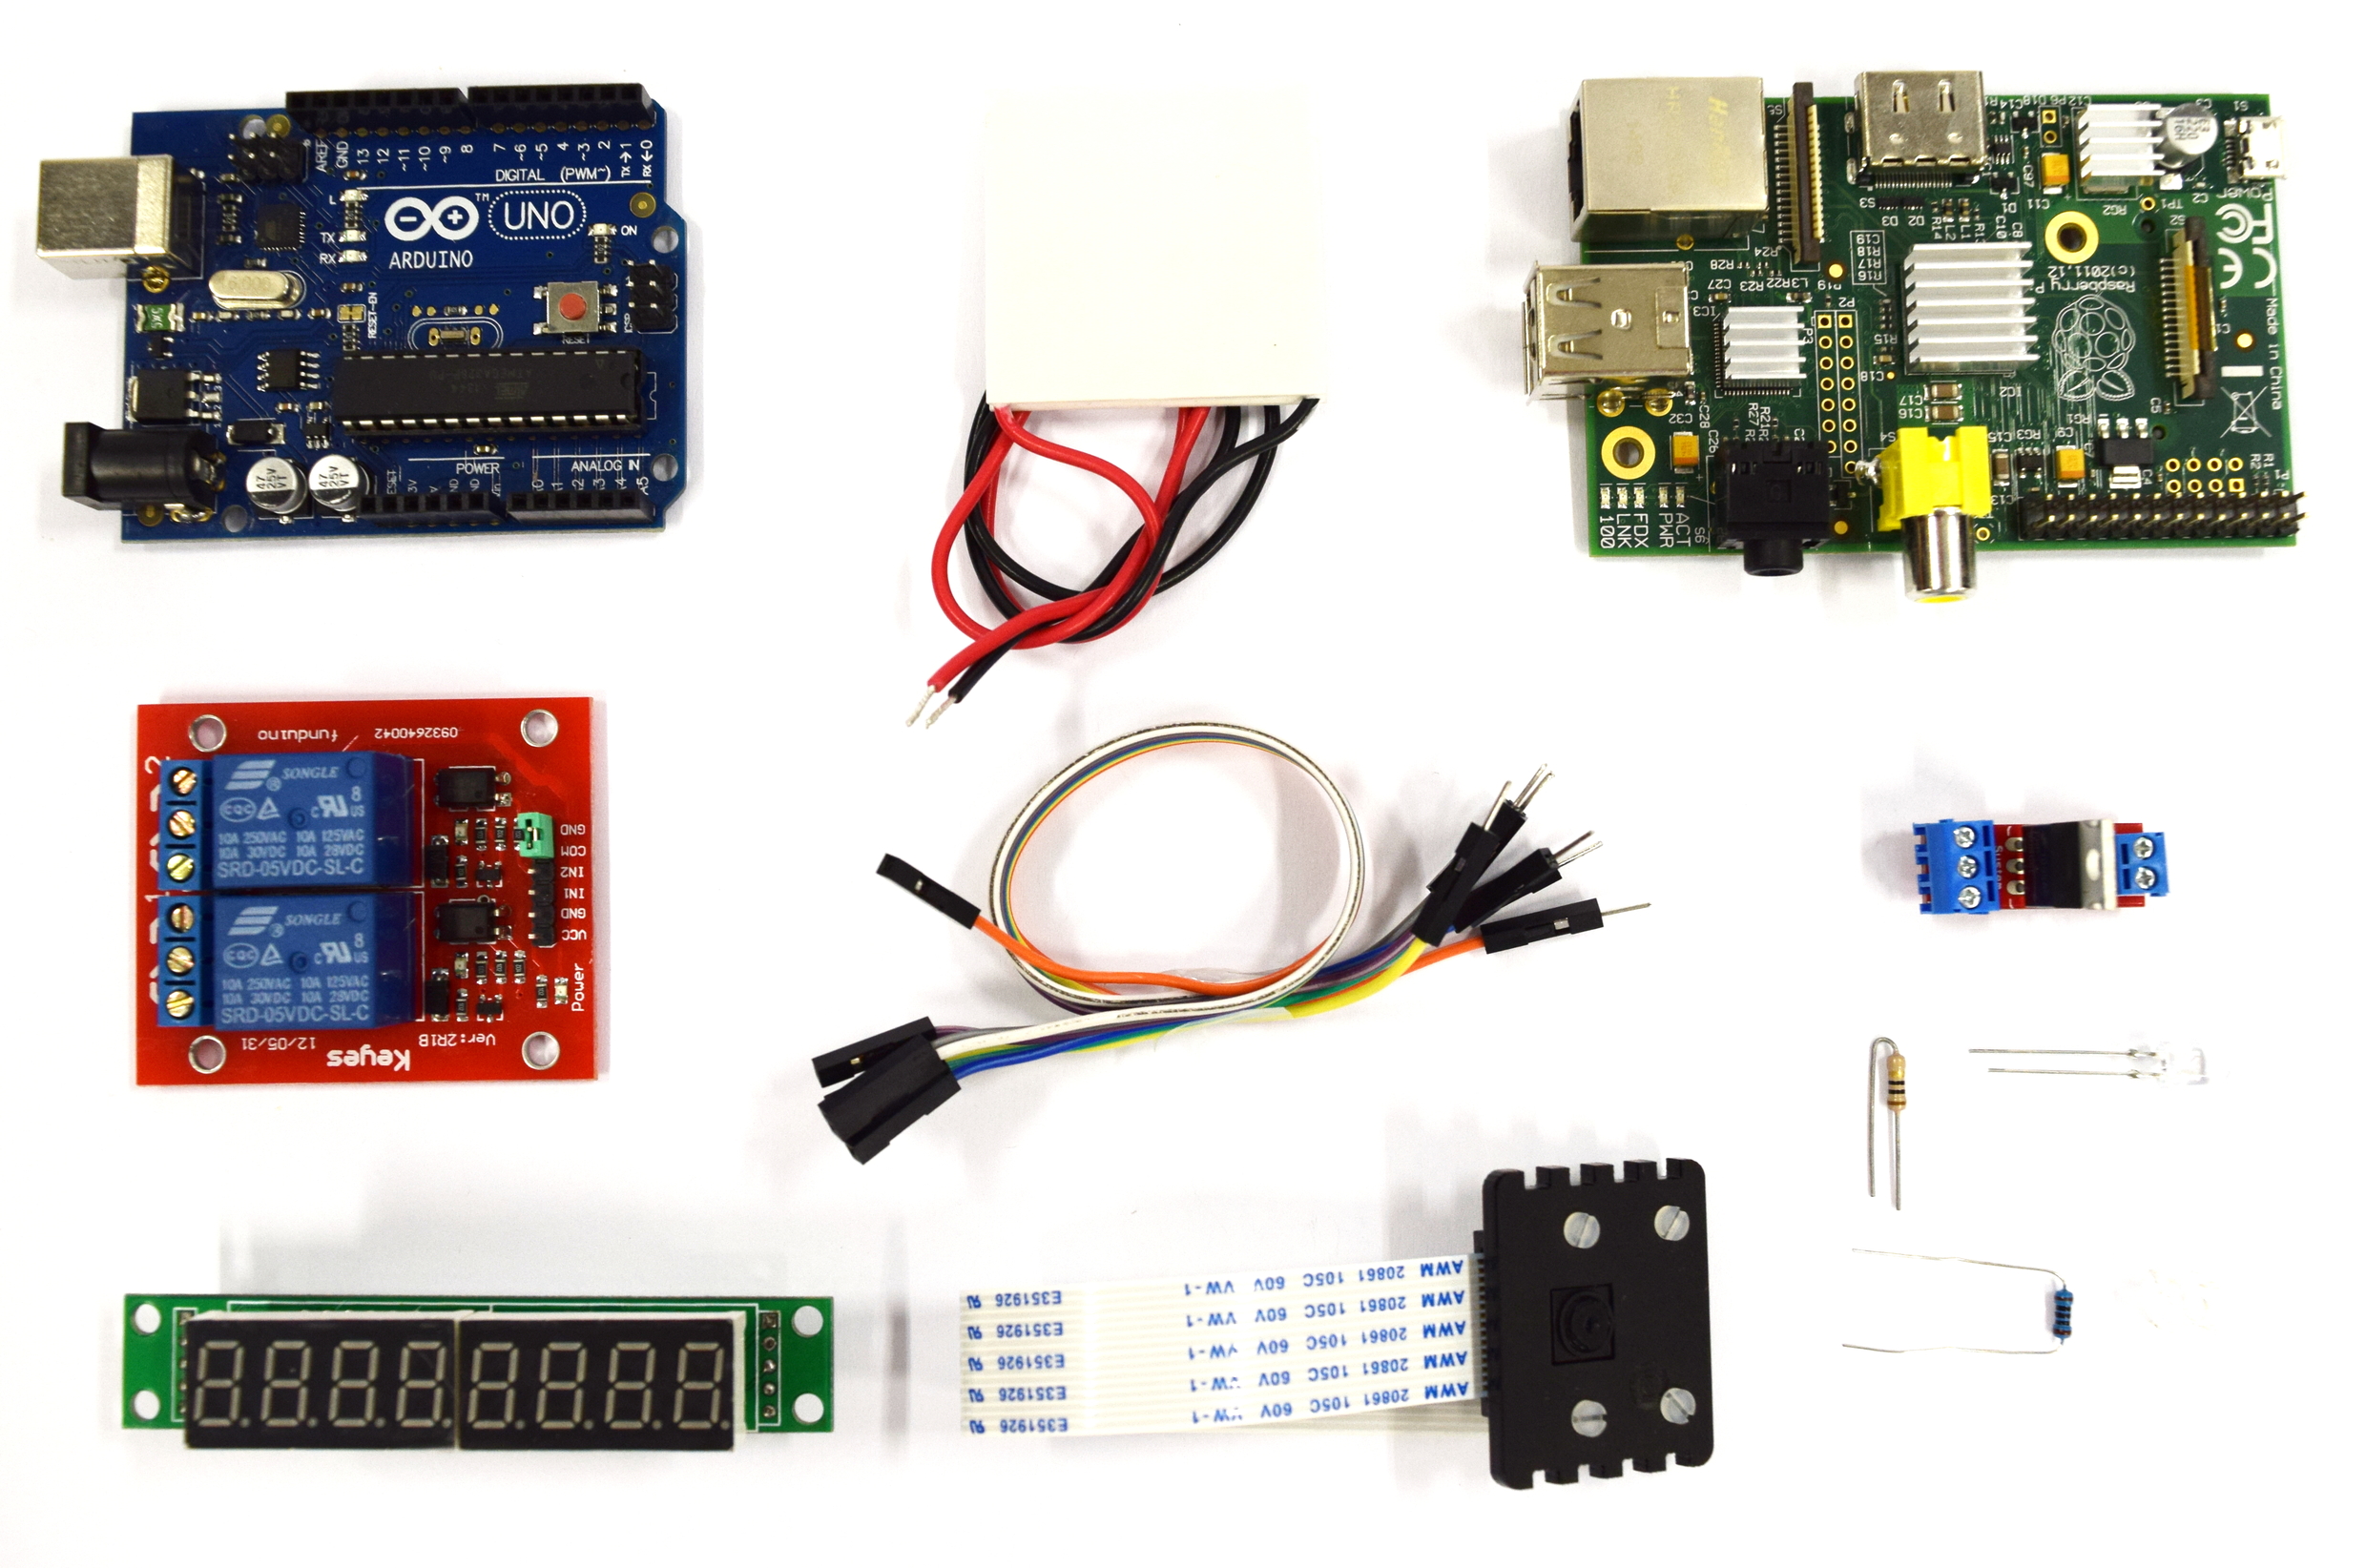
{{Team:Aachen/Figure|Aachen_Device_Elektronikkomponenten1.jpg|title=Hardware components||width=600px}} | {{Team:Aachen/Figure|Aachen_Device_Elektronikkomponenten1.jpg|title=Hardware components||width=600px}} | ||
| Line 45: | Line 91: | ||
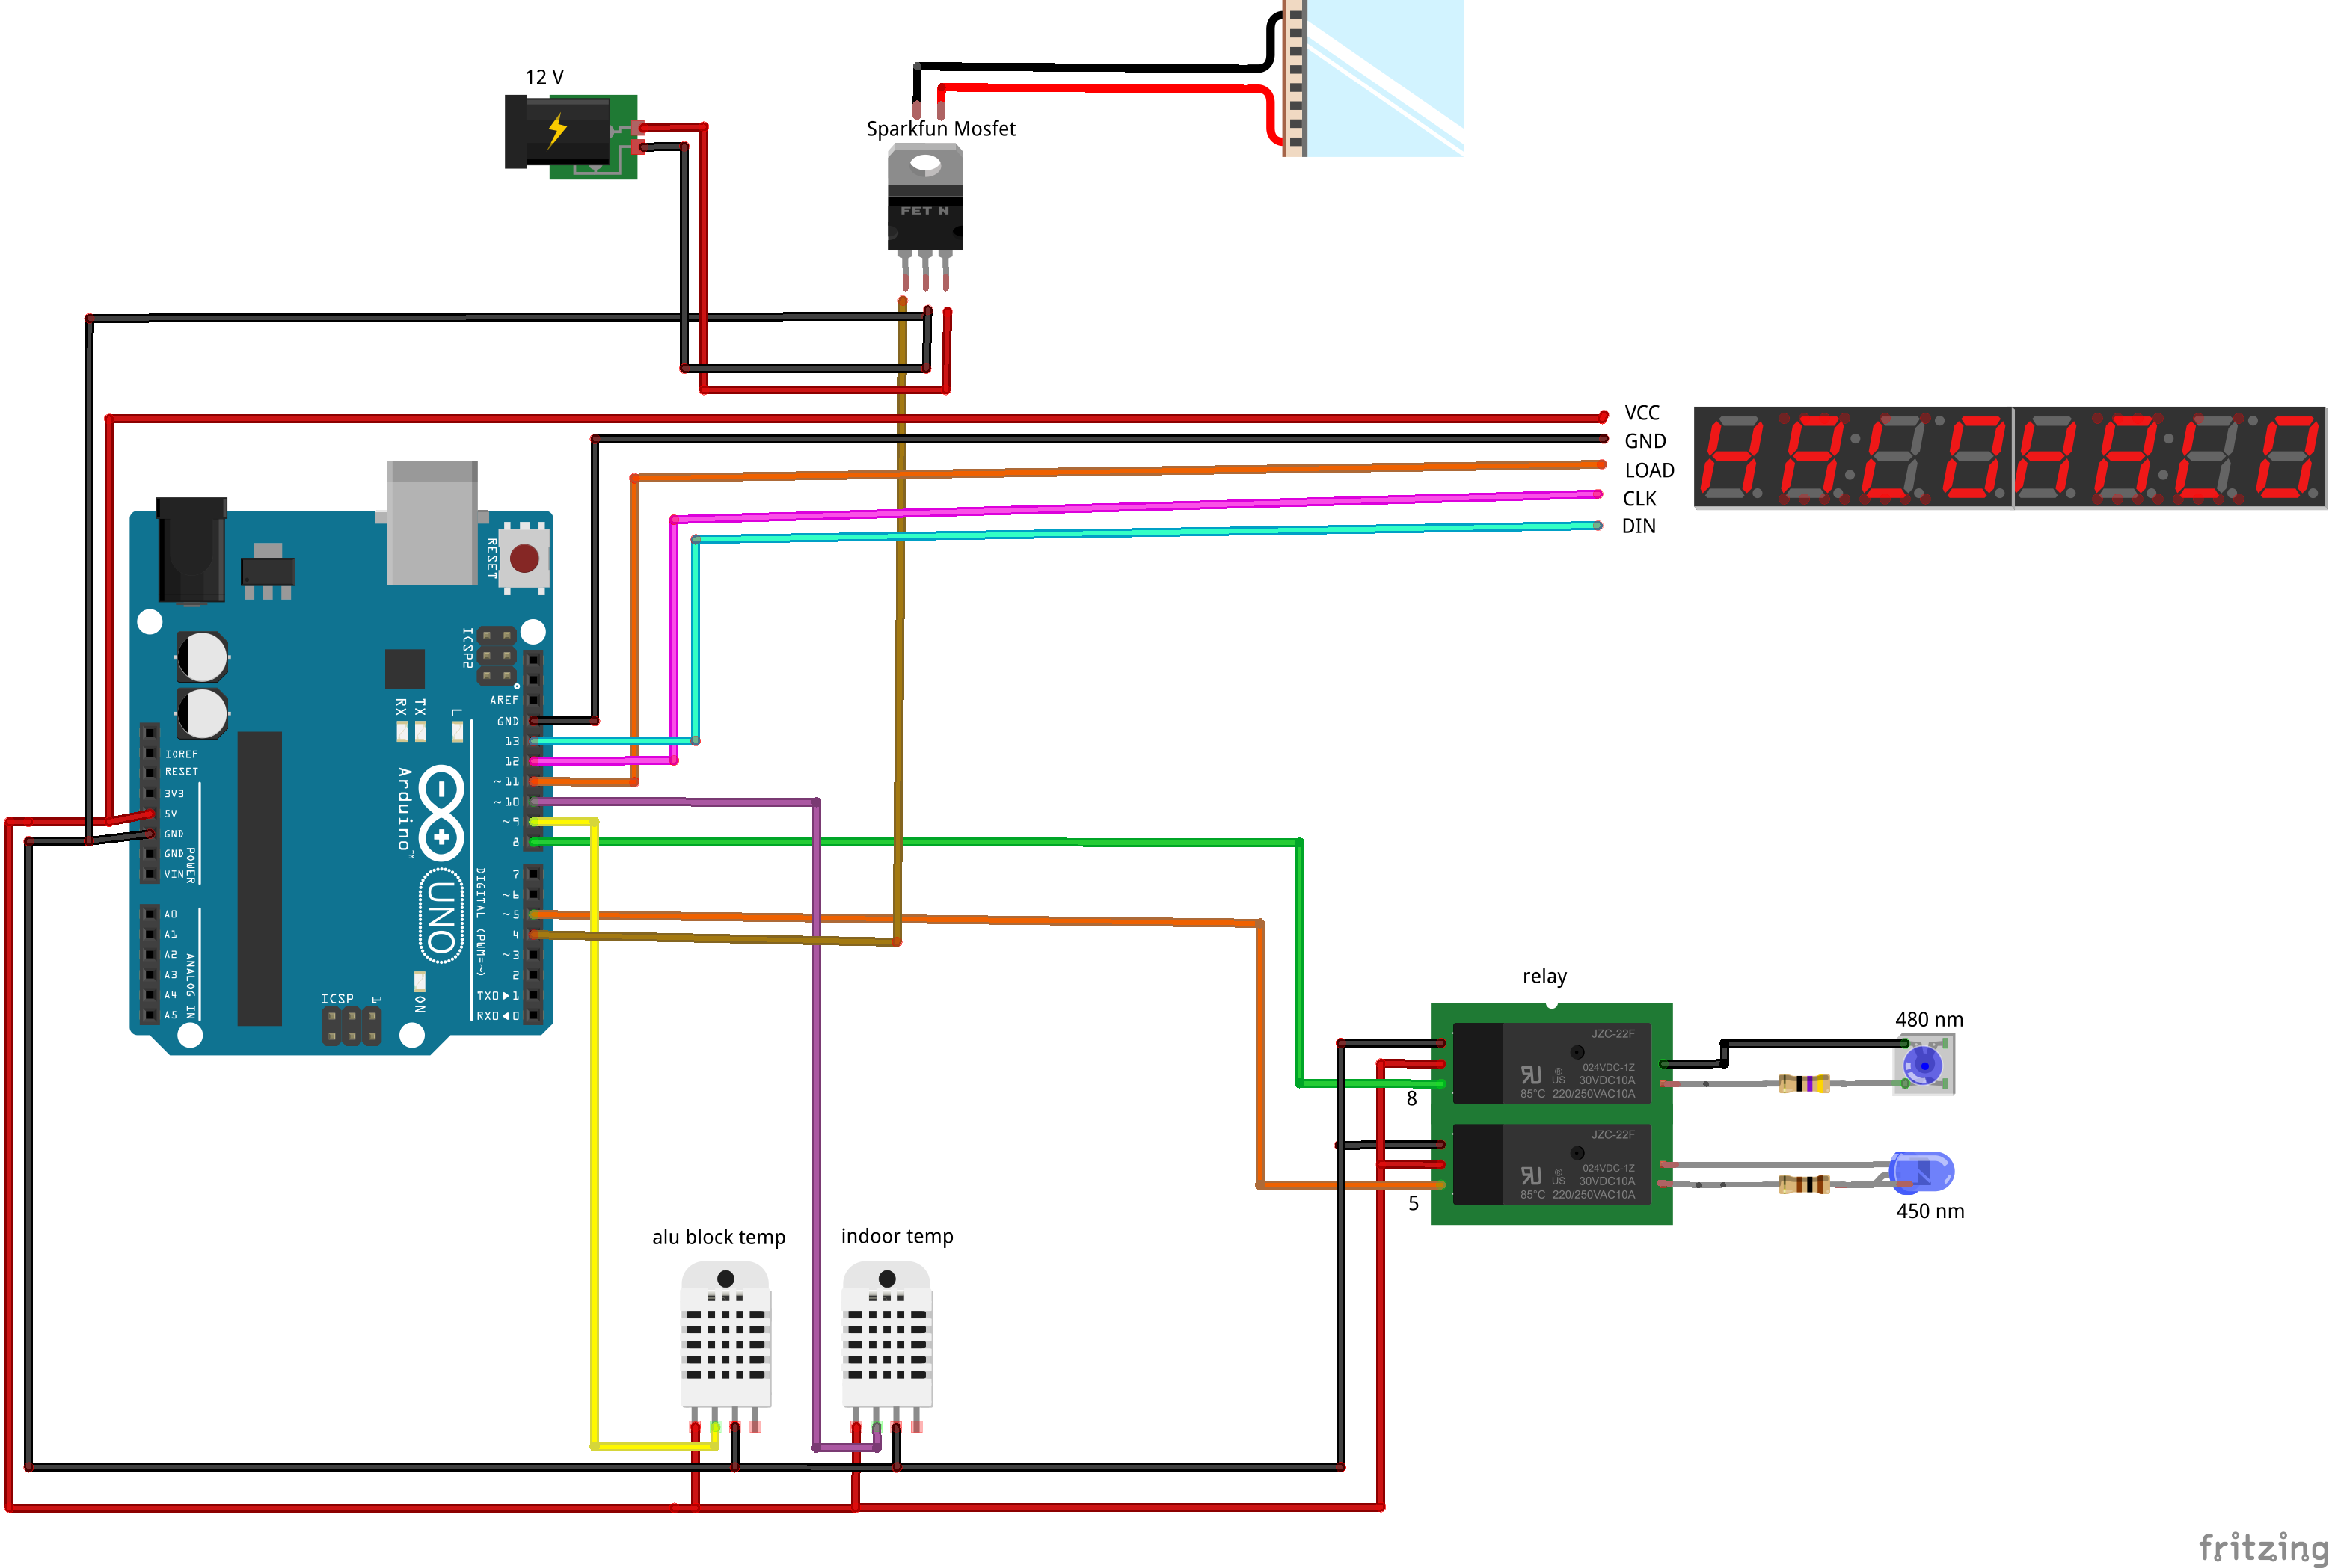
* '''Display''': The display is connected to the arduino board and shows the current interior temperature | * '''Display''': The display is connected to the arduino board and shows the current interior temperature | ||
| - | |||
{{Team:Aachen/BlockSeparator}} | {{Team:Aachen/BlockSeparator}} | ||
| - | + | == DIY: How To Build Your Own ''WatsOn'' == | |
| - | == Build | + | <span class="anchor" id="watsondiy"></span> |
If you want to create your own ''WatsOn'' first take a look at the following list of necessary components. All parts except the laser cutted acrylic glass only need to be bought. | If you want to create your own ''WatsOn'' first take a look at the following list of necessary components. All parts except the laser cutted acrylic glass only need to be bought. | ||
Revision as of 11:16, 15 October 2014
|
|
|
|
 "
"
![350px] [File:Aachen_Device_.3jpg](/wiki/images/7/7b/Aachen_Device_2_3.jpg)
