Development
Building the OD/F device has been an interesting task. On the one hand, this device has been developed mainly by the IT division of our team. On the other hand, we got assistance from biologists suffering from color-blindness, yet eager to help selecting the best color filters for the LEDs. For the next year, you really have to select carefully who's going to help with which task!
Cuvette Holder
The essential part of this device is the cuvette holder which has also been the most tricky thing to design. In short, we had to overcome a dilemma created by the need for an optimal height for the sensor:
- A too low sensor position bears problems with sedimentation as well as light diffraction from the bottom of the cuvette.
- The sensor has to be as close as possible to the bottom so that enough light shines through for the fluorescence measurement.
As a compromise, we place the sensor at a height of 0.75 cm, which, as it turned out later, is very close to one of the standard heights (0.2 cm, 0.8 cm, 1.2 cm) of OD meters. It is important to note that despite the official minimal fill height of 1.2 mL of the 1.5 mL cuvettes we used, our device also works with filling volumens of just 1 mL which in fact comes closer to reality in the lab.
The final cuvette holder design was rendered in a stl-file shown below:
Light filters
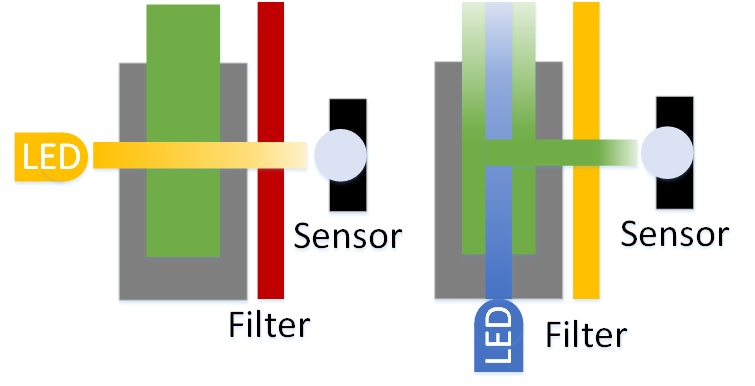
Once the cuvette holder was finished, finding good filters was a tough challenge. A main goal throughout our project has been to choose easily available parts which are also inexpensive. Thus choosing Schott glasses as filters unfortunately could not be considered. Instead, filters used for illumination of theaters seemed to be ideal solution.
Especially for the fluorescence measurements of GFP finding the right filter has been a big problem. [http://parts.igem.org/Part:BBa_E0040 GFPmut3b] has a peak excitation at 501 nm and a peak emission at 511 nm - too close together for our low-cost filters to block the excitation light but transmit the emitted light. Thus, we chose to excite at around 485 nm reduce false positive results below 500 nm. However, no adequate filter for these settings could be found.
Eventually, using the dark greenish Twickenham Green filter only little amounts of light shorter than 500 nm got through, reducing any bias from excitation illumination significantly. Unfortunately, the transmission rate of this filter is quite bad, 20 % only, for the target emission wavelength of 511 nm.
For the OD measurement, too, we had similar problems. The solution to this problem is presented in the F device section.
1. Quite a good random number generator from a computer-scientific perspective!↩
Combined Device
Even though evaluation of the measurements have been performed in two separate device, it is fairly well possible to put everything into one casing.
All you need to do is choosing another lid, and connect a second light to frequency sensor to your Arduino.
Right at the bottom we present you the differences in wiring things up.
|
 "
"

