Team:Aachen/Notebook/Engineering/WatsOn
From 2014.igem.org
(→GUI (Graphical User Interface)) |
(→Software) |
||
| (30 intermediate revisions not shown) | |||
| Line 13: | Line 13: | ||
<!-- Overview --> | <!-- Overview --> | ||
| - | + | <li style="margin-right:20px;margin-left:20px;"> | |
| + | <a href="https://2014.igem.org/Team:Aachen/Notebook/Engineering/WatsOn#watsonhardware" style="color:black"> | ||
<div class="team-item team-info" > | <div class="team-item team-info" > | ||
<div class="menukachel">Hardware</div> | <div class="menukachel">Hardware</div> | ||
| Line 26: | Line 27: | ||
| - | + | <li style="margin-right:20px;margin-left:20px;"> | |
| + | <a href="https://2014.igem.org/Team:Aachen/Notebook/Engineering/WatsOn#watsonsoftware" style="color:black"> | ||
<div class="team-item team-info" > | <div class="team-item team-info" > | ||
<div class="menukachel">Software</div> | <div class="menukachel">Software</div> | ||
| Line 37: | Line 39: | ||
</li> | </li> | ||
| - | + | <li style="margin-right:20px;margin-left:20px;"> | |
| + | <a href="https://2014.igem.org/Team:Aachen/Notebook/Engineering/WatsOn#watsondiy" style="color:black"> | ||
<div class="team-item team-info" > | <div class="team-item team-info" > | ||
<div class="menukachel">DIY</div> | <div class="menukachel">DIY</div> | ||
| Line 61: | Line 64: | ||
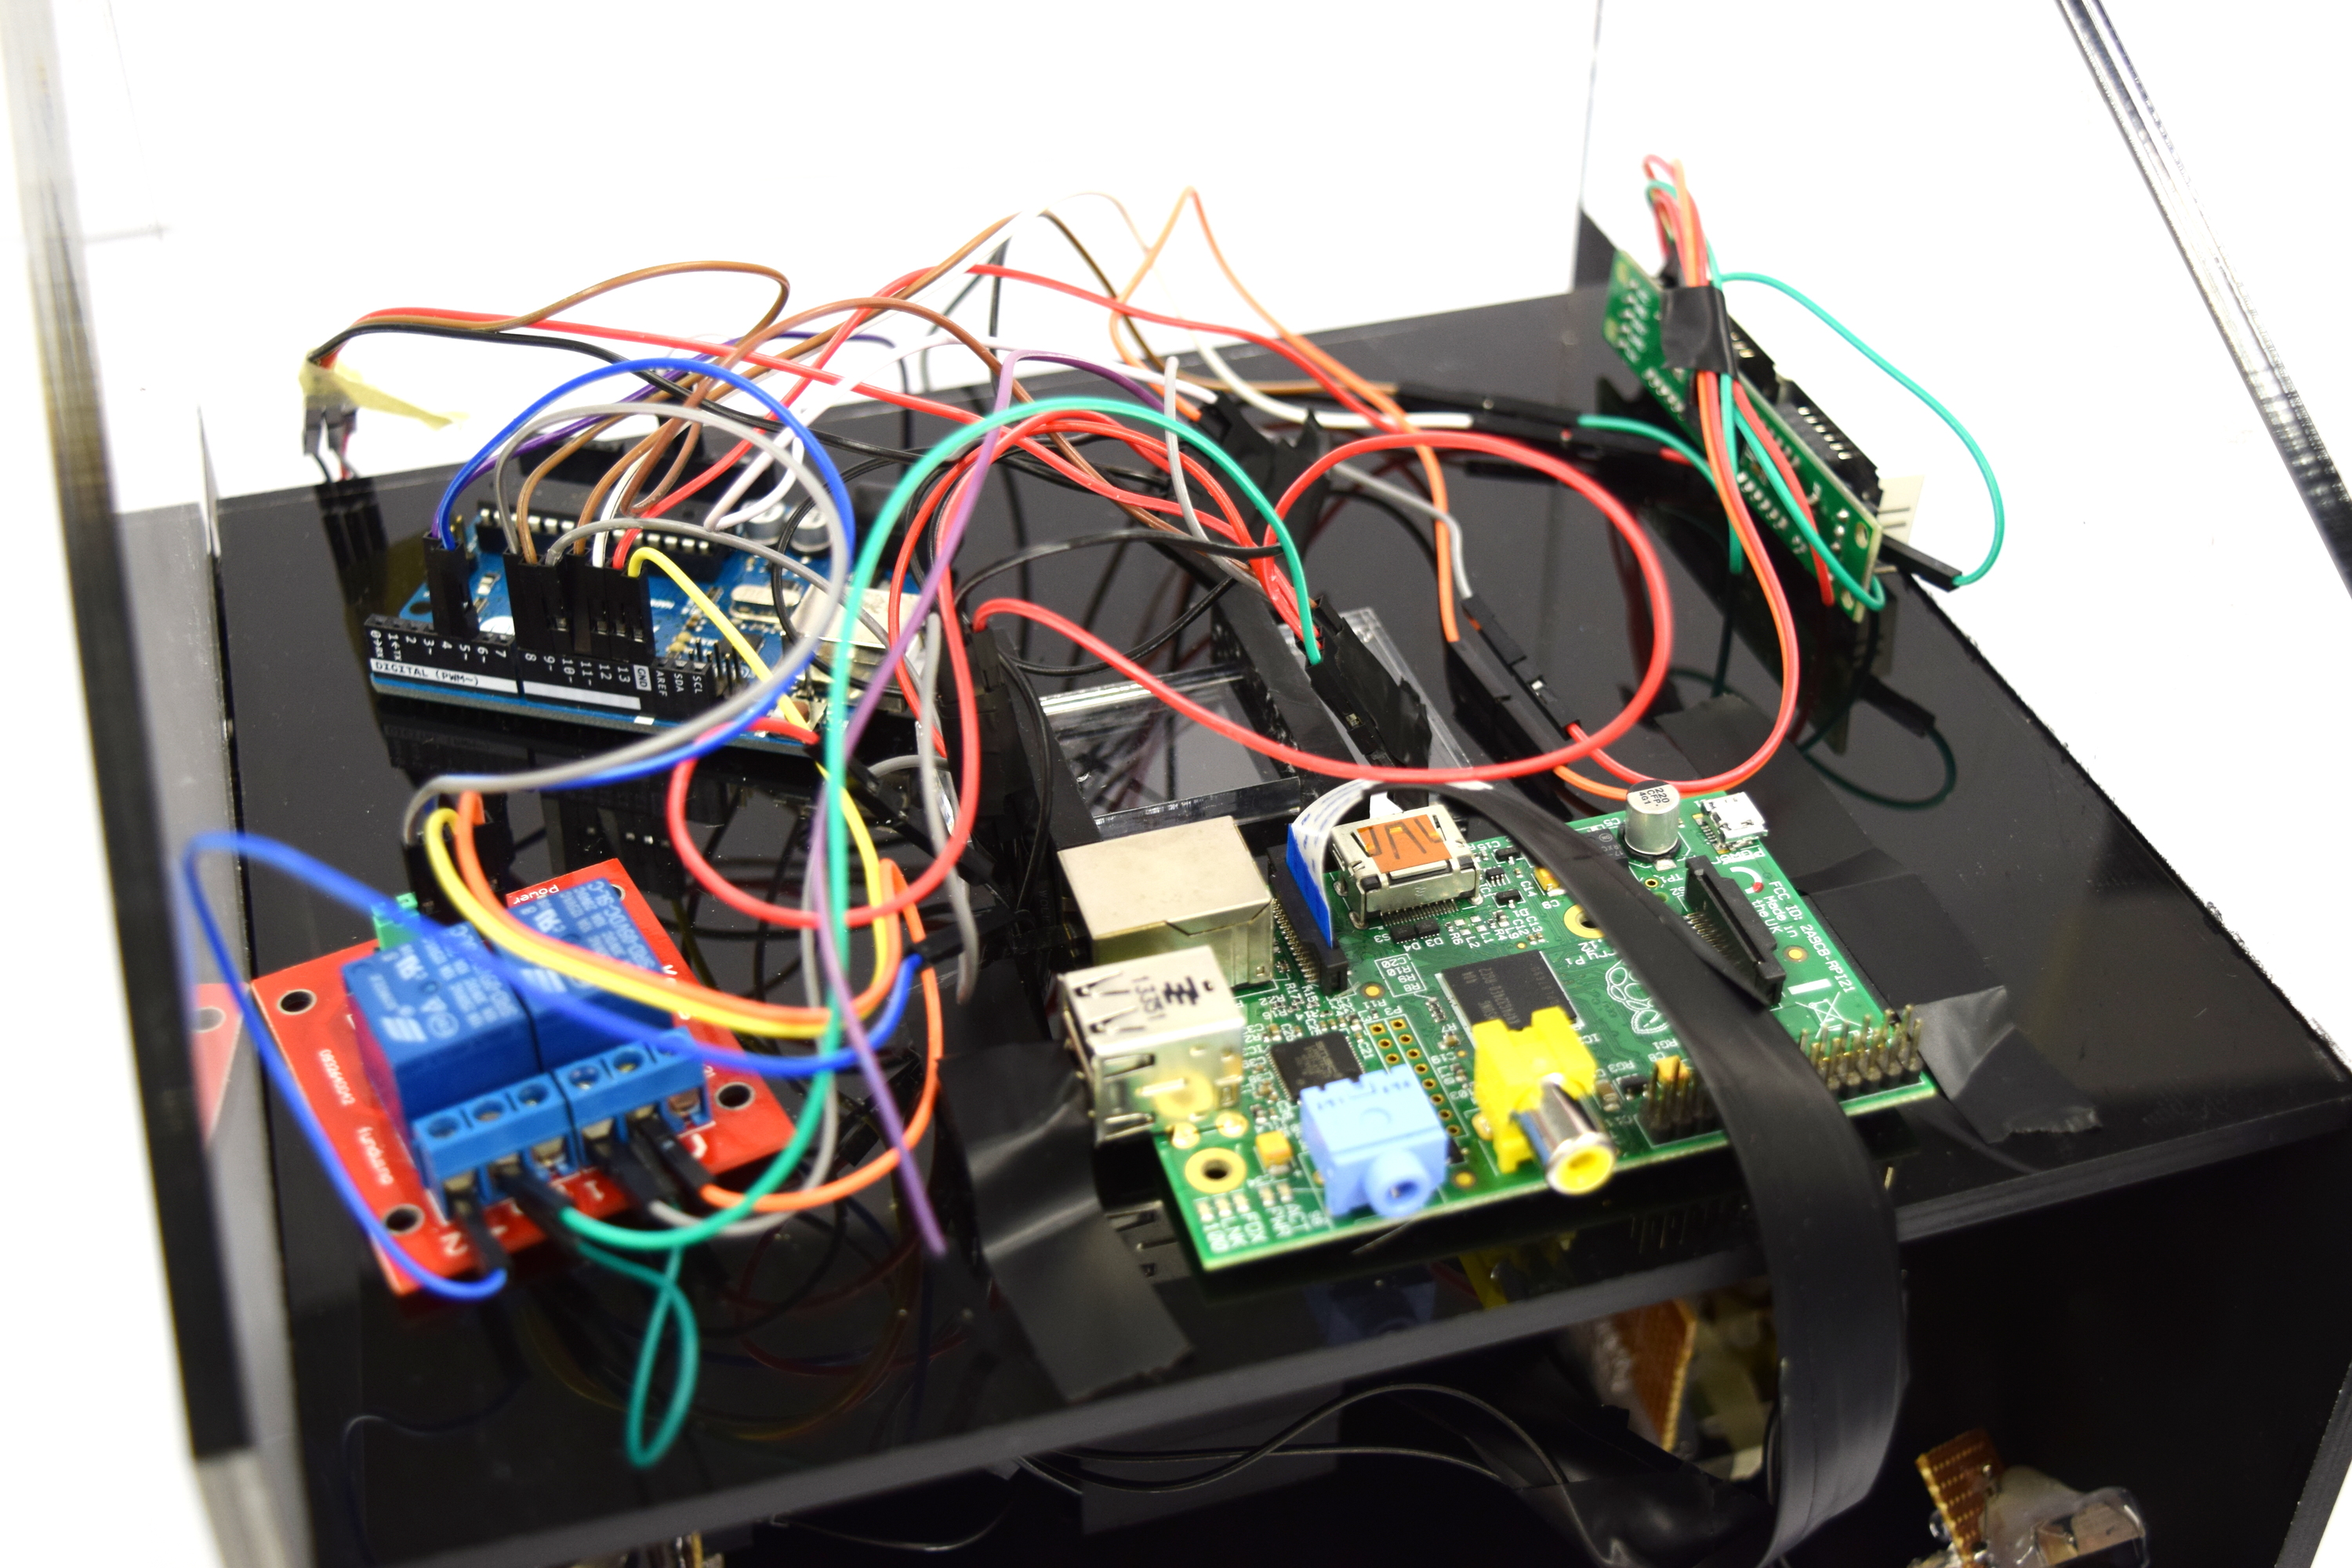
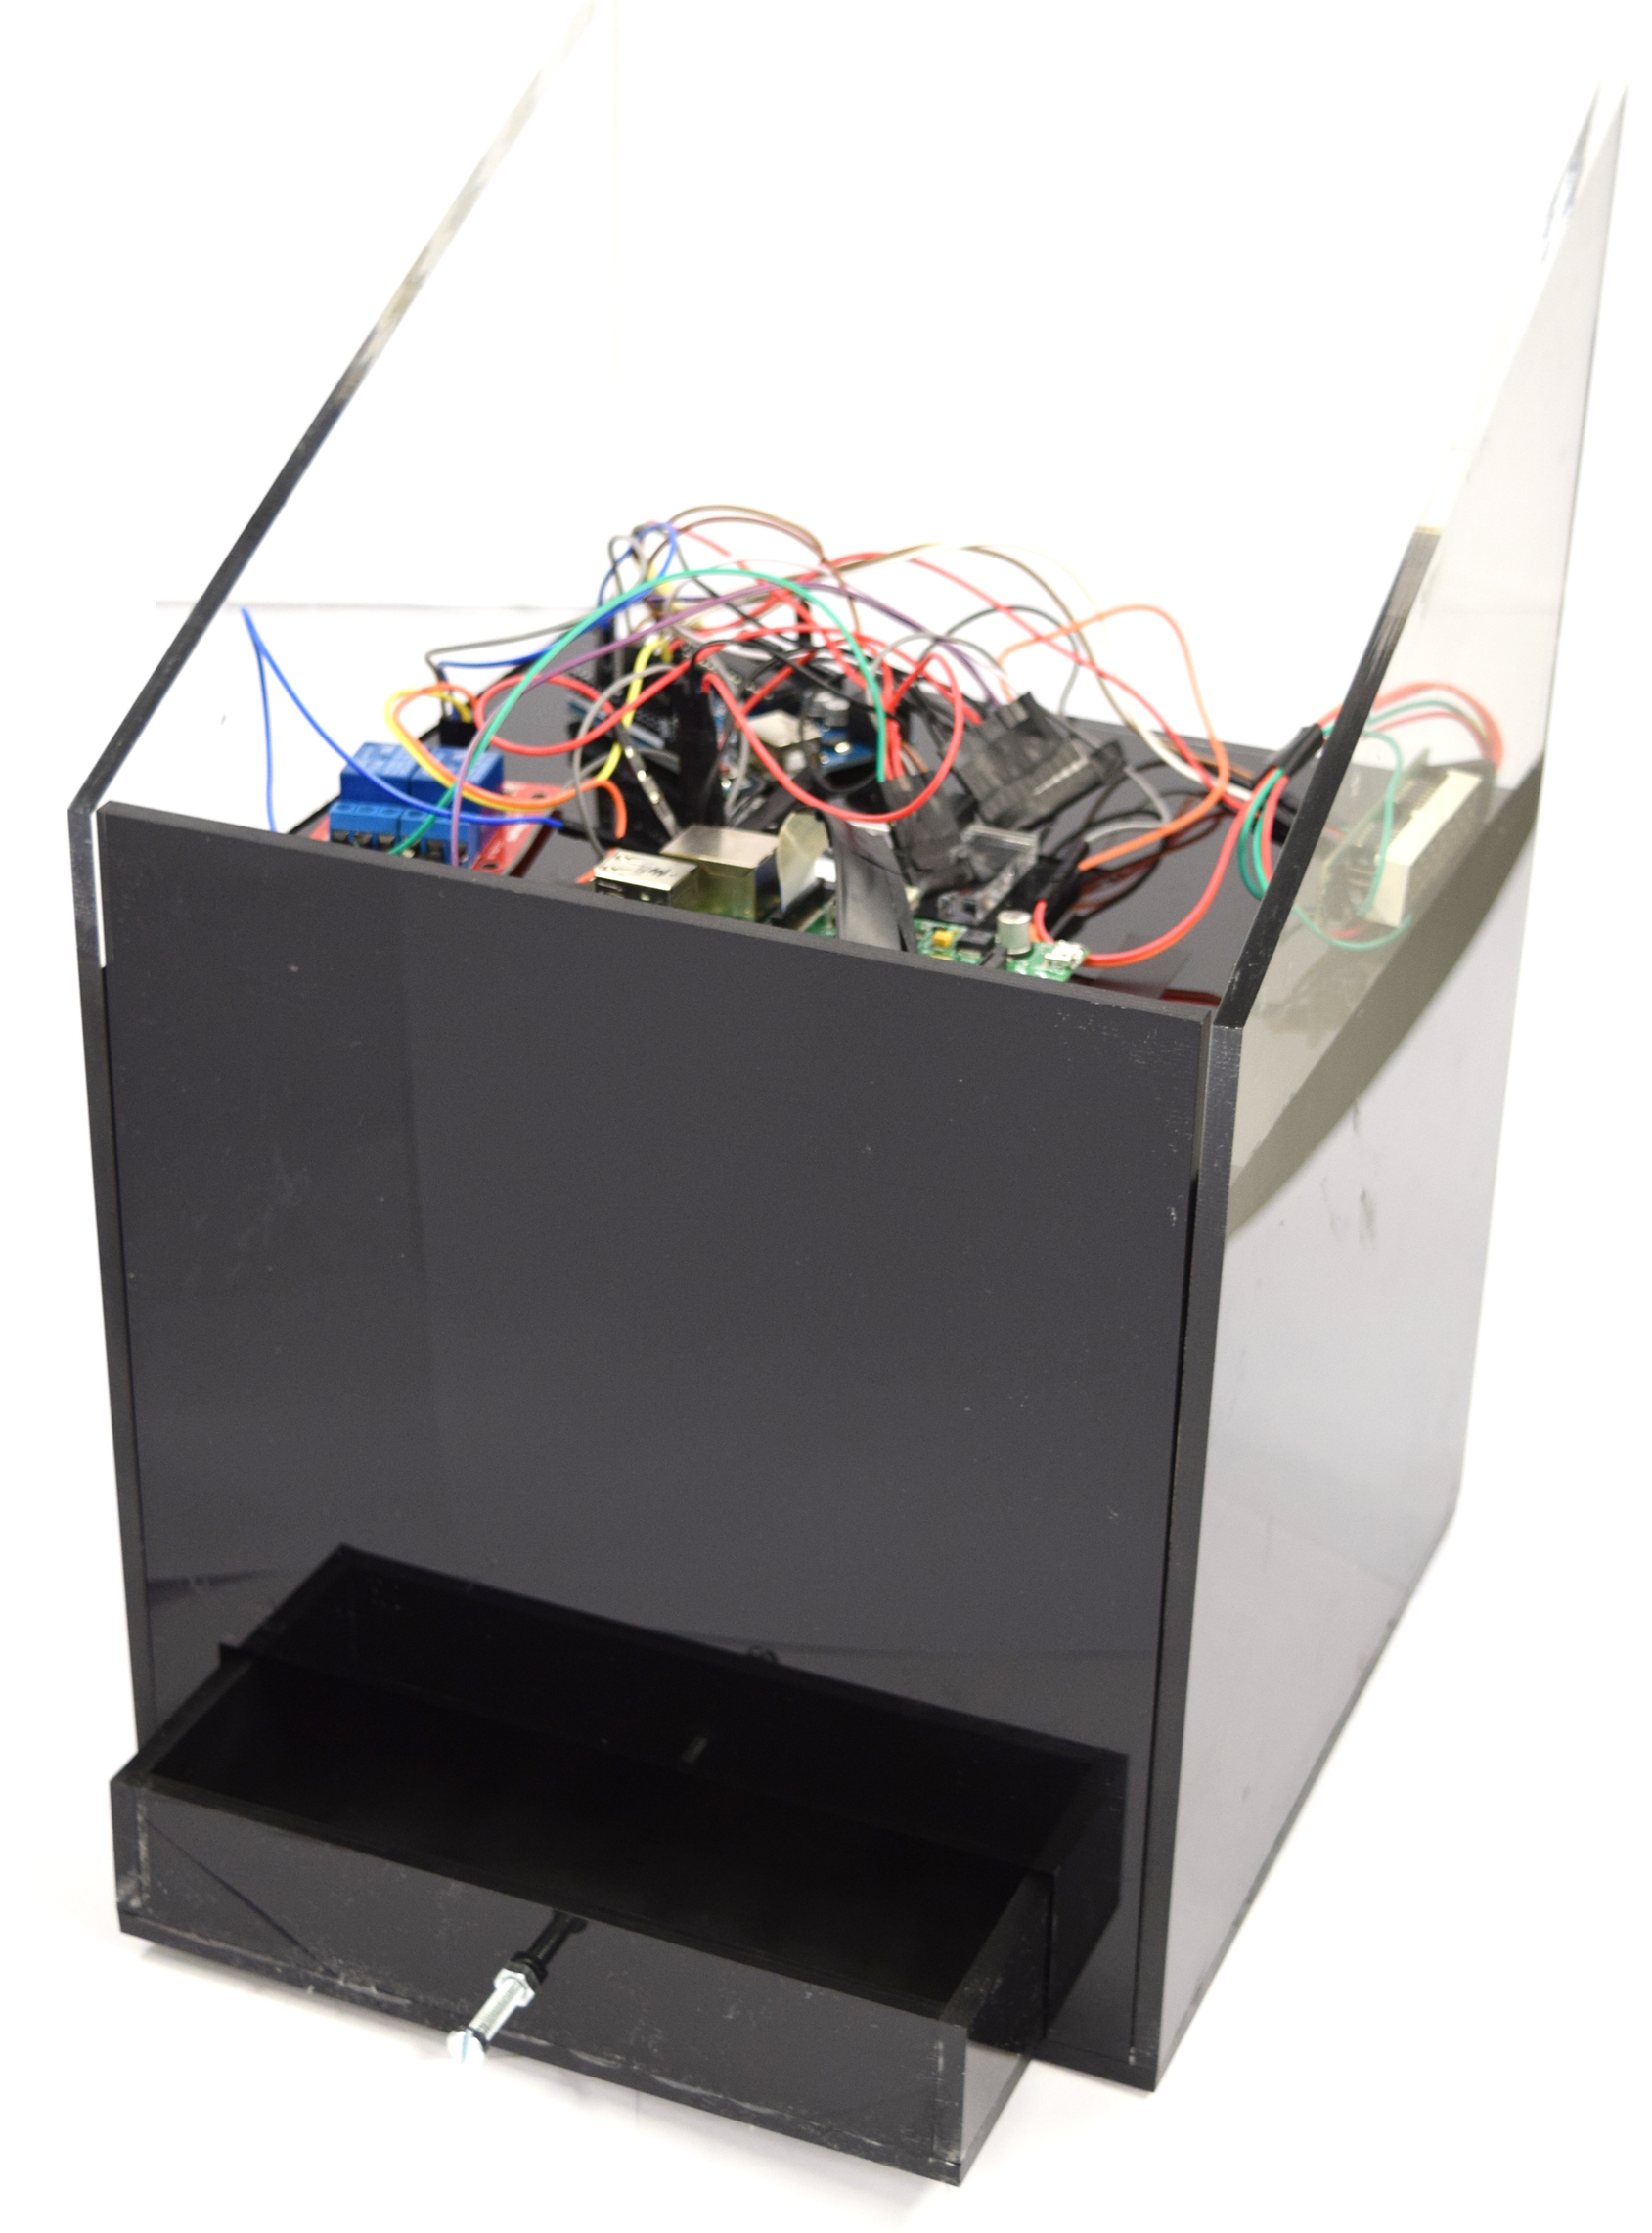
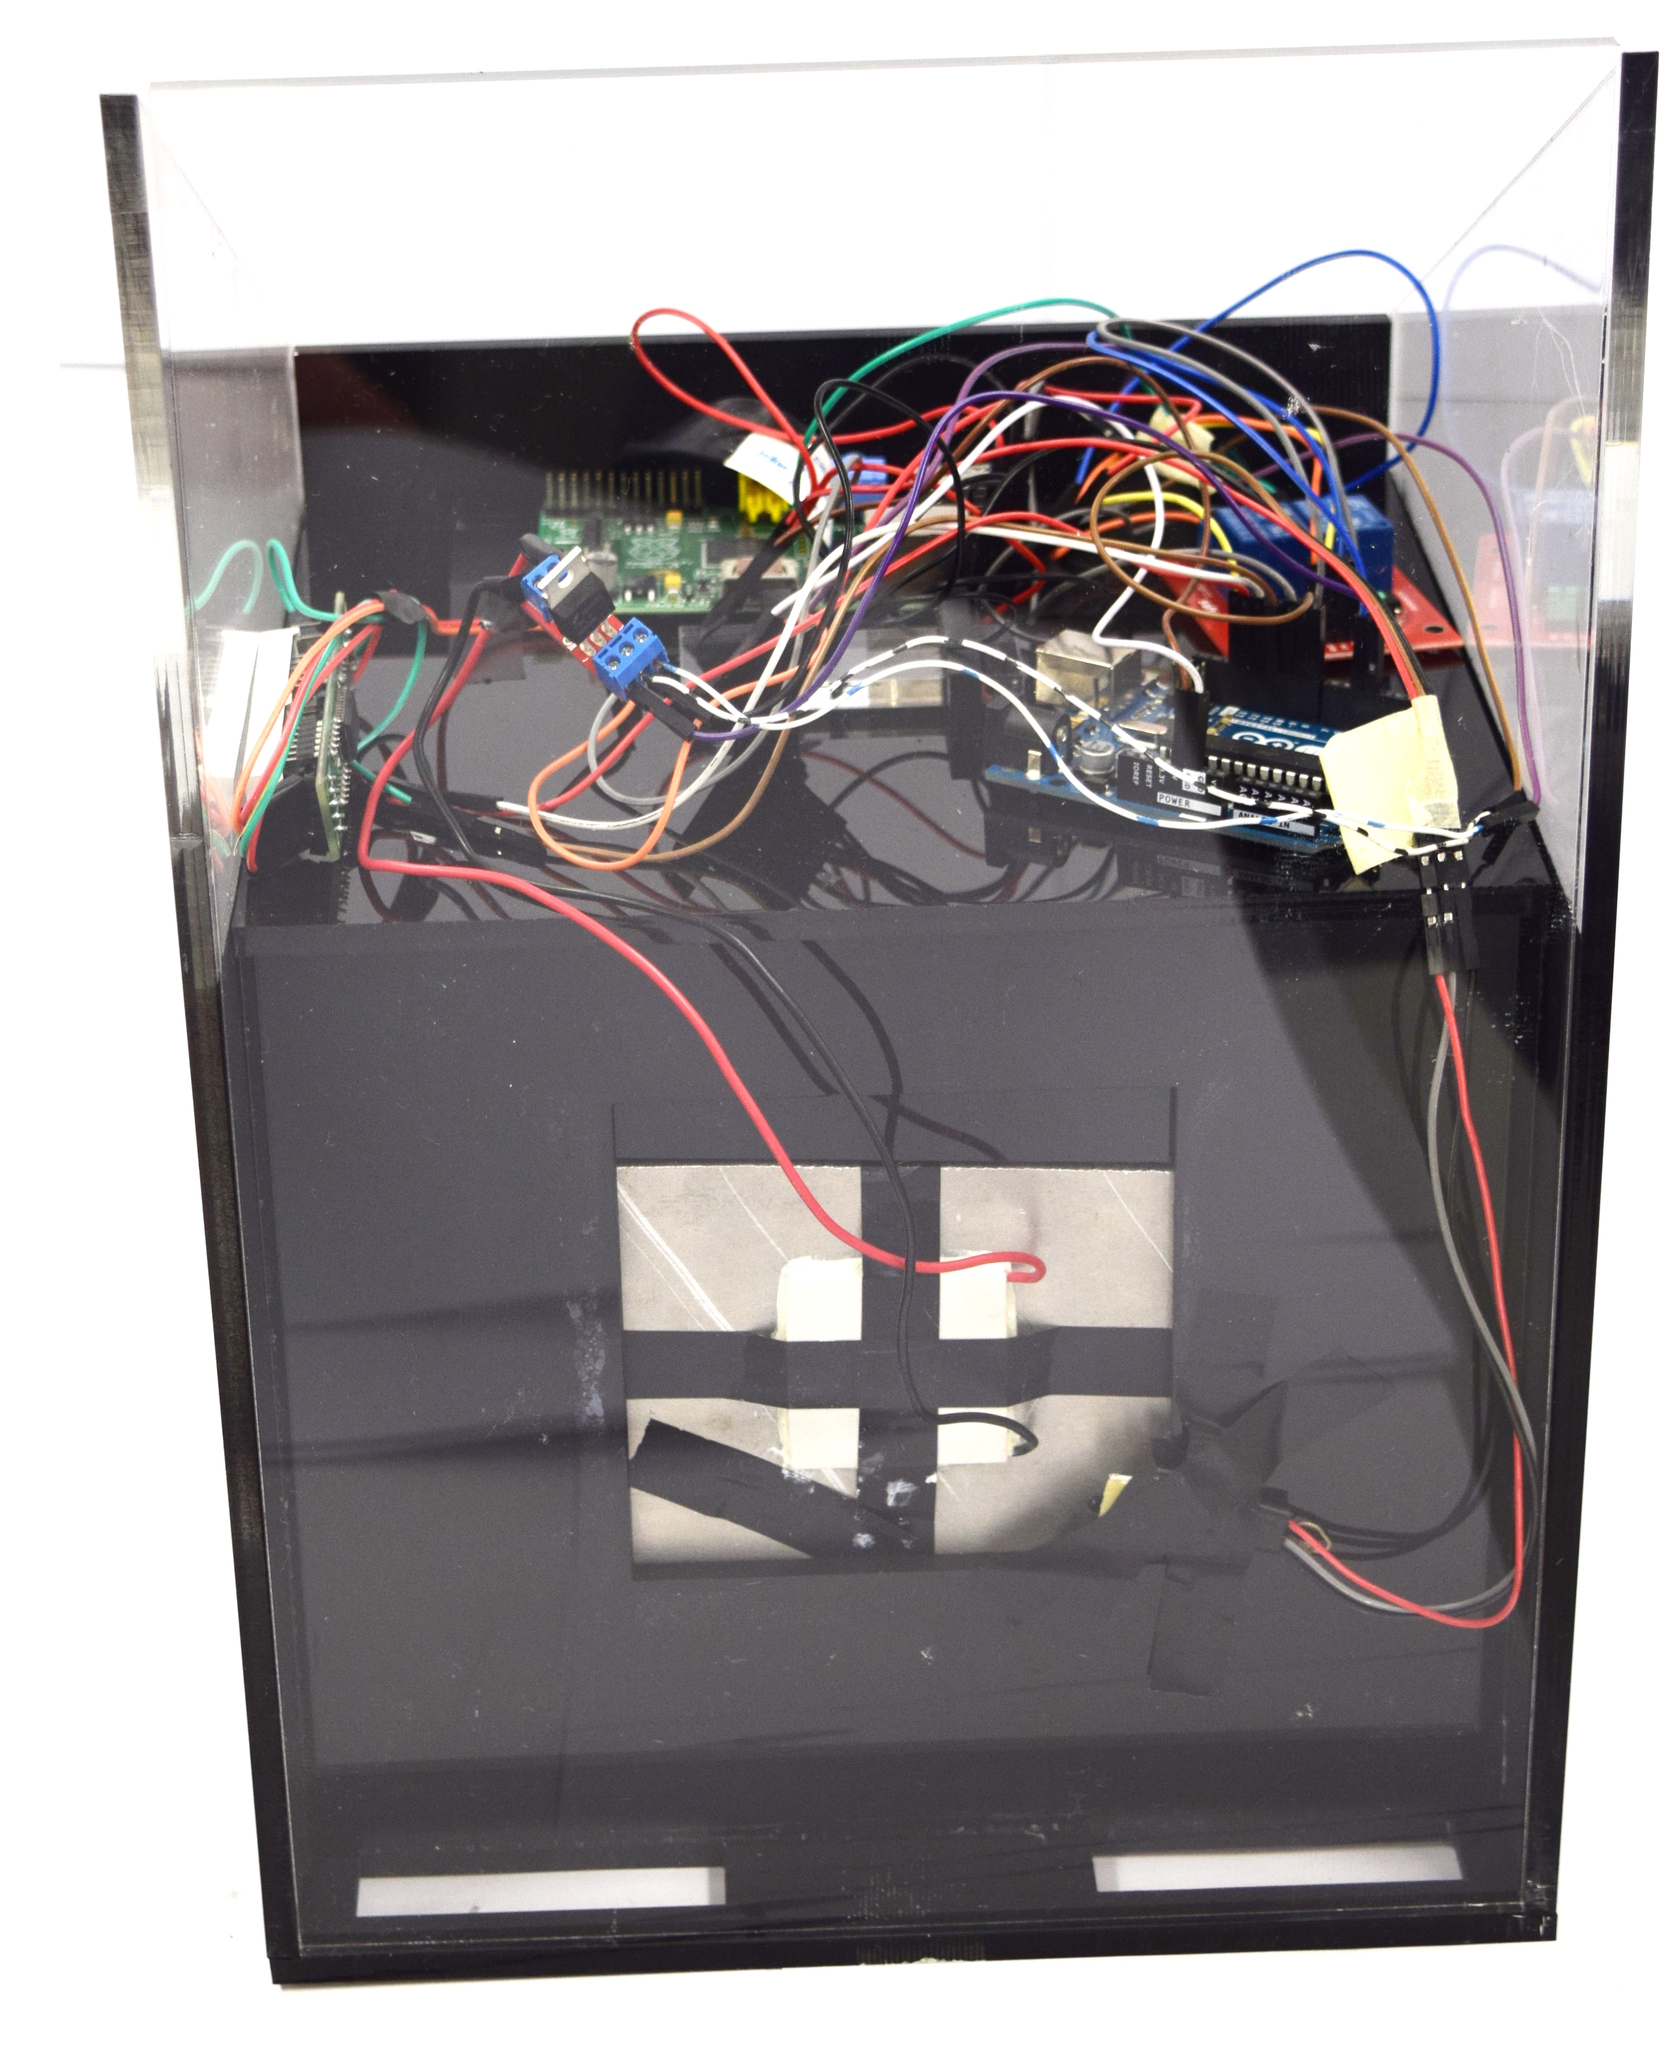
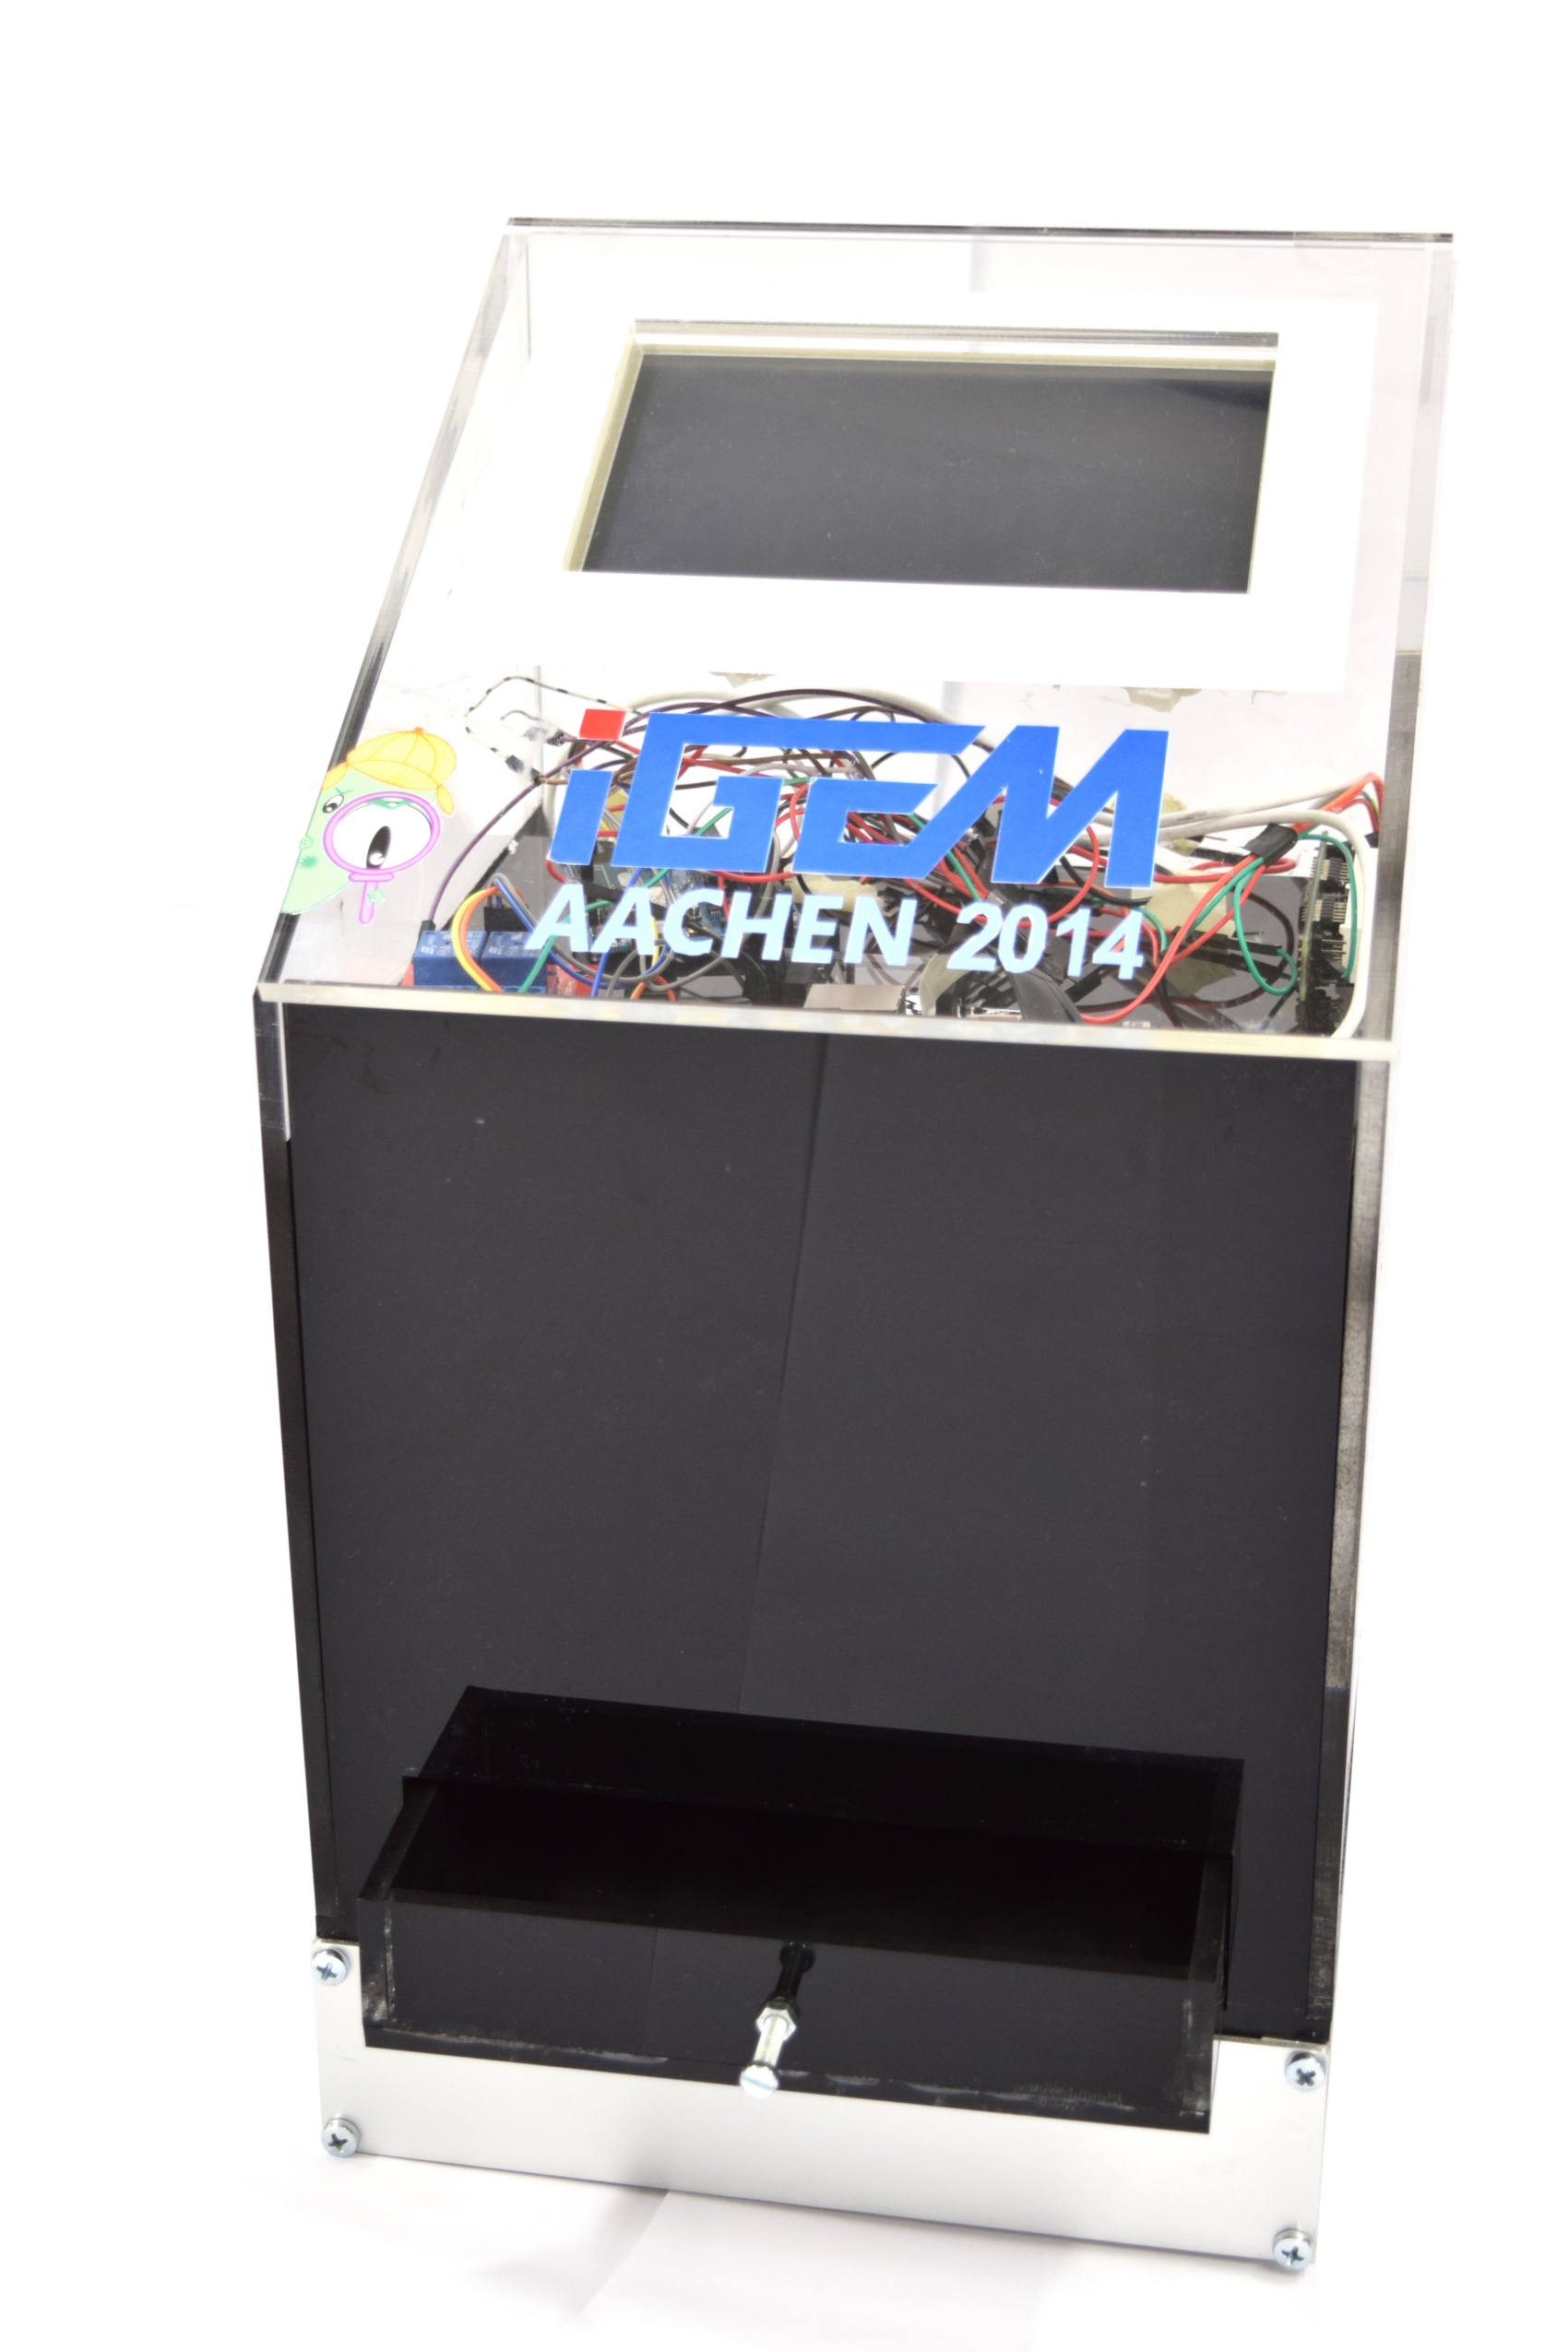
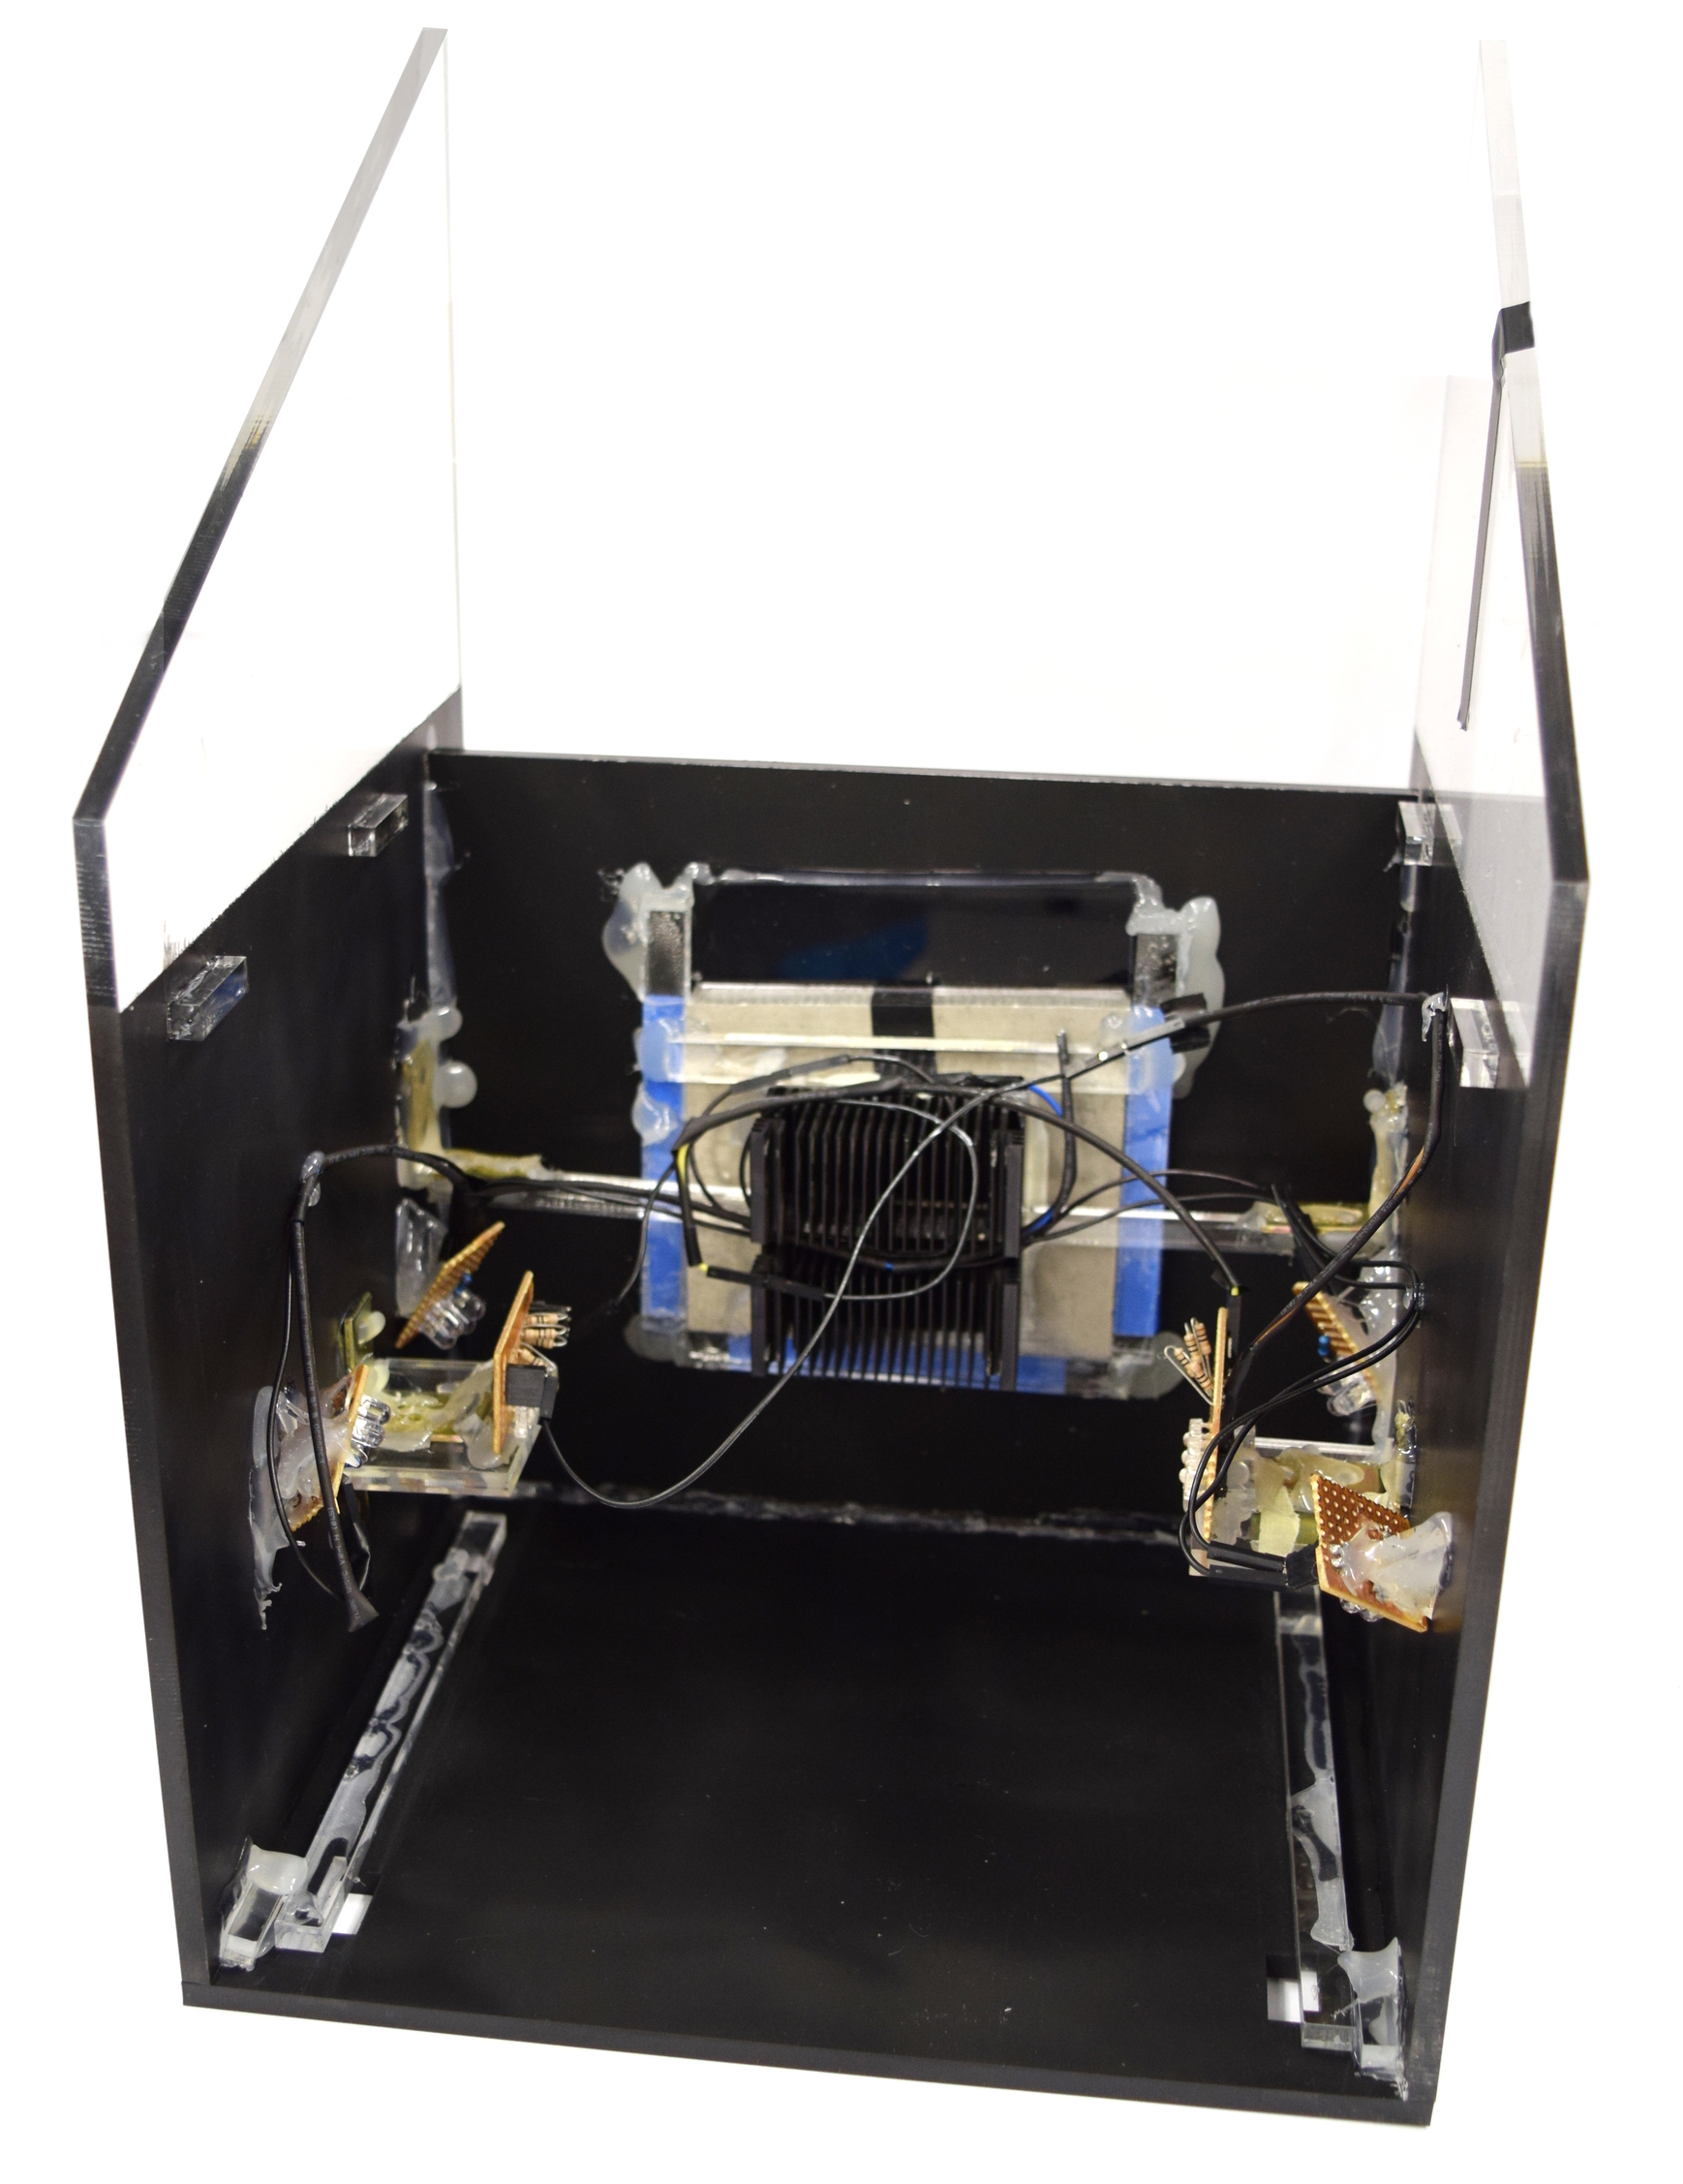
Our hardware consists of the casing and the electronical components. The casing which can be seen on the left was built from laser cut acrylic glass. A detailed description of the assembly is described in the section [https://2014.igem.org/Team:Aachen/Notebook/Engineering/WatsOn#watsondiy Build your own ''WatsOn]. | Our hardware consists of the casing and the electronical components. The casing which can be seen on the left was built from laser cut acrylic glass. A detailed description of the assembly is described in the section [https://2014.igem.org/Team:Aachen/Notebook/Engineering/WatsOn#watsondiy Build your own ''WatsOn]. | ||
| - | + | ||
| - | + | ||
| - | + | ||
| - | + | ||
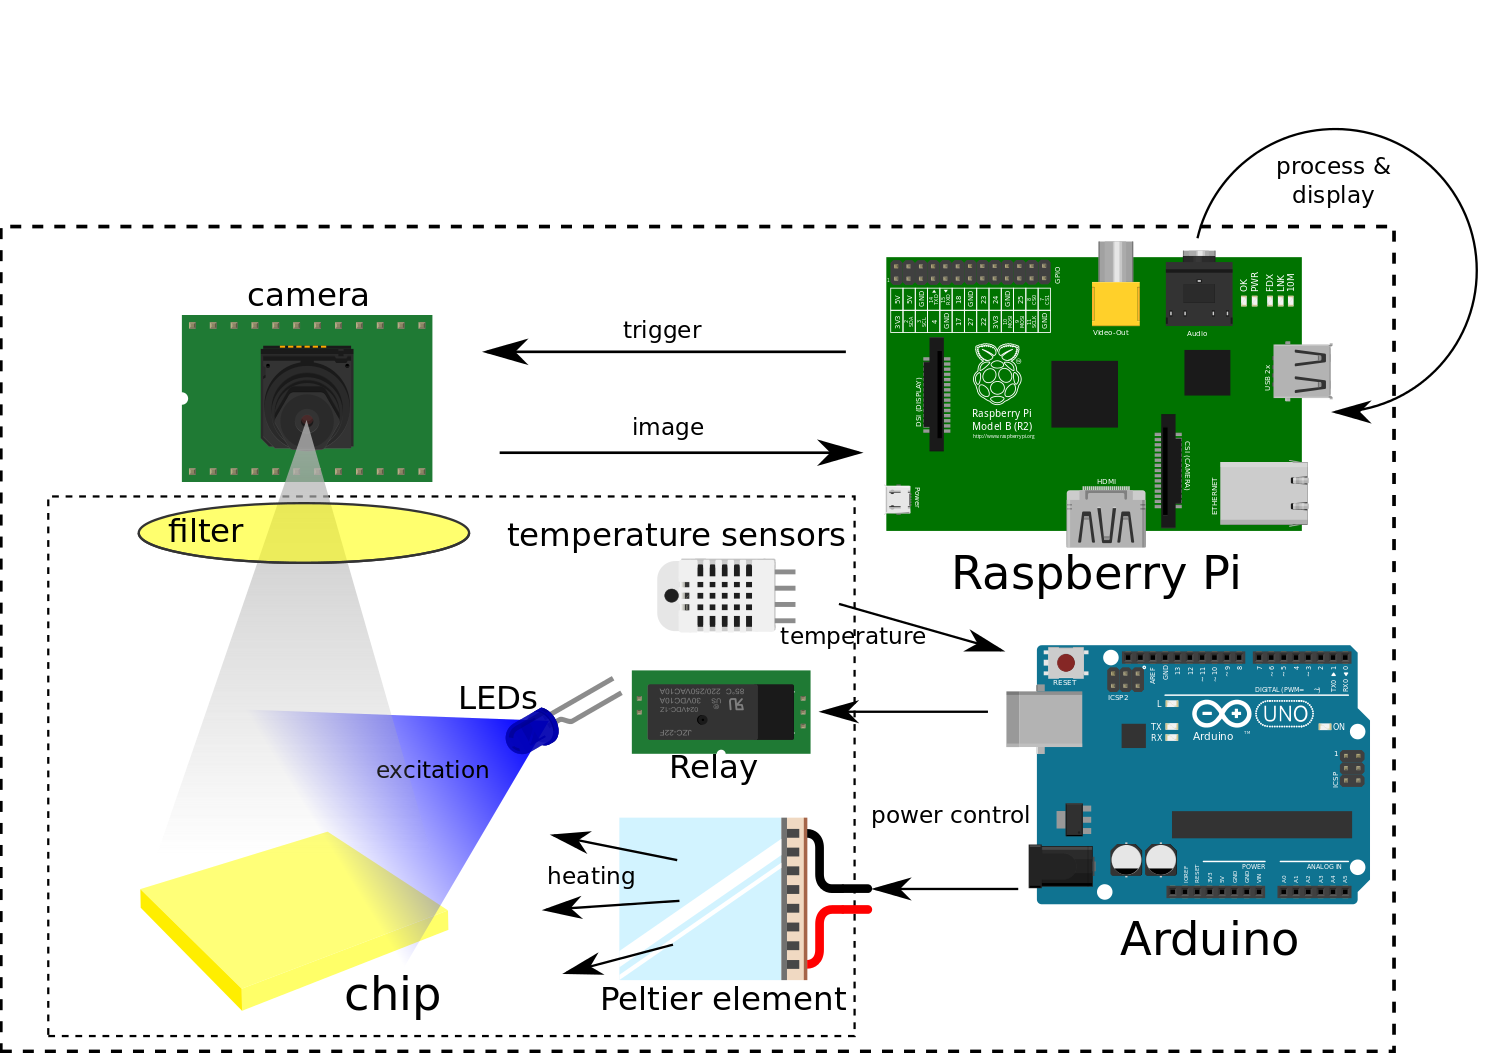
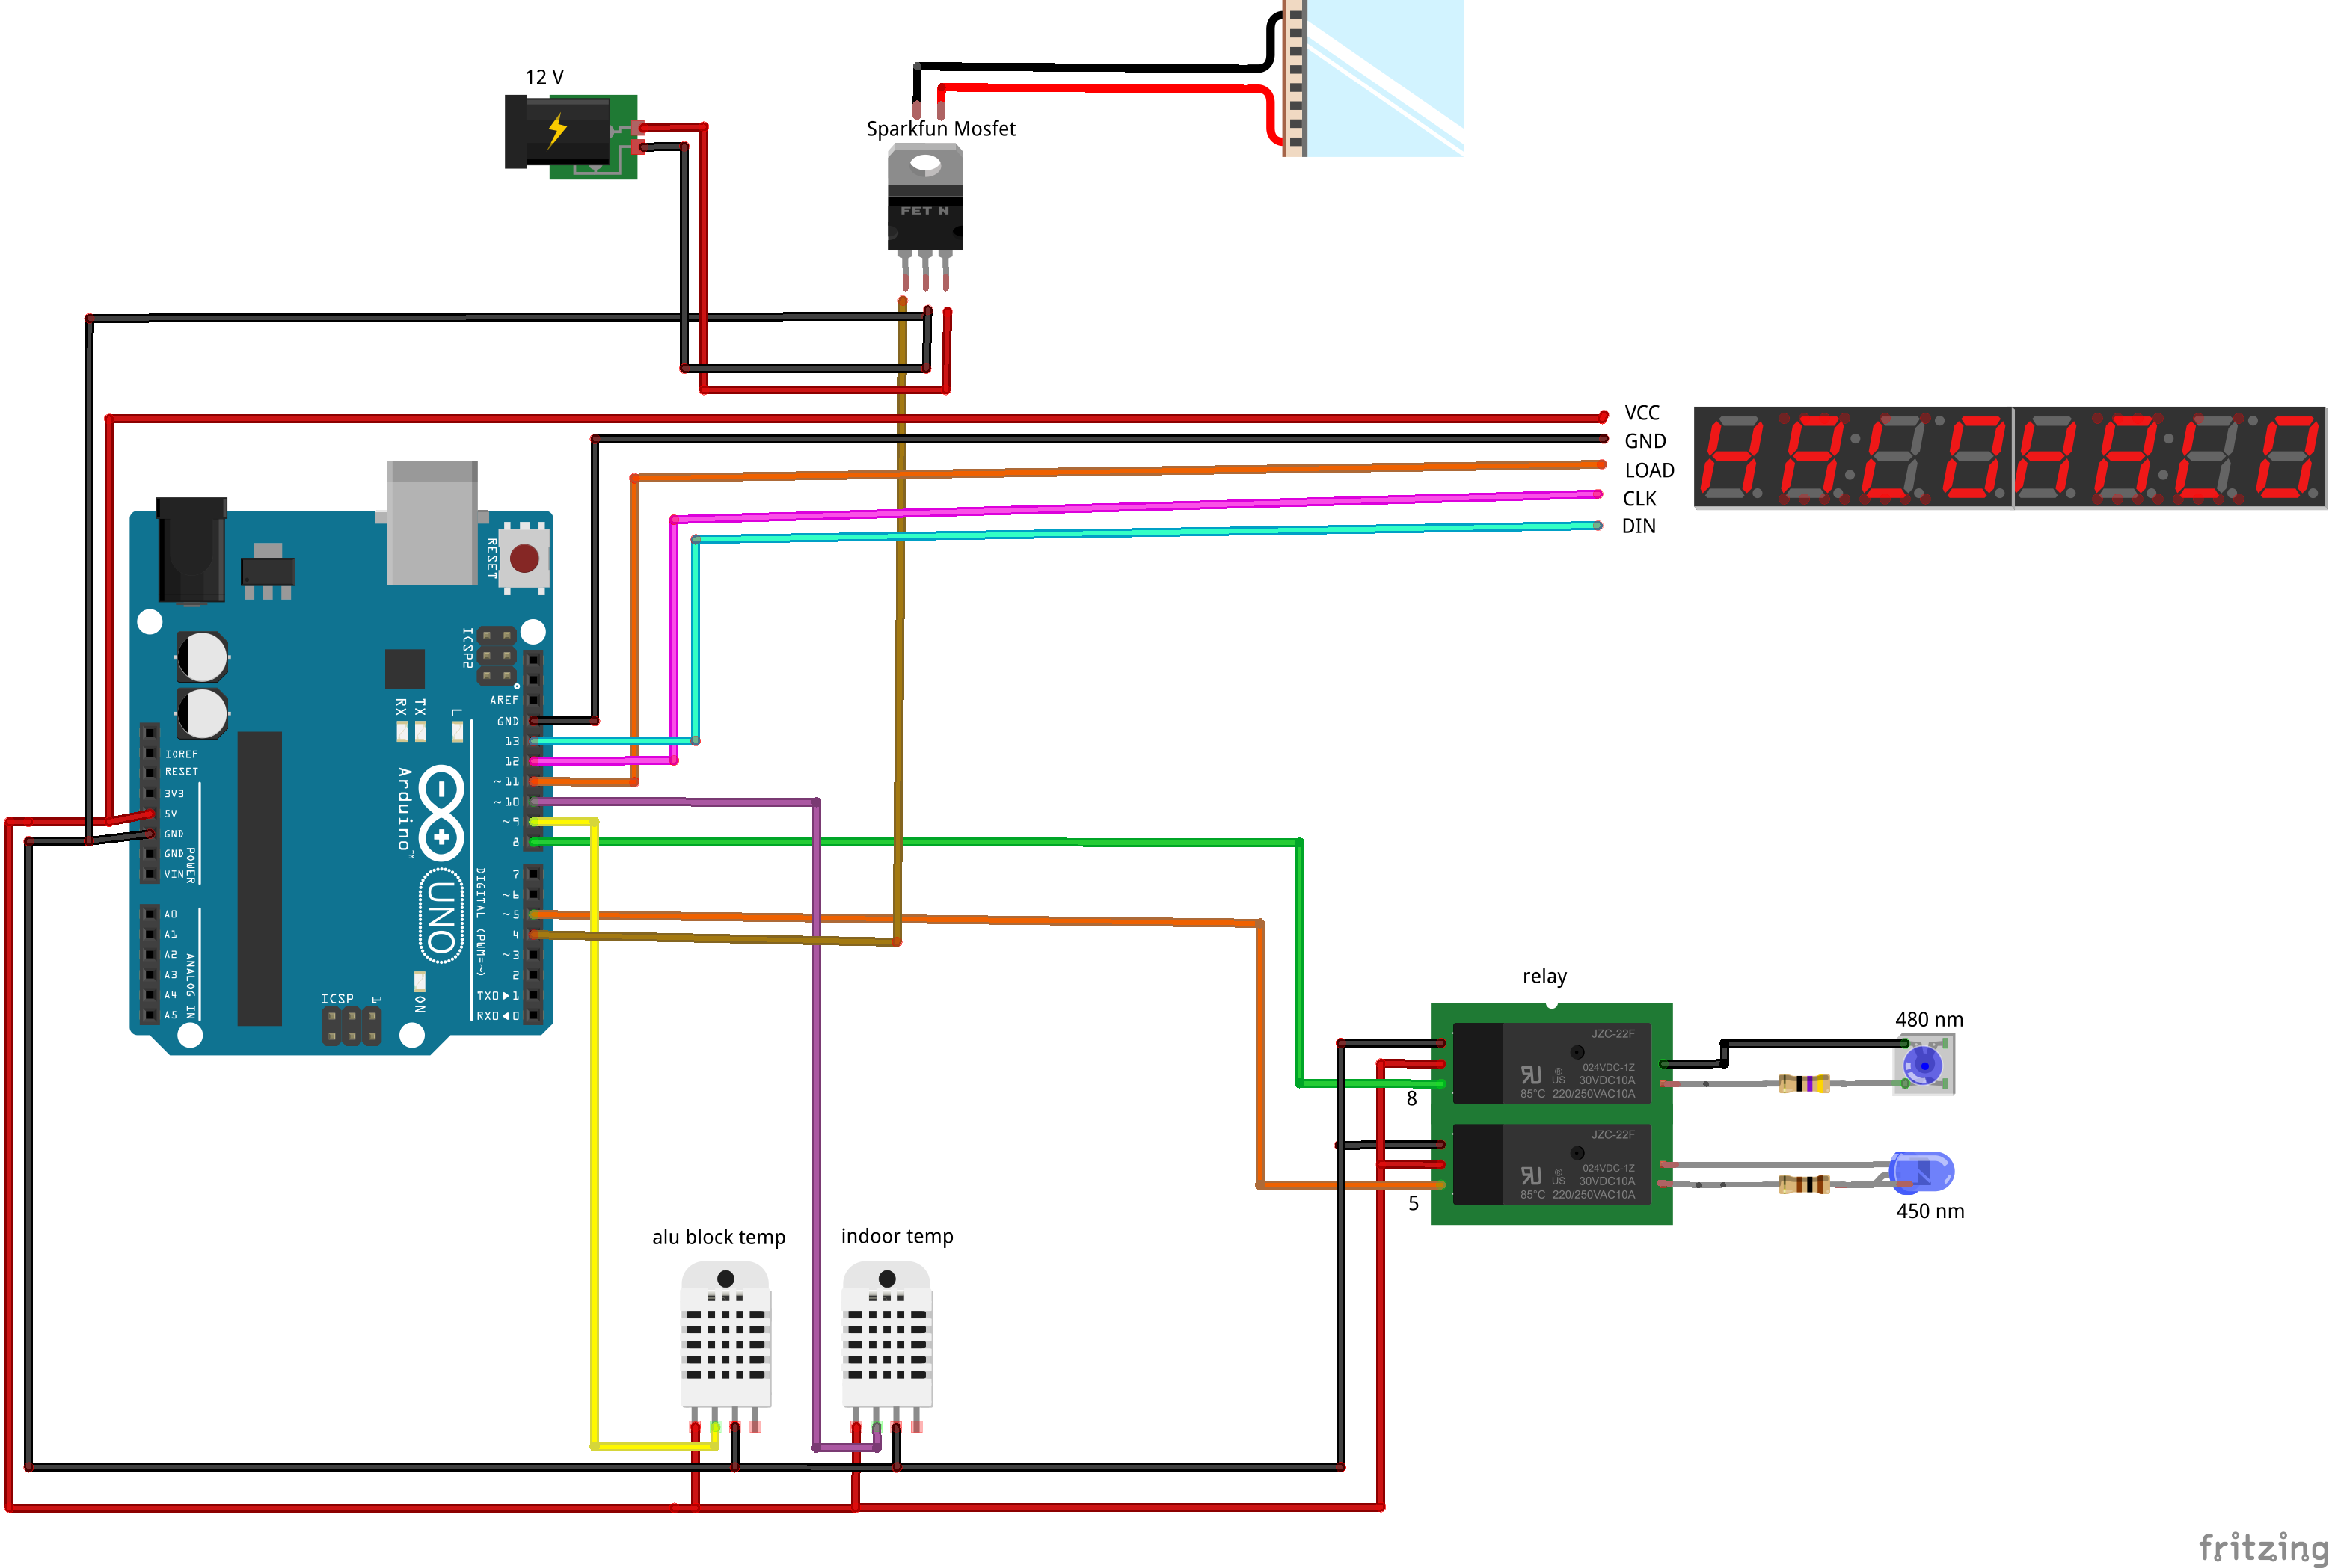
The connection between the different electronical elements is visualized below. | The connection between the different electronical elements is visualized below. | ||
| + | {{Team:Aachen/Figure|Aachen_Device_Hardware_Graphics.png|title=Interaction of electronical components||width=750px}} | ||
| - | + | * '''Raspberry Pi''' : The [http://www.raspberrypi.org/ Raspberry Pi] is a small single-board computer which runs a Linux operating system from an inserted SD card. The steps which are required to set up a fully working system are described in the [https://2014.igem.org/Team:Aachen/Notebook/Engineering/WatsOn#pisetup DIY section] of this page. The main purpose of the Raspberry Pi is to run the software described above, to control the attached camera and to show the GUI on the display. The big advantage of this board is that it is very powerful, cheap and therefore perfectly fit for our needs. | |
| - | + | ||
| - | + | ||
| - | * '''Raspberry Pi''' : The Raspberry Pi is a small single-board computer which runs a Linux operating system from an inserted SD card. The steps which are required to set up a fully working system are described in the [https://2014.igem.org/Team:Aachen/Notebook/Engineering/WatsOn#pisetup DIY section] of this page. The main purpose of the Raspberry Pi is to run the software described above, to control the attached camera and to show the GUI on the display. The big advantage of this board is that it is very powerful, cheap and therefore perfectly fit for our needs. | + | |
* '''Raspberry Pi camera''': The camera is directly connected to the Raspberry Pi board and takes the images of the chips. | * '''Raspberry Pi camera''': The camera is directly connected to the Raspberry Pi board and takes the images of the chips. | ||
| - | * '''Arduino''': The Arduino board is also a single-board computer with less computing power than the Raspberry Pi but with a greater focus on controlling electronical components. Therefore, it is used to control the LEDs and the Peltier heater. | + | * '''Arduino''': The [http://www.arduino.cc/ Arduino] board is also a single-board computer with less computing power than the Raspberry Pi but with a greater focus on controlling electronical components. Therefore, it is used to control the LEDs and the Peltier heater. |
* '''Relay''': The 2-channel relay works like two light switches which are either turned on or off. They control the 450 nm and 480 nm LEDs. The channels are connected and turned on and off by the Arduino board. | * '''Relay''': The 2-channel relay works like two light switches which are either turned on or off. They control the 450 nm and 480 nm LEDs. The channels are connected and turned on and off by the Arduino board. | ||
| Line 83: | Line 81: | ||
* '''USB WiFi stick''': The USB WiFi stick connects the Raspberry Pi to a local network. | * '''USB WiFi stick''': The USB WiFi stick connects the Raspberry Pi to a local network. | ||
| - | * '''Display''': | + | * '''Display''': A 8-digit display is connected to the Arduino board and shows the current interior temperature |
{{Team:Aachen/FigureFloatRight|Aachen_Filter_010.png|title=010|subtitle=|width=70px}} | {{Team:Aachen/FigureFloatRight|Aachen_Filter_010.png|title=010|subtitle=|width=70px}} | ||
| Line 96: | Line 94: | ||
<span class="anchor" id="watsonsoftware"></span> | <span class="anchor" id="watsonsoftware"></span> | ||
| - | The software consists of several parts which provide | + | The software consists of several parts which provide an user interface and manage the connection to the hardware. It is also hosted in the [https://github.com/igemsoftware/AachenSoftProject2014 github igemsoftware] repository. |
| - | + | ||
| - | + | ||
| - | + | ||
| - | [ | + | |
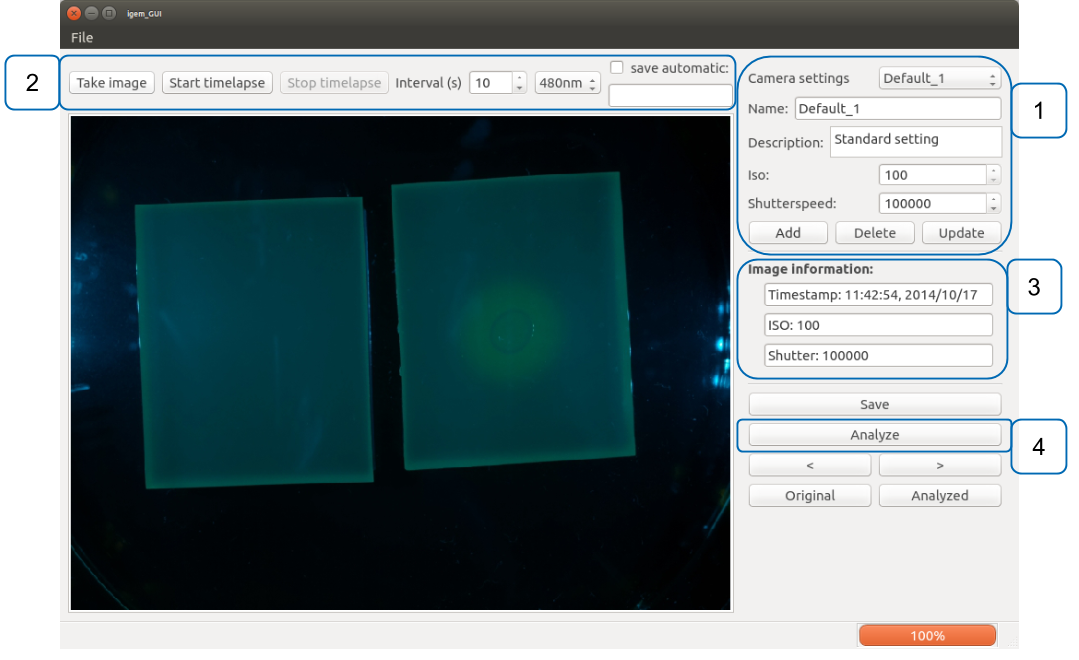
===GUI (Graphical User Interface)=== | ===GUI (Graphical User Interface)=== | ||
On the graphical interface, the user can take images and time lapses of the chips inside the device. The software is written in C++. It makes use of the [http://qt-project.org/ Qt-Library] to provide a clear interface and a comfortable way to manage various software aspects such as handling images and establishing network connections. An advantage resulting from the utilization of Qt-Library is the multi-platform support for Windows, MacOS and Linux. Additionally, Qt is available with an Open Source license which can be used for free. The software can be used locally on the Raspberry Pi or remotely from a device in the same network. | On the graphical interface, the user can take images and time lapses of the chips inside the device. The software is written in C++. It makes use of the [http://qt-project.org/ Qt-Library] to provide a clear interface and a comfortable way to manage various software aspects such as handling images and establishing network connections. An advantage resulting from the utilization of Qt-Library is the multi-platform support for Windows, MacOS and Linux. Additionally, Qt is available with an Open Source license which can be used for free. The software can be used locally on the Raspberry Pi or remotely from a device in the same network. | ||
| + | |||
| + | The scheme below shows the different components of the software: | ||
| + | |||
| + | [[File:Aachen_Device_GUI.png|center|800px]] | ||
Features of the GUI include: | Features of the GUI include: | ||
| - | * Change settings | + | * Change settings [1]: |
** The user can specify the iso-value and the shutter speed of the camera. | ** The user can specify the iso-value and the shutter speed of the camera. | ||
** Custom settings can be labeled and saved for future reference. | ** Custom settings can be labeled and saved for future reference. | ||
** Existing settings can be updated or deleted unless they are default configurations. | ** Existing settings can be updated or deleted unless they are default configurations. | ||
| - | * Take image/s | + | * Take image/s [2]: |
** The excitation wavelength of GFP (480 nm) and iLOV (450 nm) can be selected. | ** The excitation wavelength of GFP (480 nm) and iLOV (450 nm) can be selected. | ||
** The GUI offers two possibilities to take images: | ** The GUI offers two possibilities to take images: | ||
*** Take a single image with the active camera settings. | *** Take a single image with the active camera settings. | ||
*** Take time lapse shootings with the active camera settings and the specified interval. When activated, the images are saved automatically to a user defined directory with ascending filenames. | *** Take time lapse shootings with the active camera settings and the specified interval. When activated, the images are saved automatically to a user defined directory with ascending filenames. | ||
| - | ** The last image which was taken by the camera is shown in the GUI, information containing the time stamp and used camera settings are displayed next to the image | + | ** The last image which was taken by the camera is shown in the GUI, information containing the time stamp and used camera settings are displayed next to the image [3]. Previous images can be selected with the arrow buttons. |
| - | * Analyze image | + | * Analyze image [4]: |
** The image is analyzed by an image segmentation algorithm and shows whether the pathogen ''Pseudomonas aeruginosa'' is present on the chip or not | ** The image is analyzed by an image segmentation algorithm and shows whether the pathogen ''Pseudomonas aeruginosa'' is present on the chip or not | ||
| + | |||
| + | ''Download the GUI sourcecode:'' [https://static.igem.org/mediawiki/2014/9/90/Aachen_WatsOn_GUI.zip Download] | ||
===Backend=== | ===Backend=== | ||
The backend is a software that runs on the Raspberry Pi and is responsible for the connection between the GUI and the hardware. If the user interface is executed on another device, e.g. a notebook, it has to be in the same network as the Raspberry Pi. The backend works like a web server that receives commands and acts according to the submitted parameters. It can take images and returns them to the GUI. | The backend is a software that runs on the Raspberry Pi and is responsible for the connection between the GUI and the hardware. If the user interface is executed on another device, e.g. a notebook, it has to be in the same network as the Raspberry Pi. The backend works like a web server that receives commands and acts according to the submitted parameters. It can take images and returns them to the GUI. | ||
| - | Before an image is taken, the backend turns on the specified LEDs by sending a command to the connected Arduino board. | + | Before an image is taken, the backend turns on the specified LEDs by sending a command to the connected Arduino board. Subsequently, the LEDs are turned off using the same mechanism. These steps are repeated in the given interval for a time lapse shooting. |
| - | ''Download the backend sourcecode:'' [https:// | + | ''Download the backend sourcecode:'' [https://static.igem.org/mediawiki/2014/7/77/Aachen_Device_Backend.zip Download] |
<html><br></html> | <html><br></html> | ||
| Line 132: | Line 132: | ||
The software on the Arduino board sets the power and thus controls the temperature of the Peltier heater. The power is set by evaluating the received values from the temperature sensors for the interior of the device and the aluminum block. Additionally, the Arduino receives commands from the Raspberry Pi to turn the LEDs on and off. | The software on the Arduino board sets the power and thus controls the temperature of the Peltier heater. The power is set by evaluating the received values from the temperature sensors for the interior of the device and the aluminum block. Additionally, the Arduino receives commands from the Raspberry Pi to turn the LEDs on and off. | ||
| - | ''Download the Arduino sourcecode:'' [https://static.igem.org/mediawiki/2014/ | + | ''Download the Arduino sourcecode:'' [https://static.igem.org/mediawiki/2014/c/cd/Aachen_WatsOn_arduino.zip Download] |
| + | |||
| + | ===Measurarty=== | ||
| + | We have developed our own image analysis pipeline ''Measurarty''. Please go to the [https://2014.igem.org/Team:Aachen/Notebook/Software/Measurarty ''Measurarty''] project page for further information. | ||
| Line 144: | Line 147: | ||
==Technical Components== | ==Technical Components== | ||
If you want to create your own ''WatsOn'' first take a look at the following list of necessary components. All parts except the laser cut acrylic glass can be readily purchased and do not require further adjustments. | If you want to create your own ''WatsOn'' first take a look at the following list of necessary components. All parts except the laser cut acrylic glass can be readily purchased and do not require further adjustments. | ||
| - | + | ||
| + | ''Download the laser cutting plan here: [https://static.igem.org/mediawiki/2014/f/fd/Aachen_WatsOn_laser_cut.svg.zip Download] (for acrylic glass with a height of 6 mm) | ||
| + | |||
'''All needed components, their quantities and prices for creating your own ''WatsOn''''' | '''All needed components, their quantities and prices for creating your own ''WatsOn''''' | ||
{| class="wikitable sortable" | {| class="wikitable sortable" | ||
| Line 180: | Line 185: | ||
| 1|| [http://corporate.evonik.com/en/products/pages/default.aspx case acrylic glass XT 6mm~0.5<sup>2</sup>]||39.88||50.65||39.88||50.65 | | 1|| [http://corporate.evonik.com/en/products/pages/default.aspx case acrylic glass XT 6mm~0.5<sup>2</sup>]||39.88||50.65||39.88||50.65 | ||
|- | |- | ||
| - | | 1||spray paint for acrylic glass||5.15||6.54||5.15||6.54 | + | | 1|| black spray paint for acrylic glass||5.15||6.54||5.15||6.54 |
|- | |- | ||
| 1|| [http://www.newark.com/raspberry-pi/raspberry-modb-512m/raspberry-pi-model-b-board/dp/68X0155 Raspberry Pi model B board]||27.56||35.00||27.56||35.00 | | 1|| [http://www.newark.com/raspberry-pi/raspberry-modb-512m/raspberry-pi-model-b-board/dp/68X0155 Raspberry Pi model B board]||27.56||35.00||27.56||35.00 | ||
| Line 238: | Line 243: | ||
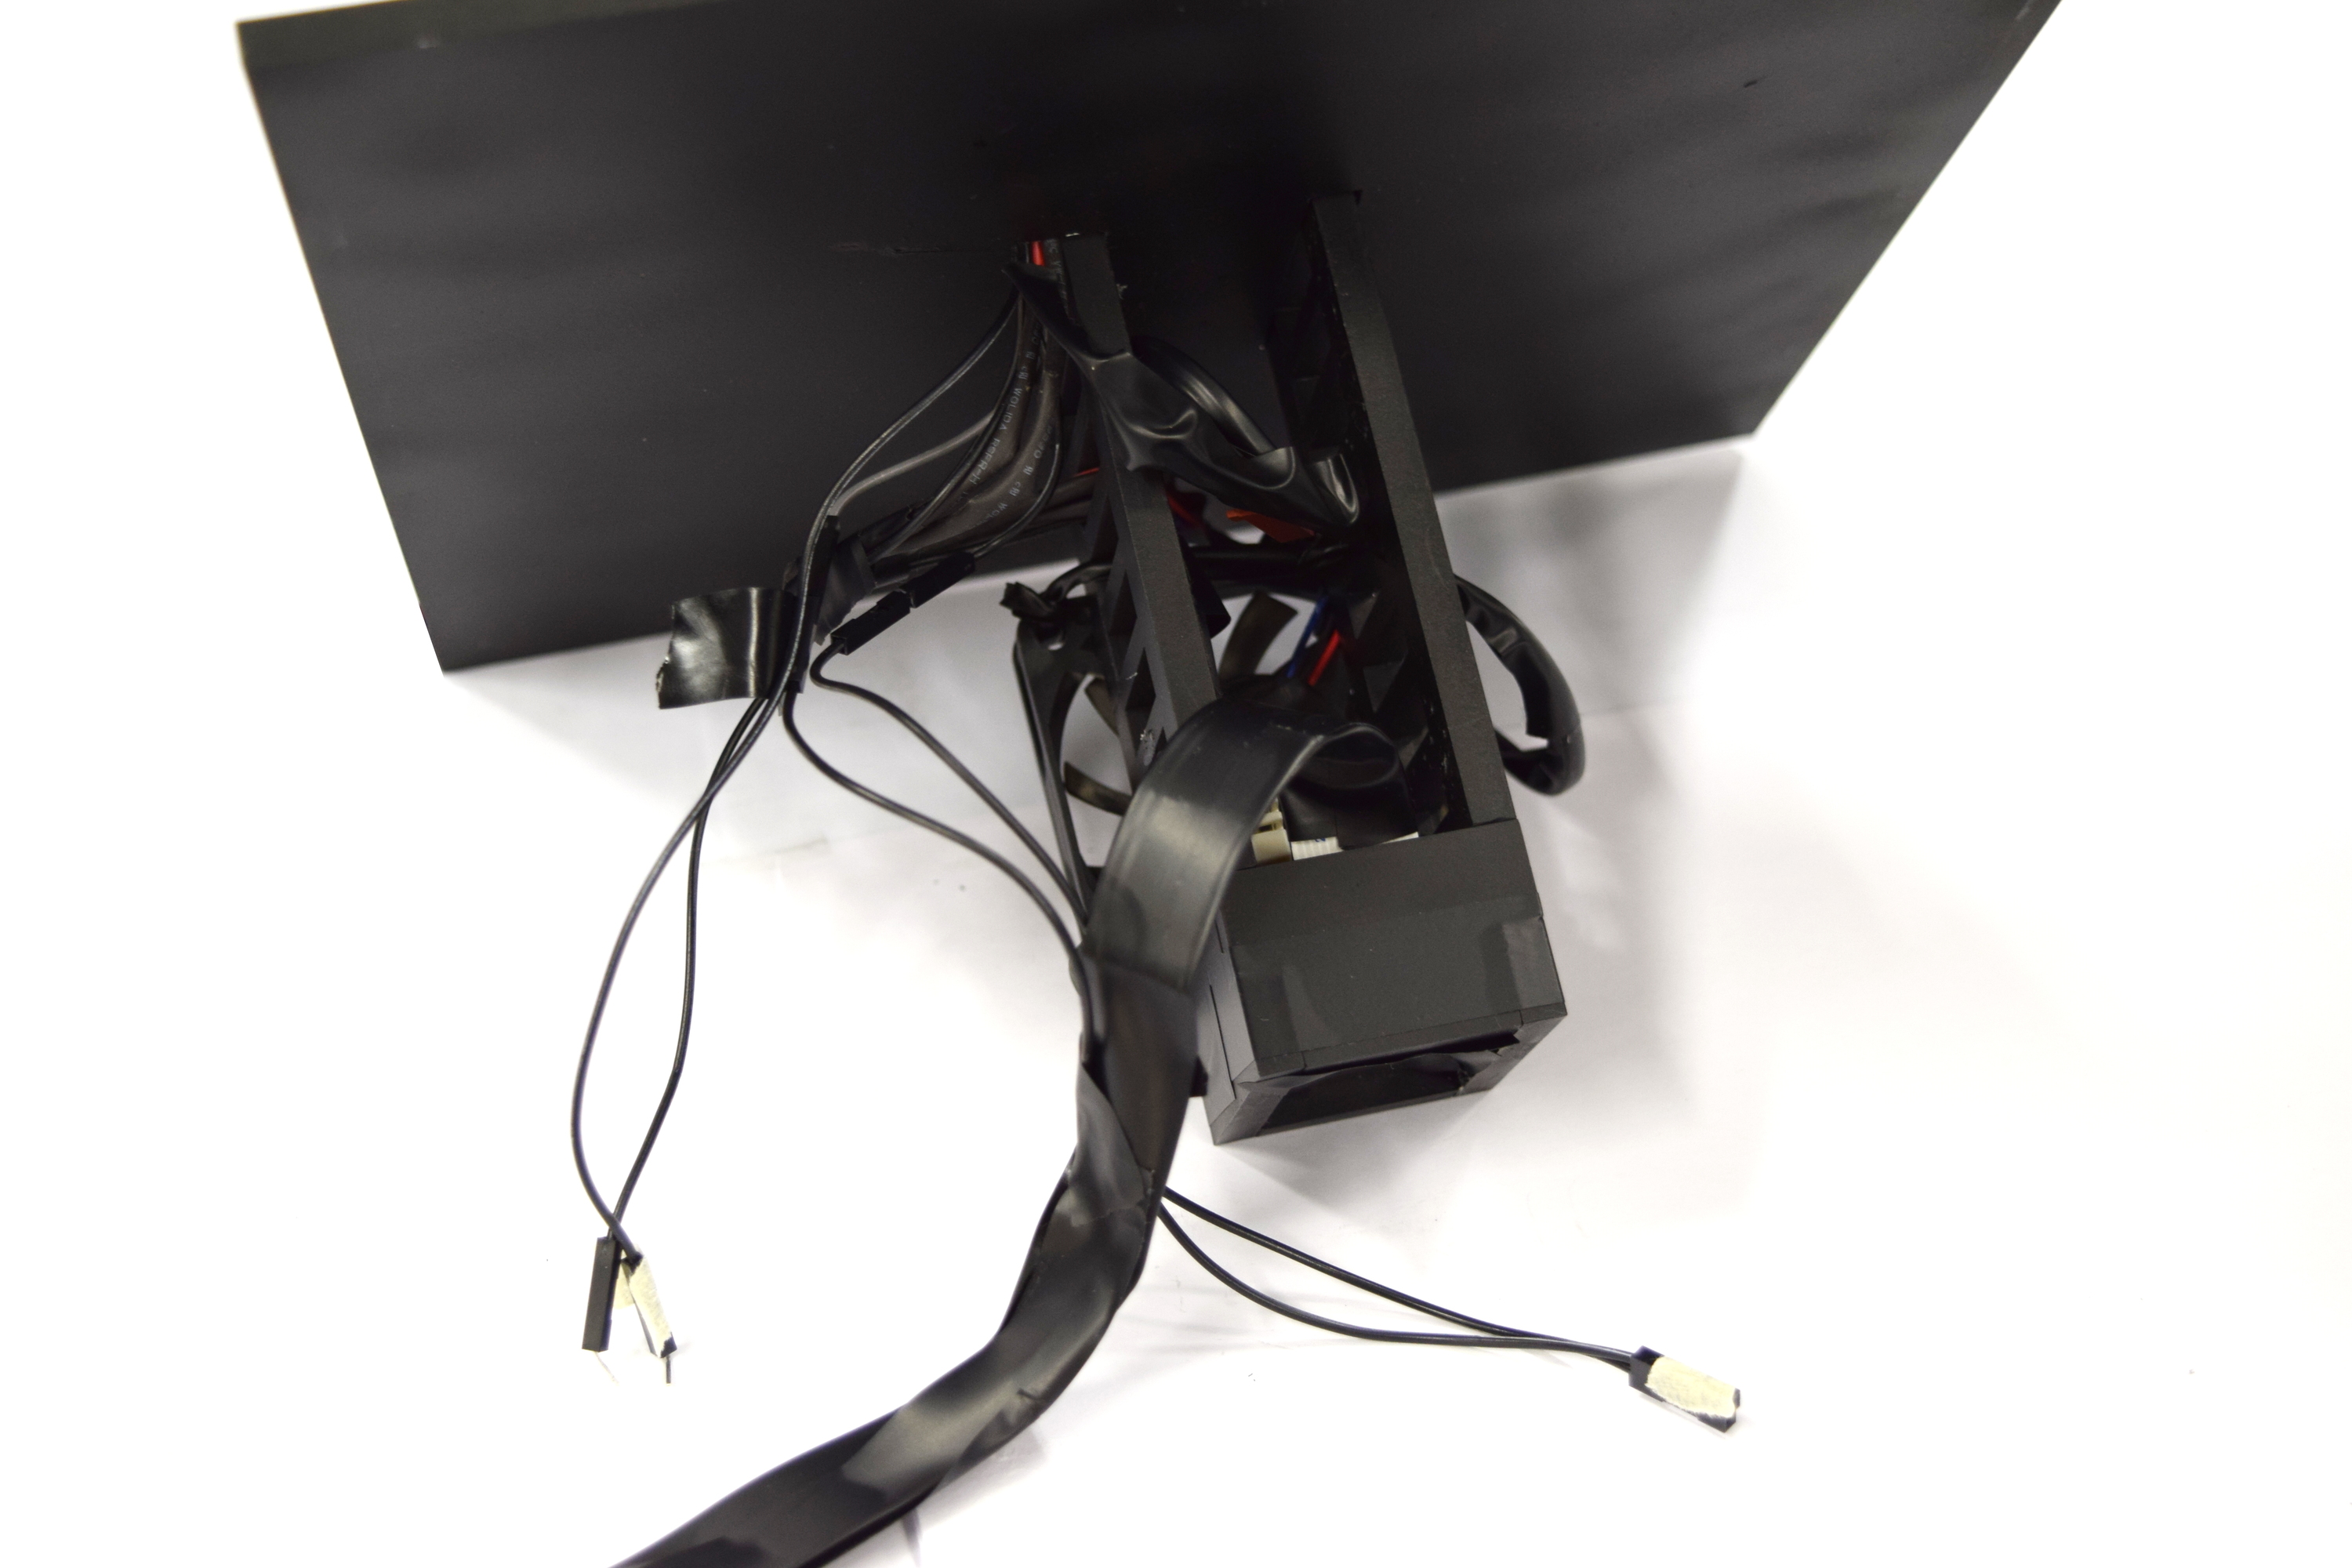
| [[File:Aachen_Device_10.jpg|350px]] || Place the temperature sensor measuring the aluminum block temperature directly on the block and put the back panel in front of it. | | [[File:Aachen_Device_10.jpg|350px]] || Place the temperature sensor measuring the aluminum block temperature directly on the block and put the back panel in front of it. | ||
|-style="border-top: 2px #808080 solid;" | |-style="border-top: 2px #808080 solid;" | ||
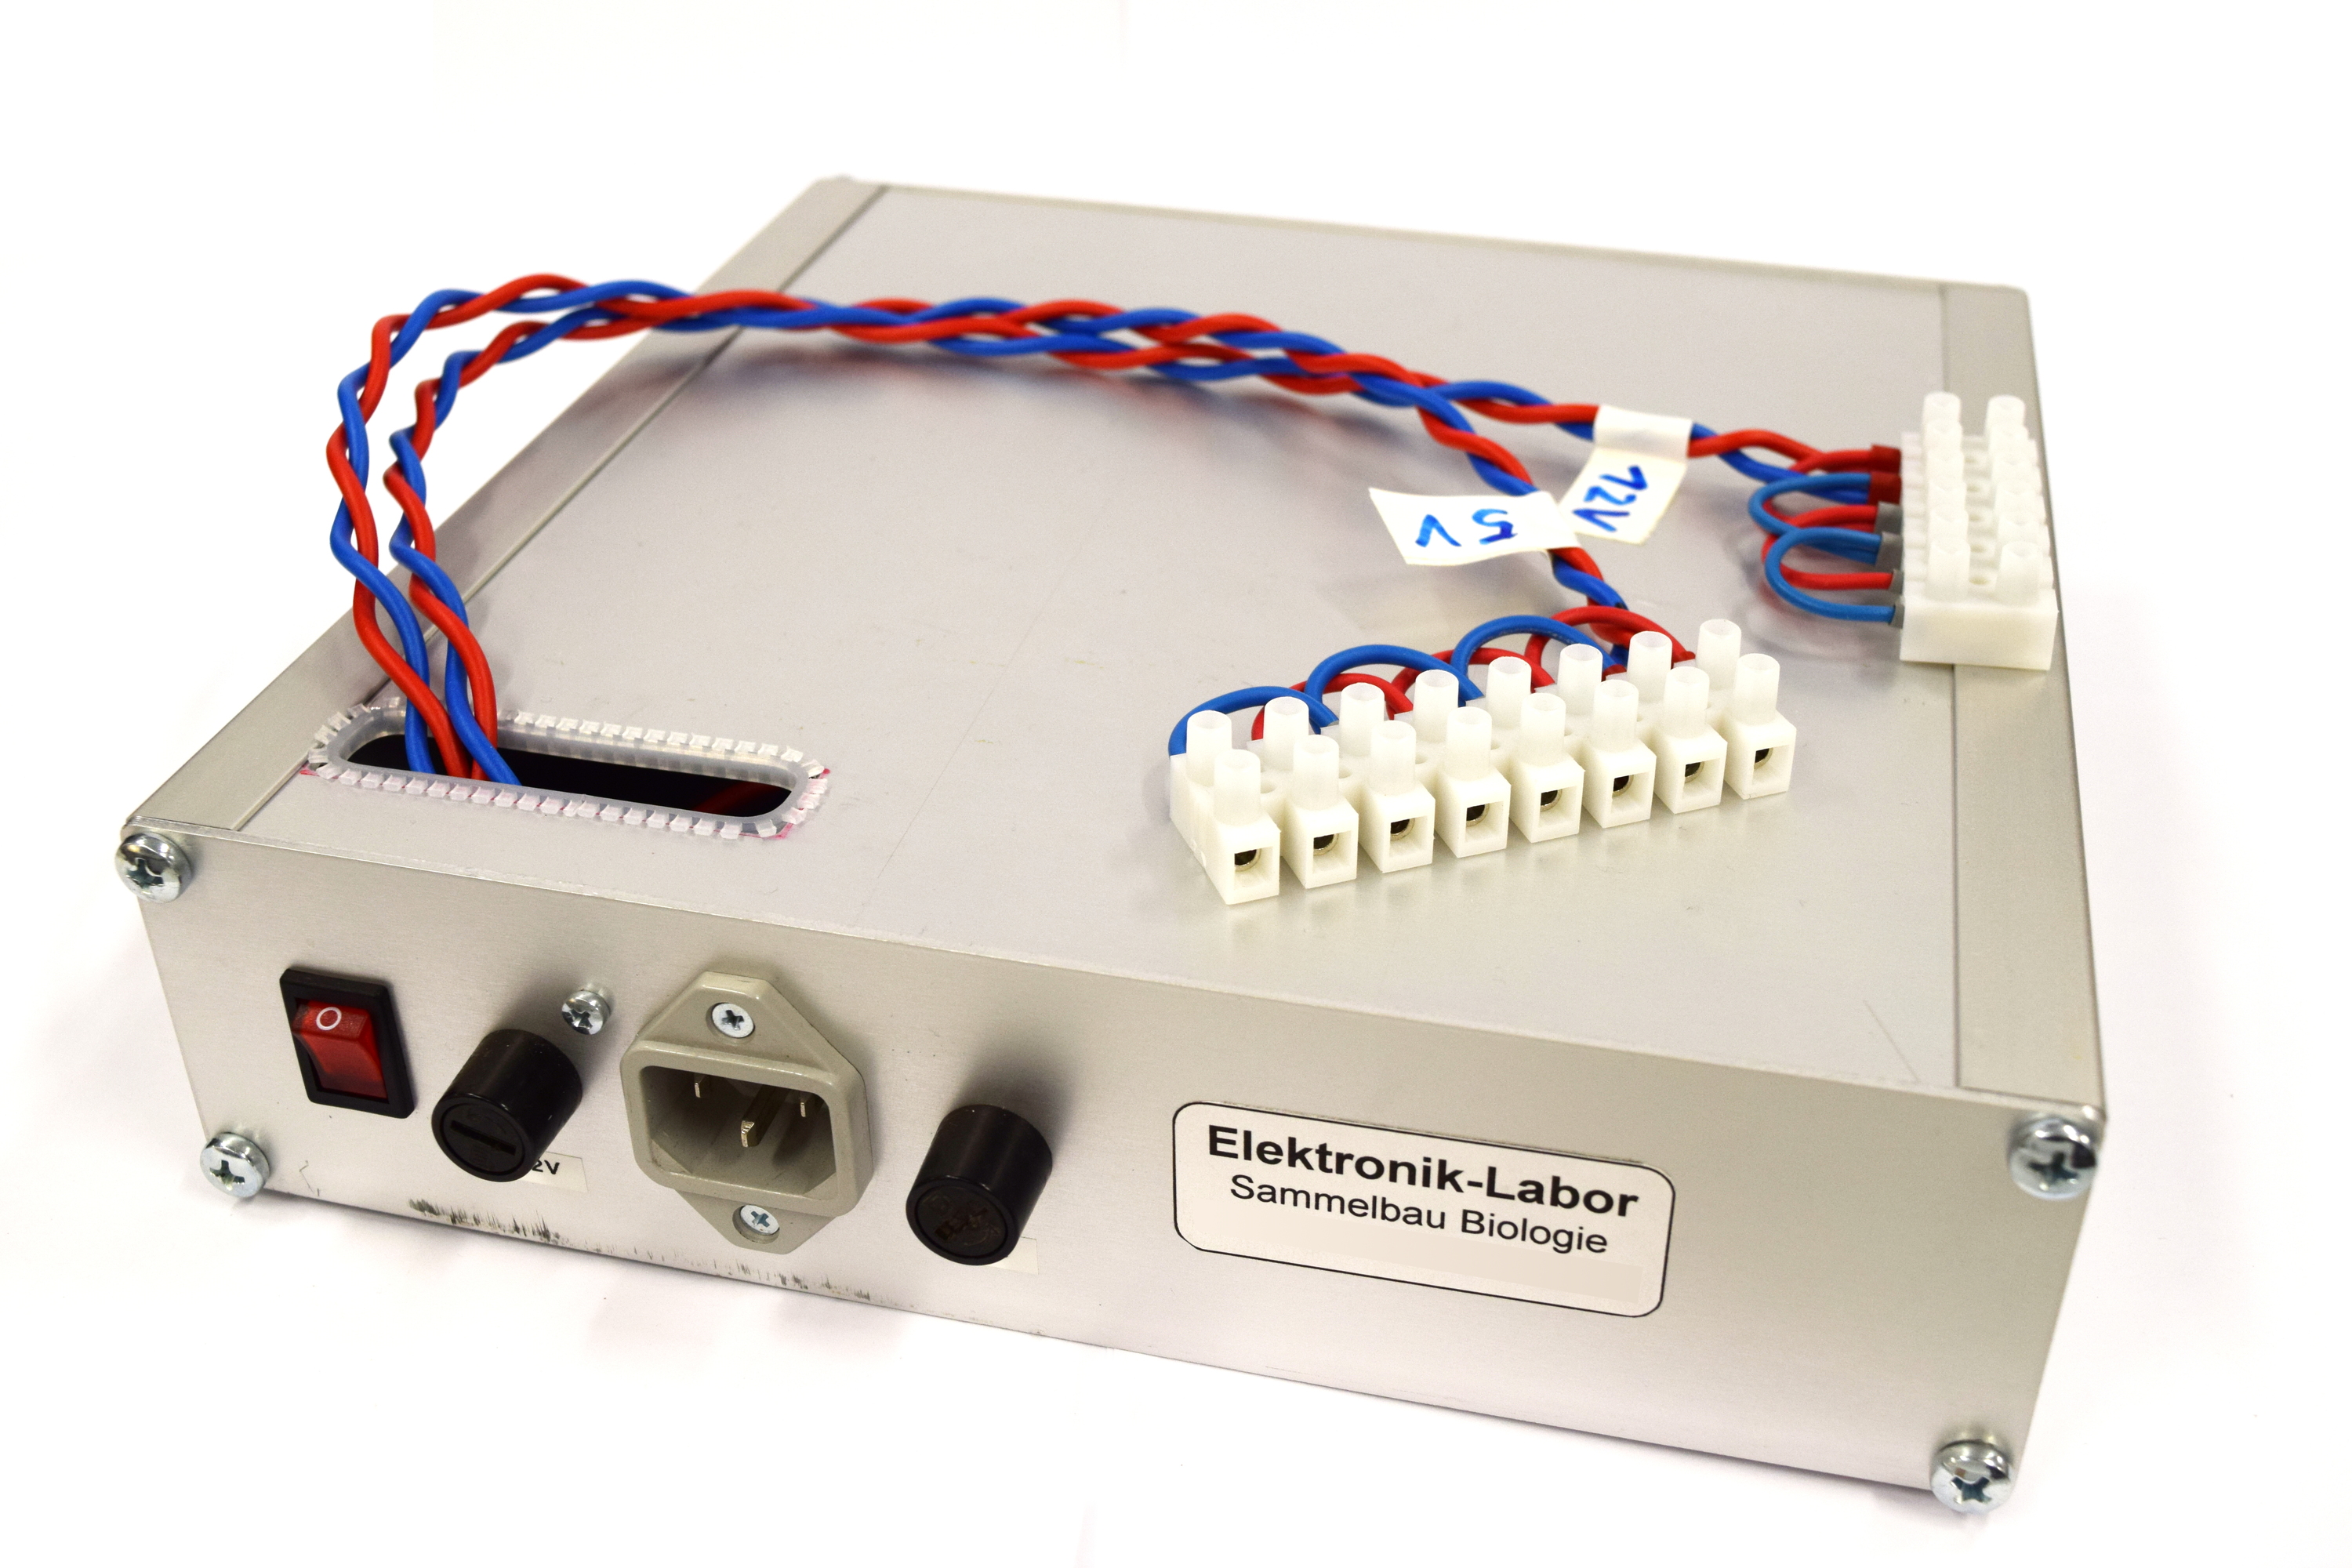
| - | | [[File:Aachen_Device_6.jpg|350px]] || Setup the power supply<sup>[https://2014.igem.org/Team:Aachen/Notebook/Engineering/WatsOn#fn1 1]</sup> and connect all devices to either 5 V or 12 V. | + | | [[File:Aachen_Device_6.jpg|350px]] || Setup the power supply<sup>[https://2014.igem.org/Team:Aachen/Notebook/Engineering/WatsOn#fn1 1]</sup> and connect all devices to either 5 V or 12 V. For security reasons it has been placed into an aluminium casing. Plug the USB hub connector into the Raspberry. If you use the GUI locally on the device a mouse and a keyboard need to be attached to the USB hub to navigate on the user interface. Follow the steps described in the section [https://2014.igem.org/Team:Aachen/Notebook/Engineering/WatsOn#pisetup Raspberry Pi - Setup]. |
|-style="border-top: 2px #808080 solid;" | |-style="border-top: 2px #808080 solid;" | ||
| [[File:Aachen_Device_11.jpg|350px]] || Mount the device on top of the power supply casing. Add the display and apply some stickers to enjoy your custom-made ''WatsOn''. | | [[File:Aachen_Device_11.jpg|350px]] || Mount the device on top of the power supply casing. Add the display and apply some stickers to enjoy your custom-made ''WatsOn''. | ||
| Line 255: | Line 260: | ||
* Once finished, insert the SD card in the slot on the Raspberry Pi board, connect a monitor over HDMI, plug in a USB mouse and keyboard and start the Raspberry Pi by connecting it to the micro USB power supply. Follow the installation instructions; these should be straightforward. After the installation you will be shown the desktop of your new system. | * Once finished, insert the SD card in the slot on the Raspberry Pi board, connect a monitor over HDMI, plug in a USB mouse and keyboard and start the Raspberry Pi by connecting it to the micro USB power supply. Follow the installation instructions; these should be straightforward. After the installation you will be shown the desktop of your new system. | ||
* To be able to use the Raspberry Pi camera you need activate it over a terminal. Search for a desktop icon labeled "LxTerminal", double click it and a terminal will appear where you can enter commands which will be executed after you press Return. Enter "raspi-config", press Return and activate the camera with the displayed corresponding option. | * To be able to use the Raspberry Pi camera you need activate it over a terminal. Search for a desktop icon labeled "LxTerminal", double click it and a terminal will appear where you can enter commands which will be executed after you press Return. Enter "raspi-config", press Return and activate the camera with the displayed corresponding option. | ||
| + | * To check if the camera works, enter "raspistill -t 5000 -o camera_test.jpg" in the terminal. An overlay shows a 5 second preview from the camera on the screen, then an image is taken and saved as "camera_test.jpg" in the current directory. | ||
| + | * An issue concerning the Raspberry Pi camera is that it supports just a fixed-focus which is per default set to infinity. This can be solved by removing the glue dots fixing the lense und unscrewing it until the required distance is focused. | ||
* Download the source files for the backend server and the graphical user interface (GUI). To be able to compile the GUI, you need to install the Qt5-libraries. Follow [http://qt-project.org/wiki/Native_Build_of_Qt5_on_a_Raspberry_Pi this guide] on how to get the Qt source code, compile it and setup your environment correctly. Make sure that your Raspberry Pi is constantly running, since this process takes some time and must not be interrupted. | * Download the source files for the backend server and the graphical user interface (GUI). To be able to compile the GUI, you need to install the Qt5-libraries. Follow [http://qt-project.org/wiki/Native_Build_of_Qt5_on_a_Raspberry_Pi this guide] on how to get the Qt source code, compile it and setup your environment correctly. Make sure that your Raspberry Pi is constantly running, since this process takes some time and must not be interrupted. | ||
* With the Qt-libraries installed, open a terminal and change to the directory where you put the source for the GUI (command "cd [path to source]"). Call "qmake" followed by "make" and you will start compilation of the program. When finished, you can launch the GUI with the command "./igem_GUI". | * With the Qt-libraries installed, open a terminal and change to the directory where you put the source for the GUI (command "cd [path to source]"). Call "qmake" followed by "make" and you will start compilation of the program. When finished, you can launch the GUI with the command "./igem_GUI". | ||
| Line 272: | Line 279: | ||
** http://elinux.org/RPiconfig#Video | ** http://elinux.org/RPiconfig#Video | ||
** http://www.raspberrypi.org/forums/viewtopic.php?f=29&t=24679 | ** http://www.raspberrypi.org/forums/viewtopic.php?f=29&t=24679 | ||
| + | |||
| + | * Raspberry Pi Camera Module | ||
| + | ** http://elinux.org/Rpi_Camera_Module | ||
* Network configuration: | * Network configuration: | ||
** http://www.raspberrypi.org/documentation/configuration/wireless/README.md | ** http://www.raspberrypi.org/documentation/configuration/wireless/README.md | ||
| + | |||
| + | * General | ||
| + | ** [http://elinux.org/R-Pi_Troubleshooting Raspberry Pi Troubleshooting] | ||
| + | ** [http://raspberrywebserver.com/linux-basics/ Linux basics] | ||
| + | ** [http://www.raspberrypi.org/ Raspberry Pi Foundation] | ||
{{Team:Aachen/Footer}} | {{Team:Aachen/Footer}} | ||
Latest revision as of 03:55, 18 October 2014
|
|
|
|
 "
"


![350px] [File:Aachen_Device_.3jpg](/wiki/images/7/7b/Aachen_Device_2_3.jpg)
