Team:Aachen/OD/F device
From 2014.igem.org
(→Achievements) |
|||
| (203 intermediate revisions not shown) | |||
| Line 1: | Line 1: | ||
__NOTOC__ | __NOTOC__ | ||
| + | {{CSS/Main}} | ||
| + | {{Team:Aachen/Stylesheet}} | ||
{{Team:Aachen/Header}} | {{Team:Aachen/Header}} | ||
| - | = OD/F | + | = OD/F Device = |
| - | Measuring Optical Density (OD) is | + | Measuring '''Optical Density''' (OD) or absorbance is one of the indispensable elements in the field of microbiology. One question that has to be answered often is '''how many cells are in a suspension'''? Here, the OD can give a hint. However, the commercially available [http://www.laboratory-equipment.com/laboratory-equipment/cell-density-meter.php OD meters] are expensive and limit its application and usage in low budget institutions. |
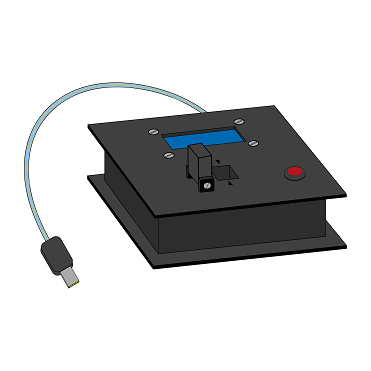
| - | + | Therefore, here we present our OD/F Device. The device is specifically designed for biohackspaces, Do It Yourself (DIY), community laboratories and schools. With our OD/F Device, we aim to enable precise and inexpensive scientific research. | |
| - | + | ||
| - | With | + | Further, in Synthetic Biology, the task of measuring OD and fluorescence are often performed at the same time. Hence, here we present a device that can be configured to '''simultaneously measure both fluorescence and OD'''. With such a configuration of the OD/F Device, the production of fluorescence signal can be correlated to cell growth using a single and a portable device. |
| + | |||
| + | <html> | ||
| + | <center> | ||
| + | <ul class="menusmall-grid"> | ||
| + | <!-- Overview --> | ||
| + | |||
| + | <li> | ||
| + | <a class="menulink" href="https://2014.igem.org/Team:Aachen/OD/F_device#odfmeasuringprinciple" style="color:black"> | ||
| + | <div class="menusmall-item menusmall-info" ><div class="menukachel" style="top:25%; line-height:1.5em;">Measuring Principle</div></div> | ||
| + | <div class="menusmall-item menusmall-img" style="background: url(https://static.igem.org/mediawiki/2014/0/0f/Aachen_14-10-10_ODF_Button_ipo.png); norepeat scroll 0% 0% transparent; background-size:100%"> | ||
| + | </div> | ||
| + | </a> | ||
| + | </li> | ||
| + | |||
| + | <li> | ||
| + | <a class="menulink" href="https://2014.igem.org/Team:Aachen/OD/F_device#odfapplication" style="color:black"> | ||
| + | <div class="menusmall-item menusmall-info" ><div class="menukachel" style="top:35%; line-height:1.5em;">Application</div></div> | ||
| + | <div class="menusmall-item menusmall-img" style="background: url(https://static.igem.org/mediawiki/2014/5/55/Aachen_17-10-14_Glowing_cuvette-ipo.png); norepeat scroll 0% 0% transparent; background-size:100%"> | ||
| + | </div> | ||
| + | </a> | ||
| + | </li> | ||
| + | |||
| + | <li> | ||
| + | <a class="menulink" href="https://2014.igem.org/Team:Aachen/OD/F_device#odfachievements" style="color:black"> | ||
| + | <div class="menusmall-item menusmall-info" ><div class="menukachel" style="top:25%; line-height:1.5em;">Achieve-<br/>ments</div></div> | ||
| + | <div class="menusmall-item menusmall-img" style="background: url(https://static.igem.org/mediawiki/2014/e/ef/Aachen_14-10-15_Medal_Cellocks_iNB.png); norepeat scroll 0% 0% transparent; background-size:100%"> | ||
| + | </div> | ||
| + | </a> | ||
| + | </li> | ||
| + | |||
| + | <li> | ||
| + | <a class="menulink" href="https://2014.igem.org/Team:Aachen/OD/F_device#odfoutlook" style="color:black"> | ||
| + | <div class="menusmall-item menusmall-info" ><div class="menukachel" style="top:35%; line-height:1.5em;">Outlook</div></div> | ||
| + | <div class="menusmall-item menusmall-img" style="background: url(https://static.igem.org/mediawiki/2014/6/67/Aachen_14-10-16_Outlook_Cellocks_iNB.png); norepeat scroll 0% 0% transparent; background-size:100%"> | ||
| + | </div> | ||
| + | </a> | ||
| + | </li> | ||
| + | |||
| + | </ul> | ||
| + | </center> | ||
| + | </html> | ||
| - | |||
| - | |||
{{Team:Aachen/BlockSeparator}} | {{Team:Aachen/BlockSeparator}} | ||
| - | = OD | + | [[File:Aachen_14-10-10_ODF_Button_ipo.png|right|150px]] |
| + | |||
| + | == Measuring Principle == | ||
| + | <span class="anchor" id="odfmeasuringprinciple"></span> | ||
| + | |||
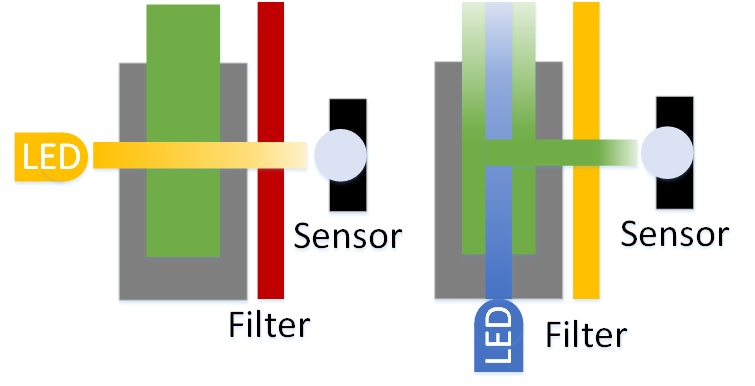
| + | The measuring principle for both optical density (OD) and fluorescence measurement is shown below. For OD measurement, the sample is illuminated with an LED and a fixed slit width. A filter blocks any light less than 600 nm. In this way, the sensor mainly senses the 600 nm light which is needed for OD{{sub|600}} measurement. | ||
| + | |||
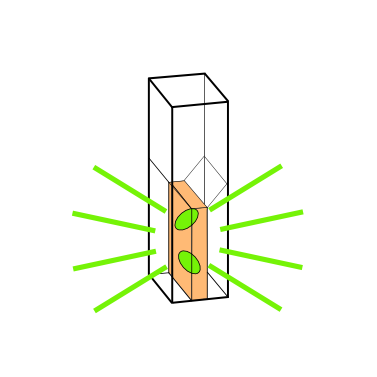
| + | For the fluorescence measurement, a similar approach is followed. The filter, again, is used to block the exciting light from being sensed. In this way, only the emitted light from the fluorescence protein is detected and measured. | ||
| + | |||
| + | Further details about selecting filters, code, a construction manual and evaluation can be found [https://2014.igem.org/Team:Aachen/Notebook/Engineering/ODF here]. | ||
| + | |||
| + | <center> | ||
| + | {{Team:Aachen/Figure|Aachen_odf_schemes.png|title=Measuring principle for OD/F Device|subtitle=The left image shows the measurement approach for the optical density. The light shines through the sample with a fixed width. The right image shows the fluorescence measurement approach, exciting the fluorescence proteins from below and measuring from the side.|width=500px}} | ||
| + | </center> | ||
| + | |||
| + | <center> | ||
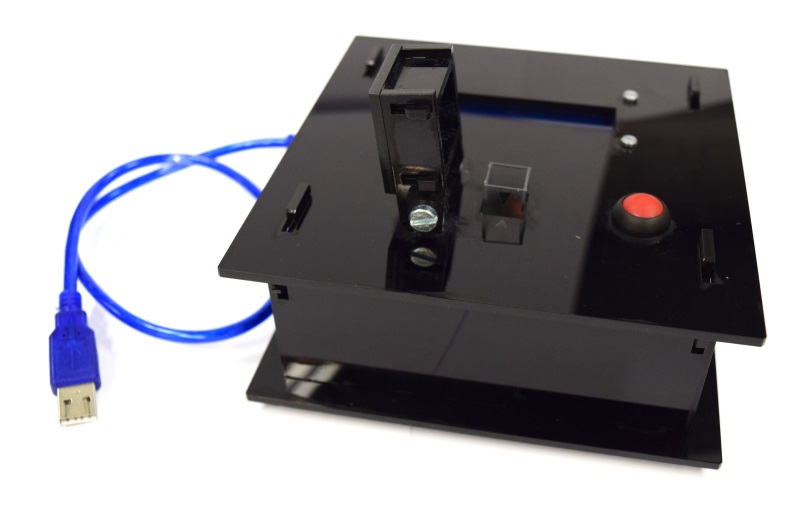
| + | {{Team:Aachen/Figure|Aachen_ODF_7.JPG|title=The combined OD/F Device for optical density and fluorescence measurement.|subtitle= |width=650px}} | ||
| + | </center> | ||
| + | |||
{{Team:Aachen/BlockSeparator}} | {{Team:Aachen/BlockSeparator}} | ||
| - | = F device = | + | [[File:Aachen 17-10-14 Glowing cuvette-ipo.png|right|150px]] |
| + | |||
| + | == ''Modus operandi'' of the OD/F Device== | ||
| + | <span class="anchor" id="odfapplication"></span> | ||
| + | |||
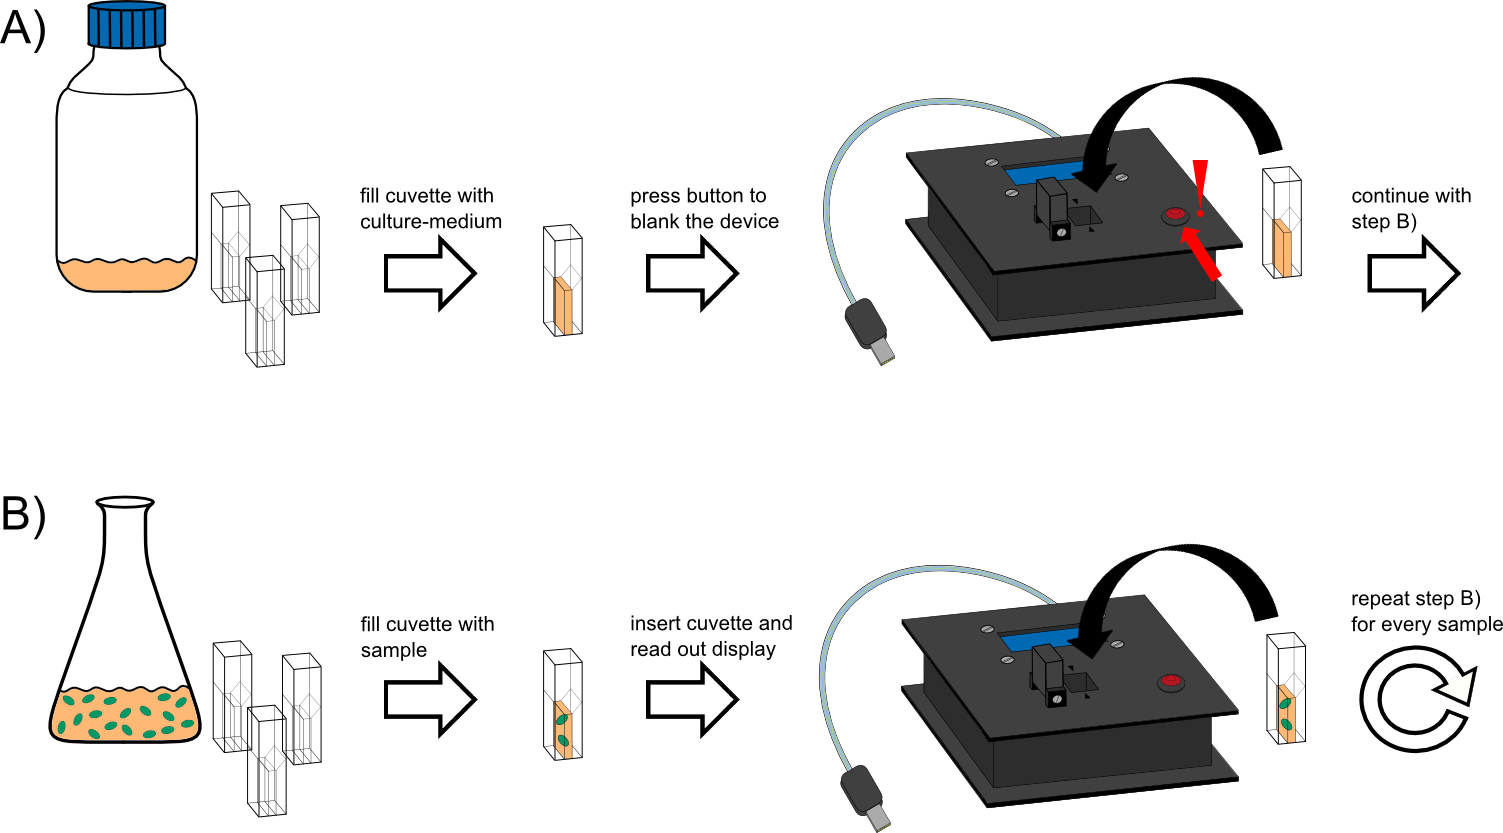
| + | The device is constructed to make it easy-to-handle for the end users. The standard operating procedure to operate and measure optical density or fluorescence is schematically shown in the figure below. | ||
| + | |||
| + | {{Team:Aachen/Figure|Aachen 14-10-09 Flowsheet OD-device ipo.png|title=|subtitle=|width=1000px}} | ||
| + | |||
{{Team:Aachen/BlockSeparator}} | {{Team:Aachen/BlockSeparator}} | ||
| - | = | + | [[File:Aachen_14-10-15_Medal_Cellocks_iNB.png|right|150px]] |
| - | + | ||
| - | + | == Achievements == | |
| - | + | <span class="anchor" id="odfachievements"></span> | |
| - | + | ||
| - | + | When building the OD/F Device, '''our goal''' was to develop a system that | |
| - | + | ||
| - | + | * easy-to-handle and portable | |
| - | + | * precise, stable, and reproducible results | |
| - | + | * easy to build from Open Source parts | |
| - | + | * combined measurement of optical density and fluorescence | |
| - | + | * low cost | |
| - | + | ||
| - | + | Commercially available equipment uses lasers and a set of two fine filters, one between laser and sample and one between sample and sensor. To reduce the cost, our OD/F Device uses a simpler measuring principle: it is designed with one low-cost filter, between sample and sensor, and illuminates with an LED instead of a laser. Nevertheless, one main goal was to produce an inexpensive device. Given that, we therefore had to compromise some of the measurement quality, were we still able to produce stable, precise and good data? | |
| - | + | ||
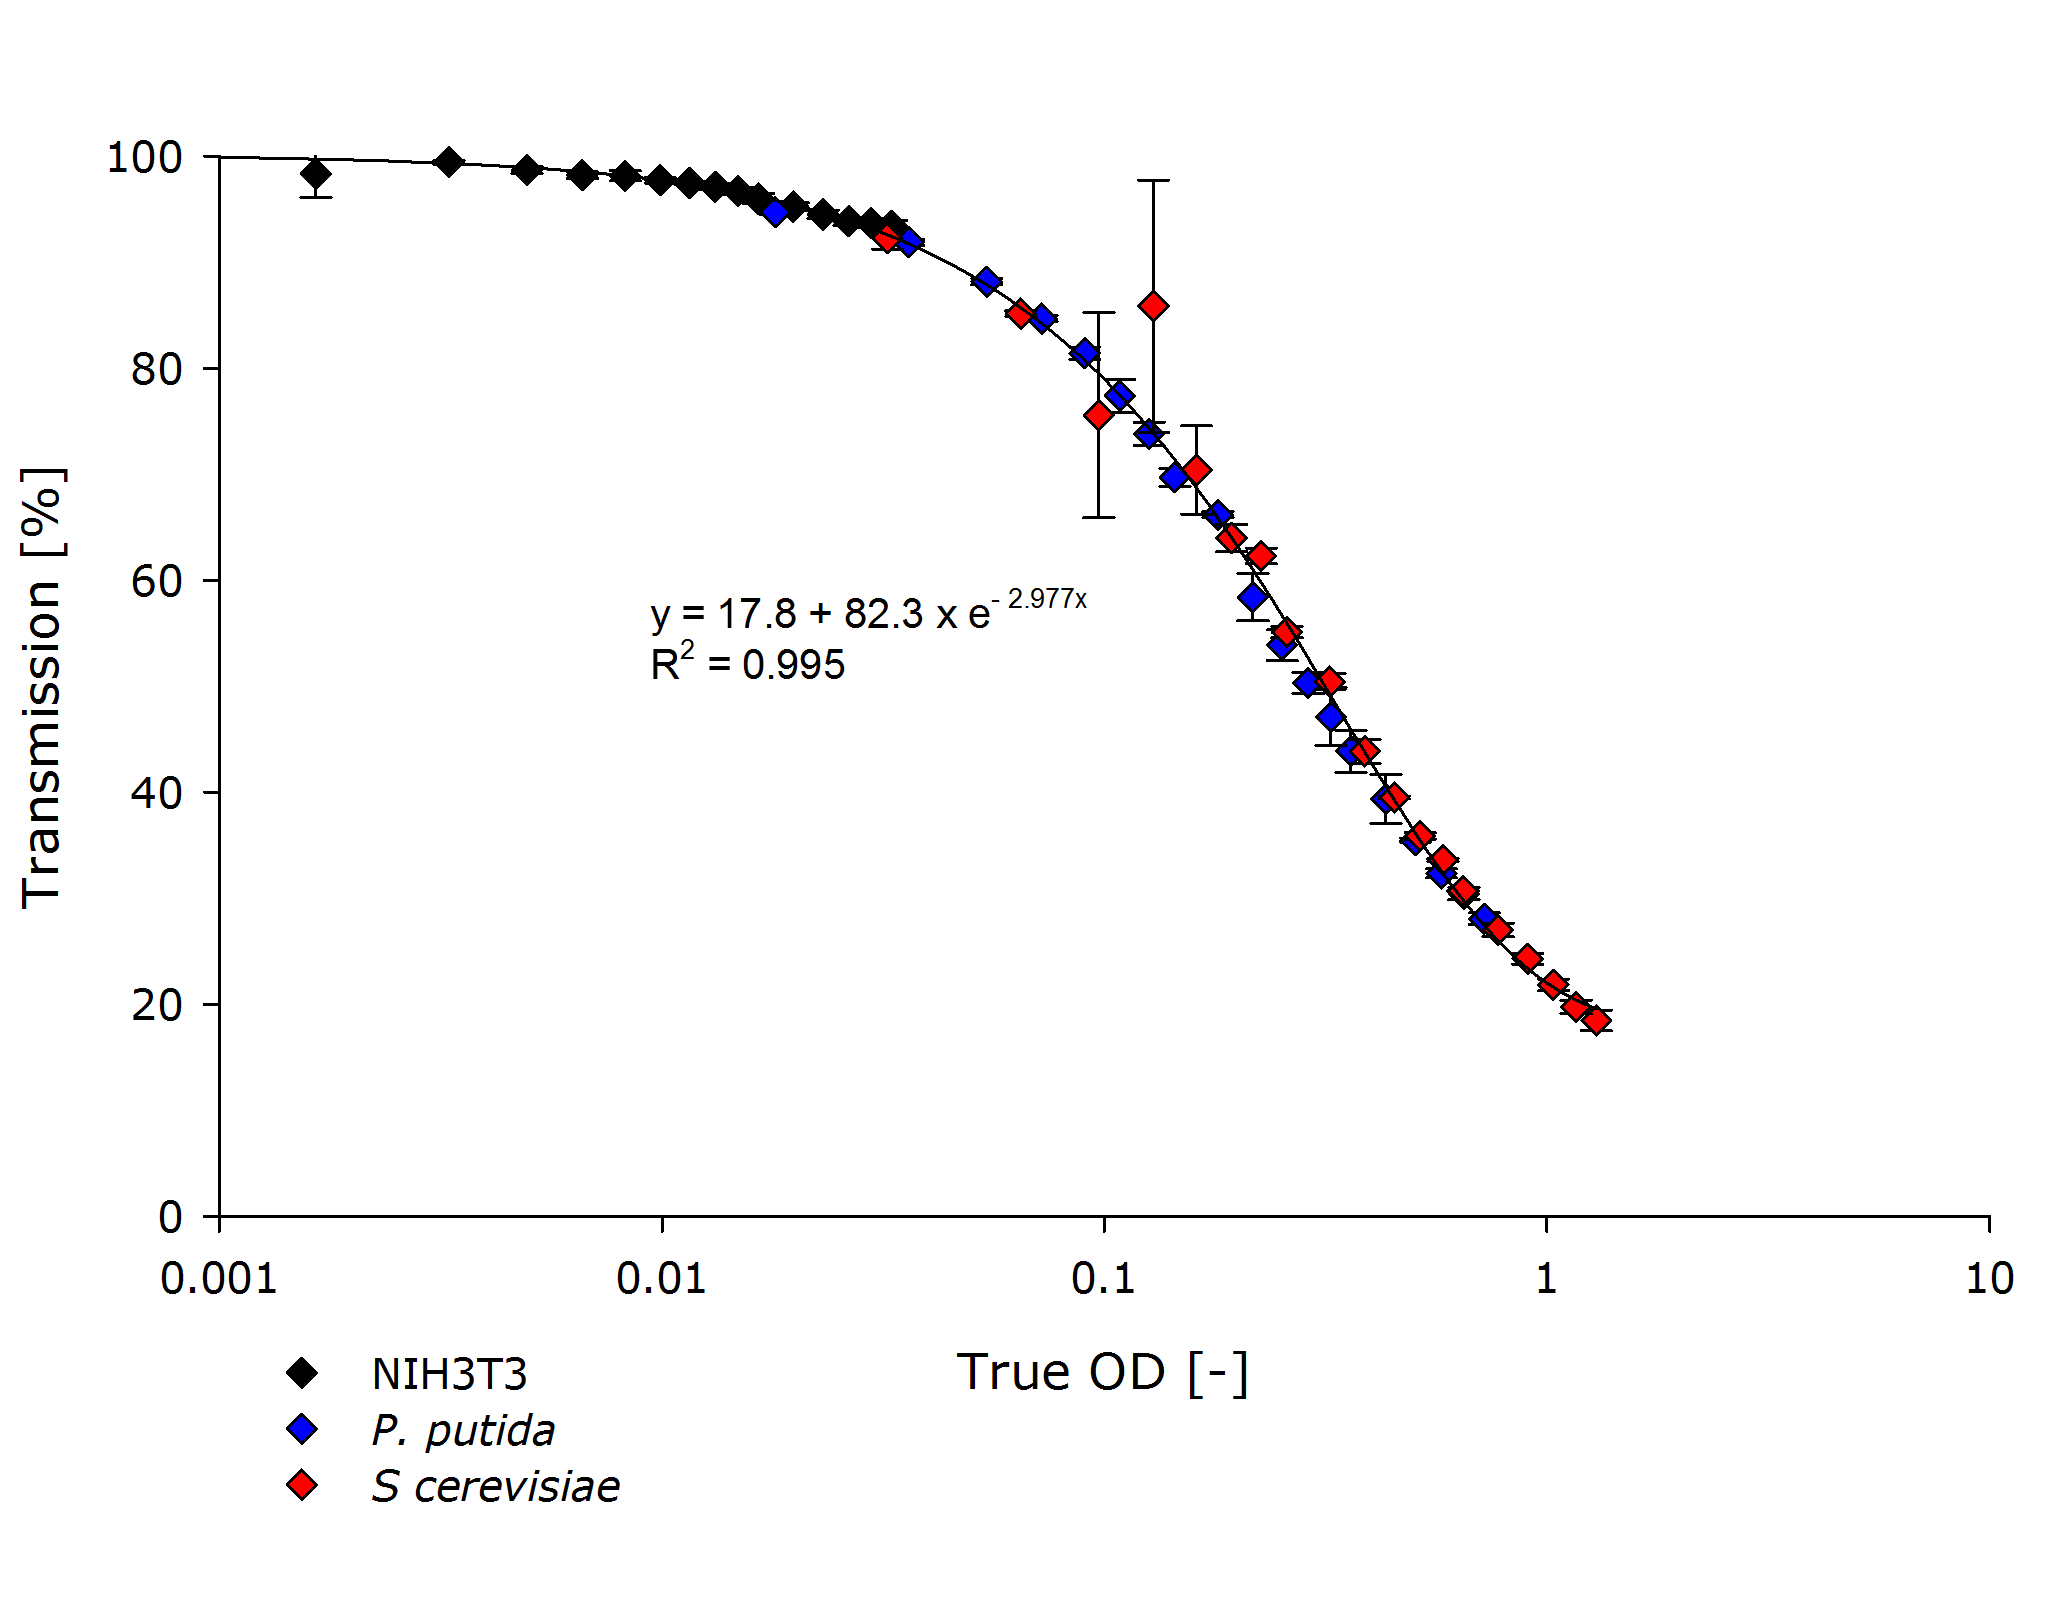
| - | + | {{Team:Aachen/Figure|Aachen_ODallstrains1.png|title=Transmission of different cell types at OD-values from 0.001-1|subtitle=The transmittance data of NIH 3T3 (mouse fibroblasts) cells align with the transmittance of ''P. putida'' and ''S. cerevisiae'' strains, even though the measured optical densities are lower by 1-2 orders of magnitude.|width=800px}} | |
| - | + | ||
| - | | | + | The answer is: Yes! With the optimal design of our cuvette holder we achieved good-quality results albeit using the cheap filter. The transmission to true OD conversion is stable for all cell types as expected. |
| - | + | ||
| - | + | Have we been re-inventing the wheel? No! | |
| - | + | In fact, you can find some DIY posts for turbidity meters such as [http://www.thingiverse.com/thing:74415 turbidity sensors]. However, a proper assessment of their linearity as well as a calculated OD-value are missing. | |
| - | + | ||
| - | + | Regarding fluorescence, we are also not re-inventing the wheel. The [https://2010.igem.org/Team:Cambridge 2010 iGEM Cambridge] team actually built a very similar device, the [https://2010.igem.org/Team:Cambridge/Tools/Eglometer E.glometer]. However, there's no data available showing an actual comparison of the data from their device and some proven commercial system to, for example, assess linearity of the measurement. | |
| - | + | ||
| - | + | We made a commercial assessment of the OD/F Device that results in a total cost of $60. The unit is built from acrylic glass for the casing. The compact design results in a weight which is less than 200g. The device can be easily connected to any power adapter via USB. The technical details and a construction manual of OD/F Device is [https://2014.igem.org/Team:Aachen/Notebook/Engineering/ODF#diy published] on our engineering page. | |
| - | + | ||
| - | + | ||
| - | + | ||
| - | + | ||
| - | + | ||
| - | + | ||
{{Team:Aachen/BlockSeparator}} | {{Team:Aachen/BlockSeparator}} | ||
| - | = | + | [[File:Aachen_14-10-16_Outlook_Cellocks_iNB.png|right|150px]] |
| + | |||
| + | == Outlook == | ||
| + | <span class="anchor" id="odfoutlook"></span> | ||
| + | |||
| + | We have proven that our device is capable of delivering good results, even in hard conditions as low cell concentrations. | ||
| + | Yet there is room for improvement. | ||
| + | The calibration process is quite intensive work. An application to do this automatically would help for this process. | ||
| + | For the ease of use and to prevent data loss from noting down measured values manually, a smartphone application that can directly correlate OD and fluorescence values would be a great addition. This addition will be implemented in the next version. | ||
| - | |||
| - | |||
| - | |||
| - | |||
| - | |||
| - | |||
| - | |||
| - | |||
| - | |||
| - | |||
| - | |||
| - | |||
| - | |||
| - | |||
| - | |||
| - | |||
| - | |||
| - | |||
| - | |||
| - | |||
| - | |||
| - | |||
| - | |||
| - | |||
| - | |||
| - | |||
{{Team:Aachen/Footer}} | {{Team:Aachen/Footer}} | ||
Latest revision as of 03:48, 18 October 2014
|
|
|
|
|
 "
"
