Team:Aachen/Project/Measurement Device

From 2014.igem.org

(Difference between revisions)
Line 77: Line 77:
{{Team:Aachen/Figure|Aachen_Device_Elektronikkomponenten1.jpg|title=Hardware components||width=520px}}
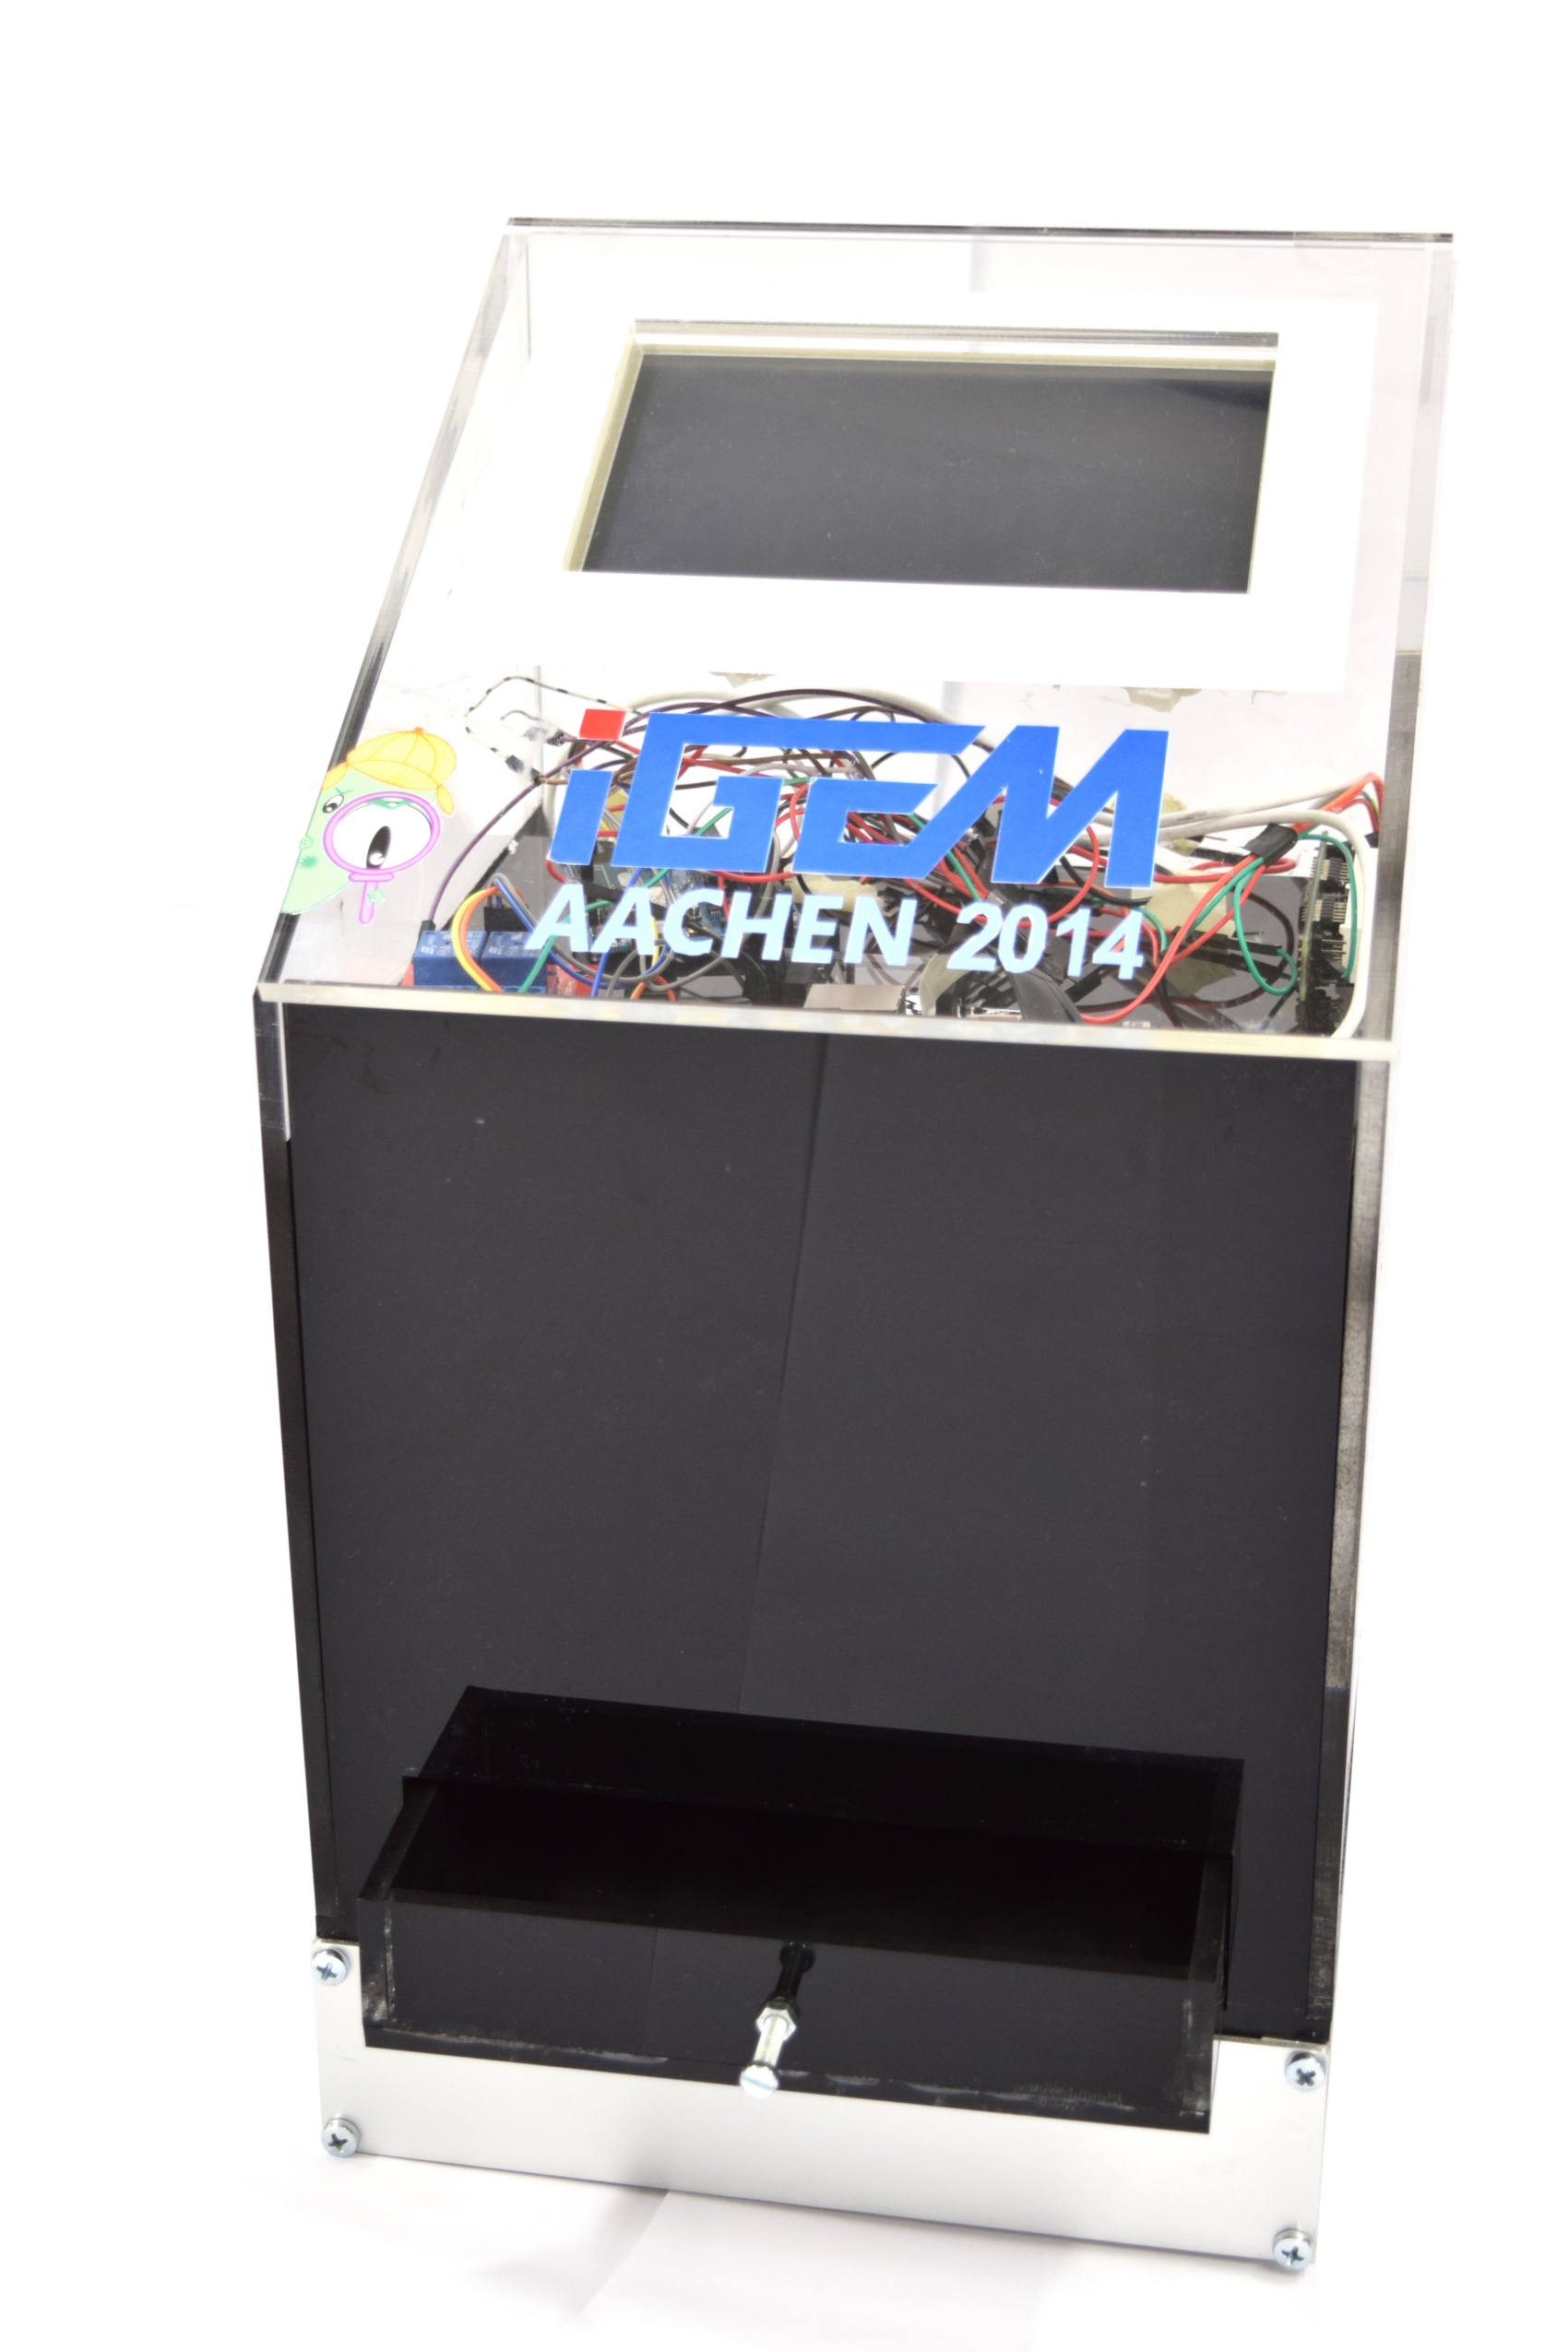
Our hardware consists of the casing and the electronical components. The casing which can be seen in the first section was build from laser cutted acrylic glass. <html><br/></html>
-
The electronic circuit is a combination of the components displayed in the image above. We combined the Raspberry Pi - a small single-board computer running a Linux operating system - and an Arduino board which is a programmable microcontroller to operate the LEDs and a Peltier heater. For taking an image we connected the Raspberry Pi camera to the board.<html><br/></html>
+
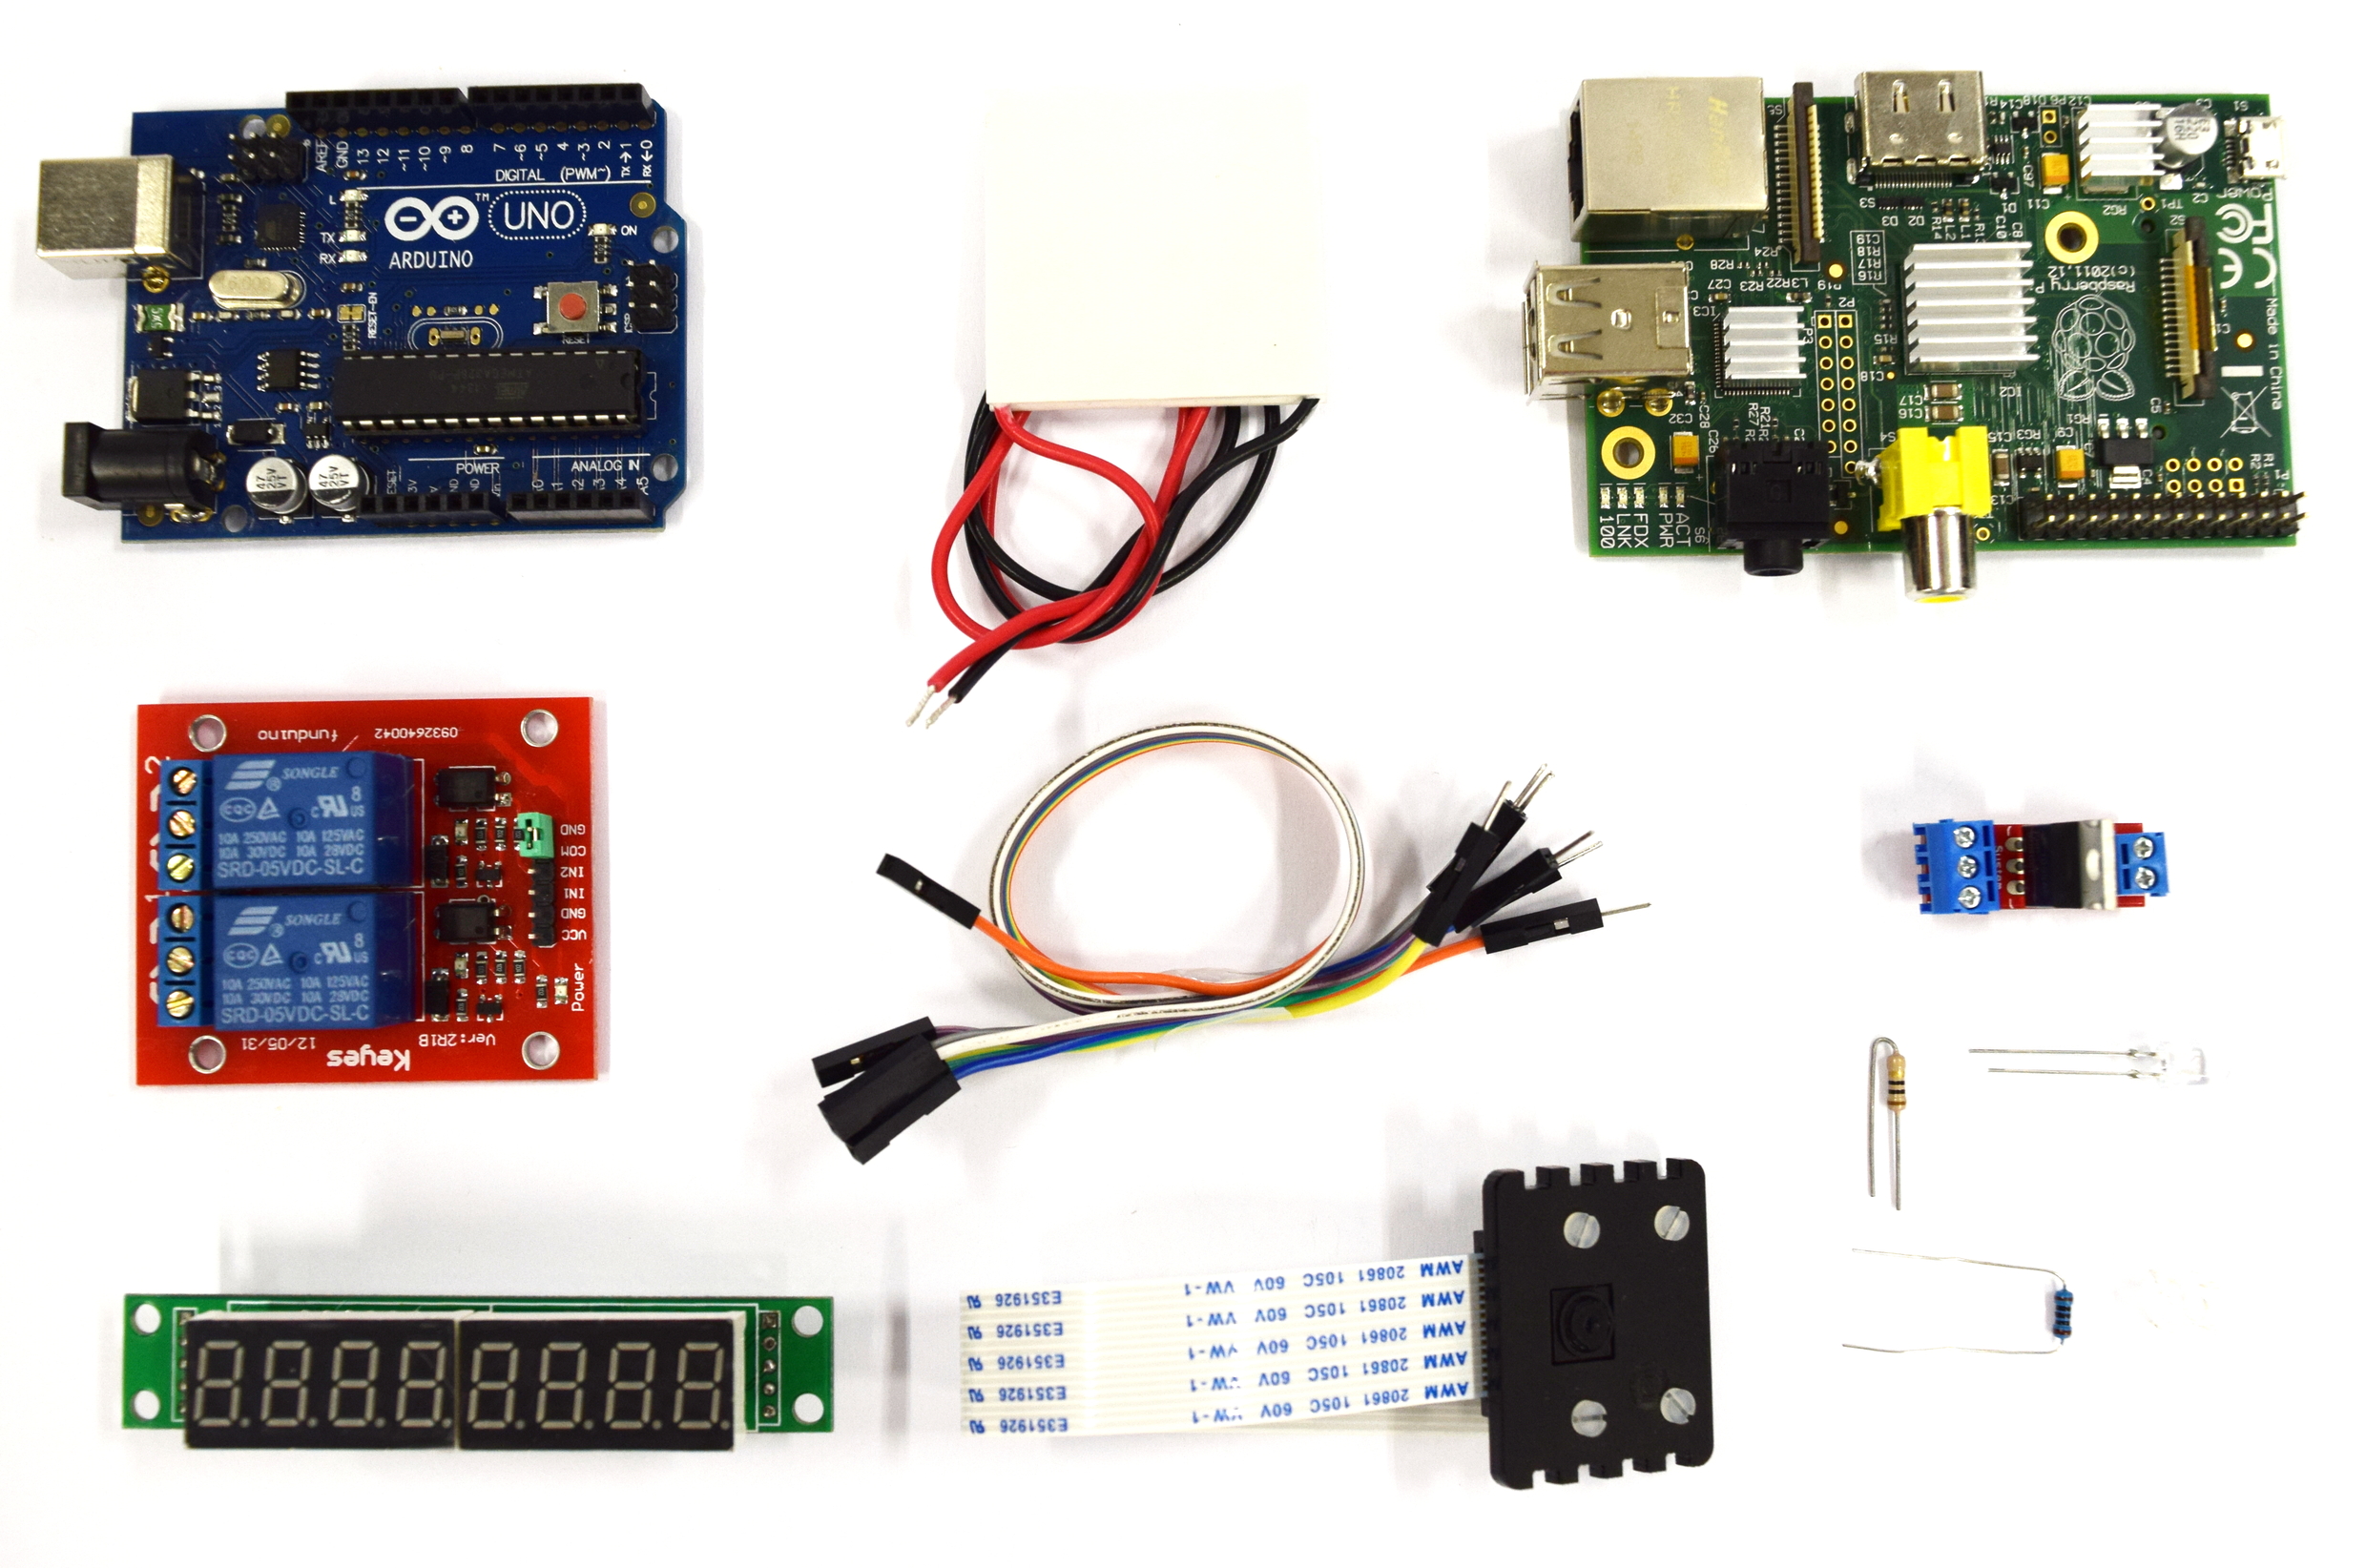
The electronic circuit is a combination of the components displayed in the image above. We combined the Raspberry Pi - a small single-board computer running a Linux operating system - and an Arduino board which is a programmable microcontroller. The Arduino operates the LEDs for excitation and a Peltier heater for incubation. For taking images of the sensor chips we used the Raspberry Pi camera module which is directly connected to the board.<html><br/></html>
A detailed description of all components and the wiring can be found here [https://2014.igem.org/Team:Aachen/Notebook/Engineering/WatsOn#watsonhardware].

Revision as of 00:26, 17 October 2014

WatsOn

Aachen Device 11.jpg
WatsOn

Part of the biosensor system Cellock Holmes are our agar chips. They contain our engineered sensing cells that fluoresce in the presence of the pathogen Pseudomonas aeruginosa. However, bacteria are small and the fluorescent signal cannot be seen with the naked eye. Thus the central question "What's on the chip?" remains.

To answer this question we present our measurement device WatsOn.

WatsOn is designed such that it can be easily copied. Our work heavily emphasizes the Open Source concept. Therefore, the construction manual and all technical detailes are published on our wiki. Analogous to our OD/F device, we used low-cost and easily available parts.

Application

How two use watsOn flowsheet V7 ipo.png
How to use WatsOn
This scheme illustrates handling WatsOn when testing the 2D biosensor for a fluorescent signal.


Hardware

Aachen Device Elektronikkomponenten1.jpg
Hardware components

Our hardware consists of the casing and the electronical components. The casing which can be seen in the first section was build from laser cutted acrylic glass.
The electronic circuit is a combination of the components displayed in the image above. We combined the Raspberry Pi - a small single-board computer running a Linux operating system - and an Arduino board which is a programmable microcontroller. The Arduino operates the LEDs for excitation and a Peltier heater for incubation. For taking images of the sensor chips we used the Raspberry Pi camera module which is directly connected to the board.
A detailed description of all components and the wiring can be found here [1].


Software

Aachen WatsOn igem GUI originalImage.png

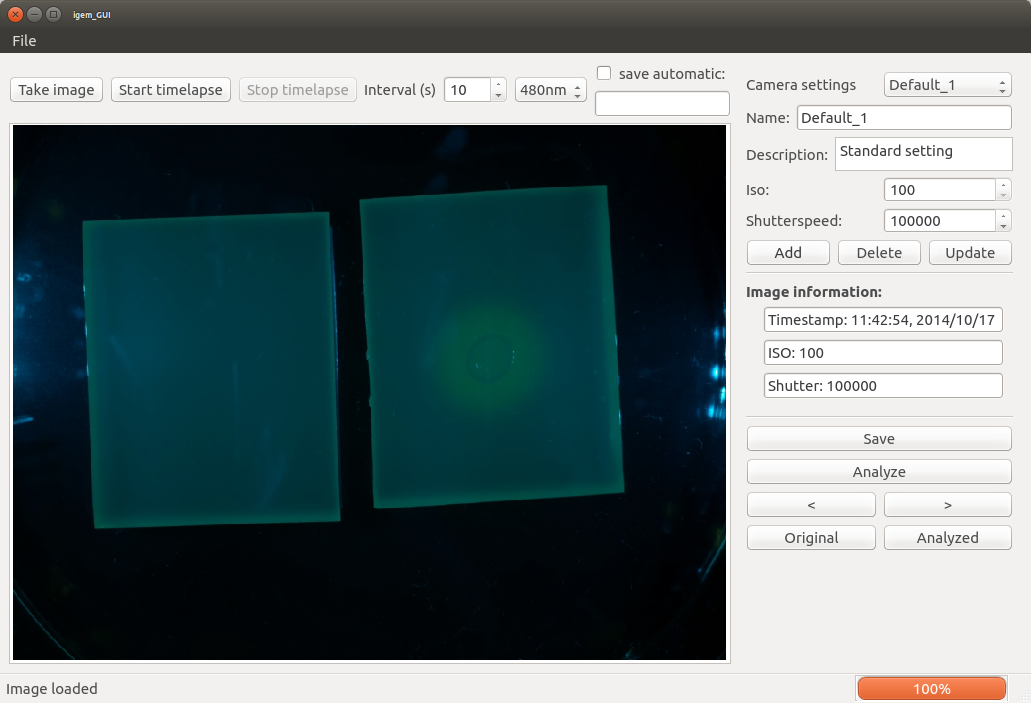
The software is responsible for presenting a user interface on the display of the device and to take images with the LED wavelength selected by the user. Therefore it is separated into three single components: the graphical user interface (GUI) with a backend script running on the Raspberry Pi and the code on the Arduino board.
The GUI(left image) provides the user with the option to take a single image or a time lapse shooting and specify parameters for the camera and the wavelength of the LEDs. The wavelength used in our device are 480nm for GFP and 450nm for iLOV. Furthermore the images are analysed for the presence or absence of P. aeruginosa by analysing the image and providing the user with a visual feedback (right image). All taken images can be saved to disk manually for single images and automatically for time lapse shootings.
Further details on the software including the backend which gives the possibility of using the GUI remotely on a different device (e.g. notebook) in the same local network can be found here [2].

Aachen 14-10-15 Medal Cellocks iNB.png

Achievements

When developing our WatsOn our goal was to build a system that

  • incubates the sensing cells and the sampling chip
  • prevents escape of potentially sampled pathogens and our genetically engineered cells
  • illuminates the chip with the right excitation wavelength for GFP or iLOV
  • takes photos and time lapse shootings of the chips
  • uses cheap filter slides to block the light emitted from the LEDs
  • analyzes the fluorescence signal
  • gives feedback to the user about the presence or absence of P. aeruginosa through a GUI (graphical user interface)
  • is portable and fast in analyzing the images