 "
"
Team:RHIT/Notebook/Protocols
From 2014.igem.org


Protocols
MEDIA RECIPES
-
To 600 ml of DI H2O, add the following: 6 g tryptone, 3 g yeast extract, 6 g NaCl
Shake until the solutes are dissolved, and adjust the pH to 7.0 with 5 N NaOH. Sterilize by autoclaving on the liquid cycle at 121°C for 35 minutes. -
M9 Salt Solution
Dissolve the following into DI H2O to a final volume of 1L:- 64g Na2HPO4*7 H2O
- 15 g KH2PO4
- 25. g NaCl
- 5.0 g NH4Cl
Autoclave on liquid cycle to sterilize.
M9 minimal media, M9 minimal + his, M9 minimal + lac, and M9 minimal + lac + his
To 300 ml DI H2 add the following:- 61.2 ml M9 salt solution
- .61 ml 1M MgSO4
- 6.12 ml 20% glucose
- 0.031 ml 1M CaCl2
- 0.031 g 1% thiamine (vitamin B)
- 0.06 g uracil
- 10 g agar
- .132 g of lac or his (for +his, +lac, and +lac+his only!)
Autoclave at 121°C for 35 minutes.
Prepare MgSO4, CaCl2, and glucose solutions separately and sterilize by autoclaving on the liquid cycle (glucose may be sterilized by passing it through a 0.22 micrometer filter), then add them to the diluted M9 mixture. -
To 600 ml of DI H2O, add the following:
- 12 g tryptone
- 3 g yeast extract
- 0.3 g NaCl
Shake until the solutes have dissolved, and then add 10 ml of 250 mM solution of KCl. Adjust the pH of the medium to 7.0 with 5 N NaOH. Sterilize by autoclaving on the liquid cycle at 121°C for 35 minutes. After autoclaving, allow the medium to cool to 60°C or less, and add 20 ml of sterile 1M glucose. Just before use, add 5 ml of an autoclaved solution of 2M MgCl2.
GENERAL PROTOCOLS
-
E. coli Construct:
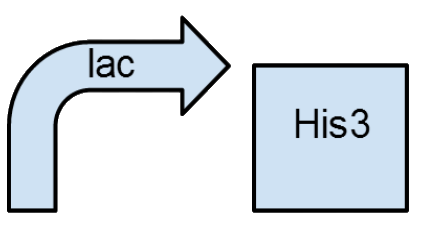
Device will be tested with the following selection strategy:
Live culture of transformed E. coli strain (Transformed JW2004) will be streaked onto three types of media for qualitative analysis.
Three types of M9 minimal media will be used for the test. Standard M9 minimal media protocol will be followed for the base of the media.
3 Types:
- lac-/his- (M9 Minimal Media)
- lac+/his- (M9 Minimal Media + lactose)
- lac-/his+ (M9 Minimal Media + histidine)
- lac+/his+ (M9 Minimal Media + lactose + histidine)
This selection scheme will determine if the device is functioning as expected in the strain.
The construct must be inserted into the standard iGEM vector.
-
Glassware & Equipment
- Falcon tubes
- 500µl Eppendorf tubes, on ice
- 200ml conical flask
- 200µl pipetman or repeating pipettor
- 5ml pipette
Preparation
- Grow a 5ml overnight culture of cells in LB media. In the morning, dilute this culture back into 25-50ml of fresh LB media in a 200ml conical flask. You should aim to dilute the overnight culture by at least 1/100.
- Grow the diluted culture to an OD600 of 0.2-0.5. (You will get a very small pellet if you grow 25ml to OD600 0.2)
- Put eppendorf tubes on ice now so that they are cold when cells are aliquoted into them later. If your culture is X ml, you will need X tubes. At this point you should also make sure that your TSS is being chilled (it should be stored at 4°C but if you have just made it fresh then put it in an ice bath).
- Split the culture into two 50ml falcon tubes and incubate on ice for 10 minutes.
All subsequent steps should be carried out at 4°C and the cells should be kept on ice whenever possible
- Centrifuge for 10 minutes at 3000 rpm and 4°C.
- Remove supernatant. The cell pellets should be sufficiently solid that you can just pour off the supernatant if you are careful. Pipette out any remaining media.
- Resuspend in chilled TSS buffer. The volume of TSS to use is 10% of the culture volume that you spun down. You may need to vortex gently to fully resuspend the culture, keep an eye out for small cell aggregates even after the pellet is completely off the wall.
- Add 100µl aliquots to your chilled eppendorfs and store at -80°C.
- The original paper suggests freezing the cells immediately using a dry ice bath. I have used liquid nitrogen quite successfully instead of dry ice. Simply placing the cells at -80°C also seems to work well.
- If you run a control every time you clone (i.e. a vector-only ligation), you can as well freeze cells in 200µl aliquots. Unused cells can be frozen back once and reused, albeit with some loss of competence.
- It is a good idea to run a positive control on the cells.
- The Endy Lab is trying to use a standard positive control to better compare (and hopefully improve) the transformation efficiencies in the lab.
TSS Protocol
To make 50 ml:
- 5g PEG 8000
- 1.5 ml 1M MgCl2 (or 0.30g MgCl2*6H2)
- 2.5 ml DMSO
- Add LB to 50ml
Filter sterilize (0.22µm filter)
-
QIAprep Spin Miniprep Kit Protocol using a microcentrifuge
This protocol is designed for purification of up to 20 µg of high-copy plasmid DNA from 1-5 ml overnight cultures of E. coli in LB (Luria-Bertani) medium.
Note: All protocol steps should be carried out at room temperature
Procedure
- Resuspend pelleted bacterial cells in 250 µl Buffer P1 and transfer to a microcentrifuge tube.
Ensure that RNase A has been added to Buffer P1. No cell clumps should be visible after resuspension of the pellet.
- Add 250 µL Buffer P2 and gently invert the tube 4-6 times to mix.
Mix gently by inverting the tube. Do not vortex, as this will result in shearing of genomic DNA. If necessary, continue inverting the tube until the solution becomes viscous and slightly clear. Do not allow the lysis reaction to proceed for more than 5 min.
- Add 350 µL Buffer N3 and invert the tube immediately but gently 4-6 times.
To avoid localized precipitation, mix the solution gently but thoroughly, immediately after addition of Buffer N3. The solution should become cloudy.
- Centrifuge for 10 min at 13,000 rpm (~17,900 x g) in a table-top microcentrifuge.
A compact white pellet will form.
- Apply the supernatants from step 4 to the QIAprep Spin Column by decanting or pipetting.
- Centrifuge for 30–60 s. Discard the flow-through.
- (Optional): Wash the QIAprep Spin Column by adding 0.5 mL Buffer PB and
centrifuging for 30–60 s. Discard the flow-through.
This step is necessary to remove trace nuclease activity when using endA+strains such as the JM series, HB101 and its derivatives, or any wild-type strain, which have high levels of nuclease activity or high carbohydrate content. Host strains such as XL-1 Blue and DH5α™ do not require this additional wash step.
- Wash QIAprep Spin Column by adding 0.75 mL Buffer PE and centrifuging for 30–60 s.
- Resuspend pelleted bacterial cells in 250 µl Buffer P1 and transfer to a microcentrifuge tube.
-
QIAquick Gel Extraction Kit
Notes before starting:
- This protocol is for the purification of up to 10 µg DNA.
- The yellow color of Buffer QG indicates a pH ≤ 7.5. DNA absorption to the membrane is only efficient at pH ≤ 7.5.
- Add ethanol (96%-100%) to Buffer PE before use (see bottle label for volume).
- Isopropanol (100%) and a heating block or water bath at 50°C are required.
- All centrifugation steps are carried out at 17,900 x g (13,000 rpm) in a conventional table-top microcentrifuge.
Procedure
- Excise the DNA fragment from the agarose gel with a clean, sharp scalpel.
- Weigh the gel slice in a colorless tube. Add 3 volumes Buffer QG to 1 volume gel (100 mg gel ~ 100µL). The maximum amount of gel per spin column is 400 mg. For >2% agarose gels, add 6 volumes Buffer QG.
- Incubate at 50°C for 10 min (or until the gel slice has completely dissolved). Vortex the tube every 2-3 min to help dissolve gel. After the gel slice has dissolved completely, check that the color of the mixture is yellow (similar to the Buffer QG without dissolved agarose). If the color of the mixture is orange or violet, add 10 µL 3 M sodium acetate, pH 5.0, and mix. The mixture turns yellow.
- Add 1 volume isopropanol to the sample and mix.
- Place a QIAquick spin column in the microcentrifuge in a provided 2 mL collection tube. To bind DNA, apply the sample to the QIAquick column and centrifuge for 1 min. Discard flow-through and place the QIAquick column back into the same tube. For sample volumes of >800 µL, load and spin again.
- If the DNA will subsequently be used for sequencing, in vitro transcription, or microinjection, add 500 µL Buffer QG to the QIAquick column and centrifuge for 1 min. Discard flow-through and place the QIAquick spin column back into the same tube.
To wash, add 750 µL Buffer PE to QIAquick column and centrifuge for 1 min. Discard flow-through and place the QIAquick column back into the same tube.
NOTE: If the DNA will be used for salt-sensitive applications (e.g. sequencing, blunt-ended ligation), let the column stand for 2-5 min after addition of Buffer PE.
Centrifuge the QIAquick column in the provided 2 mL collection tube for 1 min to remove residual wash buffer.
- Place QIAquick column into a clean 1.5 mL microcentrifuge tube.
- To elute DNA, add 50 µL Buffer EB (10 mM Tris Cl, pH 8.5) or water to the center of the QIAquick membrane and centrifuge the column for 1 min. For increased DNA concentration, add 30 µL Buffer EB to the center of the QIAquick membrane, let the column stand for 1 min, and then centrifuge for 1 min. After the addition of the Buffer EB to the QIAquick membrane, increasing the incubation time to up to 4 min can increase the yield of purified DNA.
- If the purified DNA is to be analyzed on a gel, add 1 volume of Loading Dye to 5 volumes of purified DNA. Mix the solution by pipetting up and down before loading the gel.
-
- Take competent cells from the -80°C freezer.
- Use DH5α cells in most cases
- Turn on water bath to 42°C.
- Put competent cells in a 1.5 mL tube. For transforming a DNA construct, use 50 µL of competent cells; for transforming a ligation, use 100 µL of competent cells. You may need more or less, depending on how competent the cells are.
- Keep tubes on ice.
- Add 1 µg of circular DNA into E. coli cells. Incubate on ice for 10 min. to thaw competent cells.
- Put tube(s) with DNA and E. coli into water bath at 42°C for 45 seconds.
- Put tube(s) back on ice for 2 min. to reduce damage to the E. coli cells.
- Add 1 mL of LB (with no antibiotic added). Incubate tubes for half an hour at 37°C. If you are trying to grow DNA for ligation, which is more sensitive, leave the tubes for 1 hour.
- Spread about 100 µL of the resulting culture on LB plates (with appropriate antibiotic added - usually Ampicillin or Kanamycin- for selection. Grow overnight.
- Pick colonies about 12-16 hours later.
- Take competent cells from the -80°C freezer.
-
Agarose Gel Preparation:
.9% agarose gel: add 0.36 g agarose to 40 mL of TBE buffer
Bring to a rolling boil on a hotplate or in a microwave that is not used for food. Once boiling is achieved, remove the mixture and let it cool for 5 min. When cool, pour into the gel box and leave it undisturbed for 20 min. to harden (be sure to place the comb in the gel box before pouring to create wells for samples).
DNA Digest Sample Preparation:
To each sample add the following:
- 10 µL of the digested DNA
- 8 µL of ddH2O
- 1.1 µL of 10X loading dye
Be sure to include a molecular weight ladder in the first lane (2 µL of 1 kb ladder, 1.1 µL of 10X loading dye, and 17 µL ddH2O
Running a Gel:
Once the gel is cool, position it so that the wells in which the samples will be loaded are nearest to the black electrode (DNA particles are negatively charged, and therefore run from the negative electrode to the positive electrode, or from the black end to the red end, when current is applied). Pour TBE buffer into the gel box until both sides are full, and a thin layer of buffer covers the gel. Load the samples in the wells, and record what well each sample is in. Place the top on the gel box, and be sure to place the black end of the top on the black electrode. Turn on the power, and run the gel at around 100 V until the dye is about 75% of the way down the gel. Once the dye reaches this point, turn off the power and disconnect the electrodes. Remove the gel, and place it in EtBr stain (100 mL TBE, 5 µL EtBr) on a rocker for 12-15 minutes. Be cautious, as EtBr is a known mutagen; always wear gloves when working with EtBr. When the gel is done staining, remove it and visualize the bands with any source of UV light. If the gel appears orange in color, you may place it in a small amount of TBE for about 5 min. and de-stain it slightly to remove the orange color.
-
DNA Digestion of the Blue Construct and pRS416 with EcoRI and SpeI
To a 1.5 mL microcentrifuge tube, add the following:
- 7 µL ddH2O
- 1 µL 10X cutsmart buffer
- 1 µL miniprepped DNA
- 1 µL EcoRI enzyme
Incubate the tube for 1-2 hours at 37°C, and then heat inactivate the enzyme by placing the tube in a water bath at 65°C for 20 min.
After removing the tube from the water bath, repeat the first step, instead adding SpeI as the enzyme. Incubate the tube for 1-2 hours at 37°C. Remove tube from the incubator and place it in a -20°C freezer until the product is to be analyzed by agarose gel electrophoresis.
-
The ligation of the Blue construct and pRS416 was carried out using a New England BioLabs Quick Ligation Kit. The following protocols for the ligation and subsequent transformation were included in the kit, and were used for maximum efficiency.
Ligation
- Combine 50 ng (3 µ) of vector with a 3-fold molar excess of insert (5 µL). Adjust the volume to 10 µL with dH2O.
- Add 10 µL of 2X Quick Ligation Reaction Buffer and mix.
- Add 1 µL of Quick T4 DNA Ligase and mix thoroughly.
- Centrifuge briefly and incubate at room temperature (25°C) for 5 minutes.
- Chill on ice, then transform or store at -20°C.
- Do not heat inactivate. Heat inactivation dramatically reduces transformation efficiency.
Transformation following ligation:
- That (NEB5α) competent cells on ice.
- Chill approximately 5 ng (2 µL) of the ligation mixture in a 1.5 mL microcentrifuge tube.
- Add 50 µL of competent cells to the DNA. Mix gently by pipetting up and down or flicking the tube 4-5 times to mix the cells and DNA. Do not vortex.
- Place the mixture on ice for 30 minutes. Do not mix.
- Heat shock at 42°C for 30 seconds. Do not mix.
- Add 950 µL of room temperature media to the tube.
- Place tube at 37 °C for 60 minutes. Shake vigorously (250 rpm) or rotate.
- Warm selection plates (LB-AMP) to 37°C.
- Spread 50-100 µL of the cells and ligation mixture onto the plates.
- Incubate overnight at 37°C.
-
Spin down a 3 mL overnight culture for 1 minute in a 1.5 mL eppendorf tube (i.e. two spins).
Aspirate supernatant or pour off.
- Resuspend the pellet in 100 µL STET
---- - 8% sucrose
- 0.5% Triton X-100
- 50 mM EDTA (pH 8.0)
- 50 mM Tris⋅Cl (pH 8.0) ----
- Add 25 µL freshly made lysozyme (10mg/mL in 10 mM Tris⋅Cl, pH 8.0) and vortex for 3 seconds.
- Place the tube in a boiling water bath for 40 seconds.
- Spin down the bacterial lysate at 12,000 x g for 10 min at room temperature.
- Remove the bacterial pellet with a sterile toothpick and discard.
- Add 40 µL of 2.5 M NaAcetate (pH 5.2) and 420 µL isopropanol. Mix by vortexing and incubate on ice for 10 min.
- Centrifuge 10 min. at 12,000 x g, Aspirate supernatant carefully. Spin pellet and remove remaining sup.
- Wash with 1 mL 70% EtOH, centrifuge for 2 min, remove supernatant and allow the pellet to dry.
- Resuspend in 100 µL TE (pH 8.0) or H2O containing 20 µg/mL RNaseA or add RNaseA to restriction enzyme digests.